
- Joined
- Sep 24, 2009
- Messages
- 0
- Reaction score
- 16
- Points
- 0
- Location
- Walls, MS
- Vehicle Year
- 1988
- Vehicle
- Ford
- Engine Size
- 4.0 v6
Everyone knows that the door armrests on most 1st gens are shot by now.... well me being me and wanting to try to fix something instead of just throw them away and replace them had this thought....
I wish I had before pics... but if you have a first gen you know what I'm talking about... they sag and pull away from the door and all that junk. so this was my first thought... I took some 3m epoxy kind of like this http://solutions.3m.com/wps/portal/3M/en_US/3M-Industrial/Adhesives/Product/Catalog/Detail/?PC_7_RJH9U5230GJJ60IS8FSO6Q3GD3000000_nid=3TKKZLMQ56be7ZMZSJBQRHgl and just filled up the arm rest... worked it the best i could and then sanded it down to the shape i needed it... turned out like this
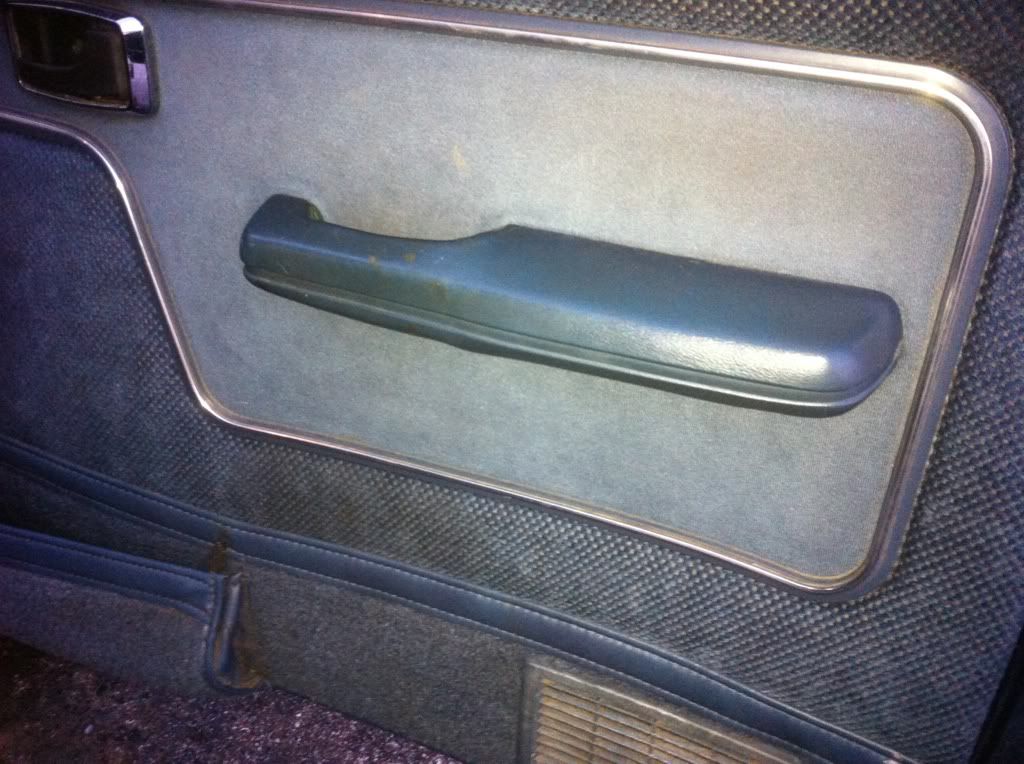
note: do not get that stuff where you don't want it... it does NOT come up easily. notice i got a little on the outside of my armrest.
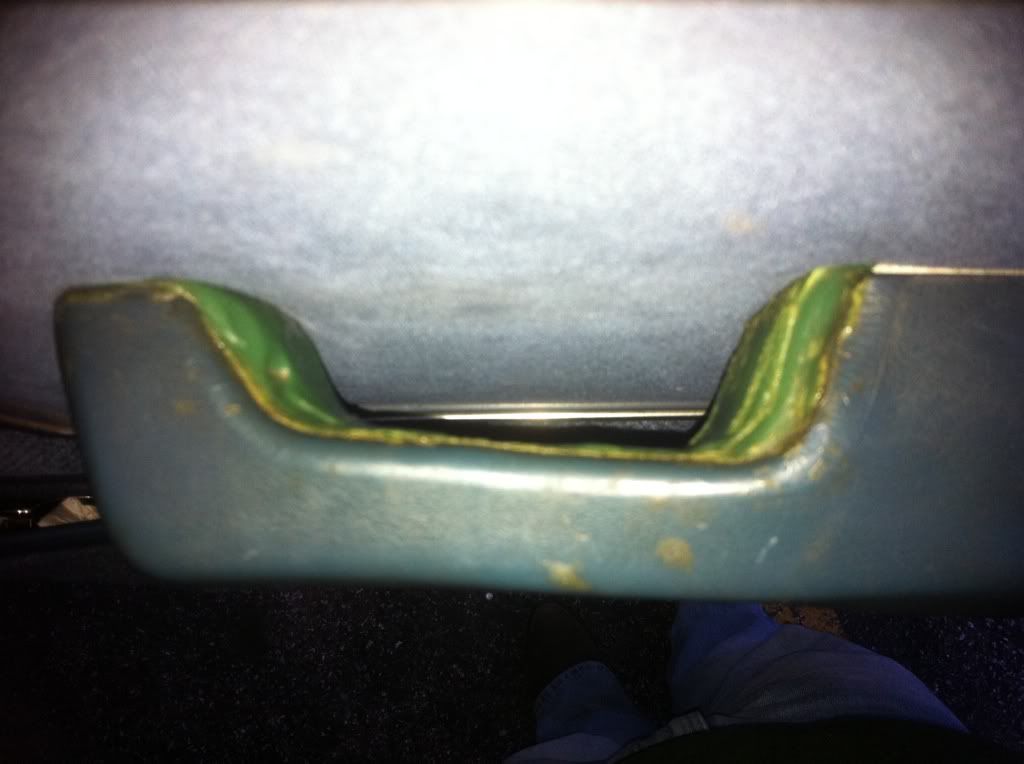
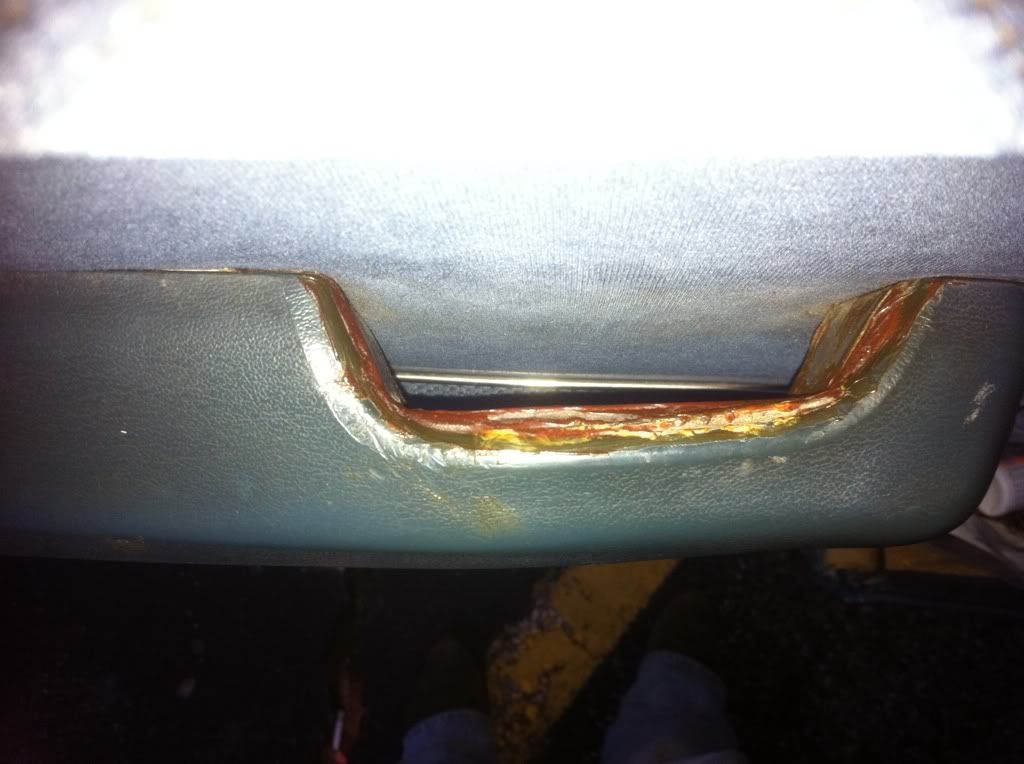
on the driver side, the plastic piece broke also.. so this was my fix to that...
first i took it off, and removed the plastic piece.. made a metal piece about the same size and shape of it and drilled the holes where they needed to be.
then filled the armrest up with the epoxy and then put the metal piece on the outside. it worked even better than the passenger side. here's some pics of it
once again, don't make a mess with this stuff....
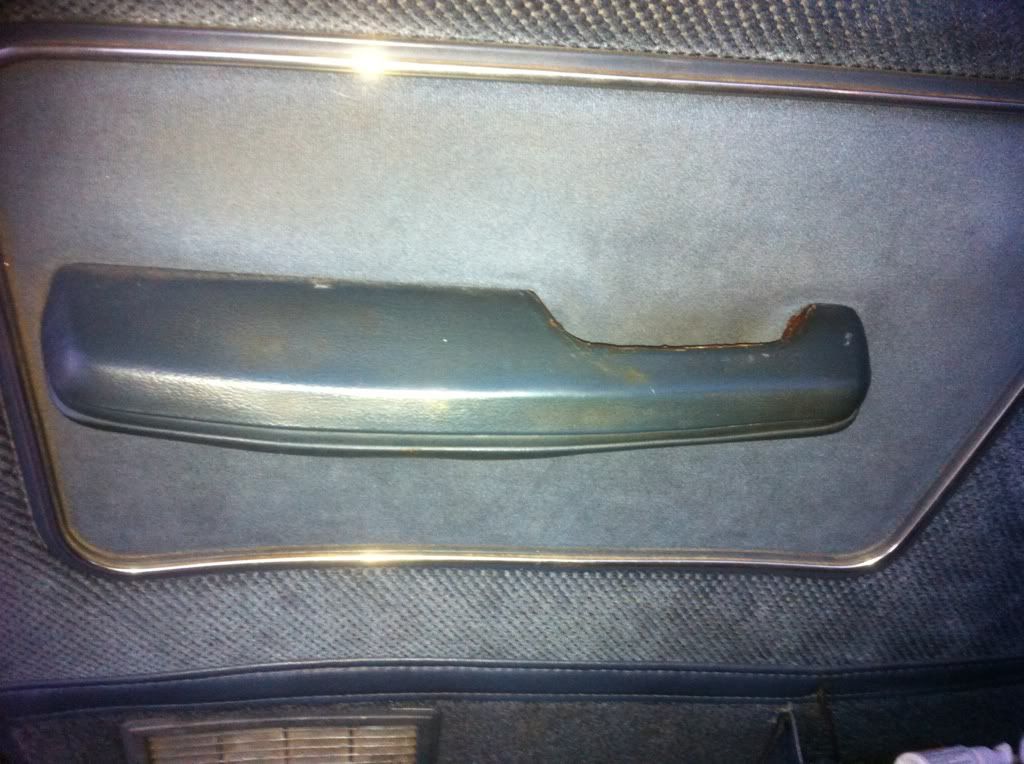
after I had both sides completed and dry, I redrilled the mounting holes out and bolted them up, they have been fine ever since... its been probably 2 years since I did this. :icon_bounceblue:
yeah, its not the cleanest... I could have done it a lot better. Truth is, I didn't honestly think it would work as well as it did. I plan to get some more from a junkyard and redo it cleaner.
don't know if anyone is interested in this or not... but it worked for me and helped me so maybe someone else needs to know it to.
I wish I had before pics... but if you have a first gen you know what I'm talking about... they sag and pull away from the door and all that junk. so this was my first thought... I took some 3m epoxy kind of like this http://solutions.3m.com/wps/portal/3M/en_US/3M-Industrial/Adhesives/Product/Catalog/Detail/?PC_7_RJH9U5230GJJ60IS8FSO6Q3GD3000000_nid=3TKKZLMQ56be7ZMZSJBQRHgl and just filled up the arm rest... worked it the best i could and then sanded it down to the shape i needed it... turned out like this
note: do not get that stuff where you don't want it... it does NOT come up easily. notice i got a little on the outside of my armrest.
on the driver side, the plastic piece broke also.. so this was my fix to that...
first i took it off, and removed the plastic piece.. made a metal piece about the same size and shape of it and drilled the holes where they needed to be.
then filled the armrest up with the epoxy and then put the metal piece on the outside. it worked even better than the passenger side. here's some pics of it
once again, don't make a mess with this stuff....
after I had both sides completed and dry, I redrilled the mounting holes out and bolted them up, they have been fine ever since... its been probably 2 years since I did this. :icon_bounceblue:
yeah, its not the cleanest... I could have done it a lot better. Truth is, I didn't honestly think it would work as well as it did. I plan to get some more from a junkyard and redo it cleaner.
don't know if anyone is interested in this or not... but it worked for me and helped me so maybe someone else needs to know it to.
