•  

    Click HERE to join our forum and participate in the discussions.


Josh's Bronco II Body Restoration Thread


85_Ranger4x4

December 2013 OTOTM
V8 Engine Swap
Joined
Aug 7, 2007
Messages
97
Reaction score
79
Points
18
Age
39
Location
SW Iowa
Vehicle Year
2022
Vehicle
Ford
Engine Size
2.3
Suspension Style
4wd
Coat both sides of the rusted metal. I even use it on all welds I do. It will seal out the rusted metal for good. You can even use it with fiberglass cloth. It really is a good product.
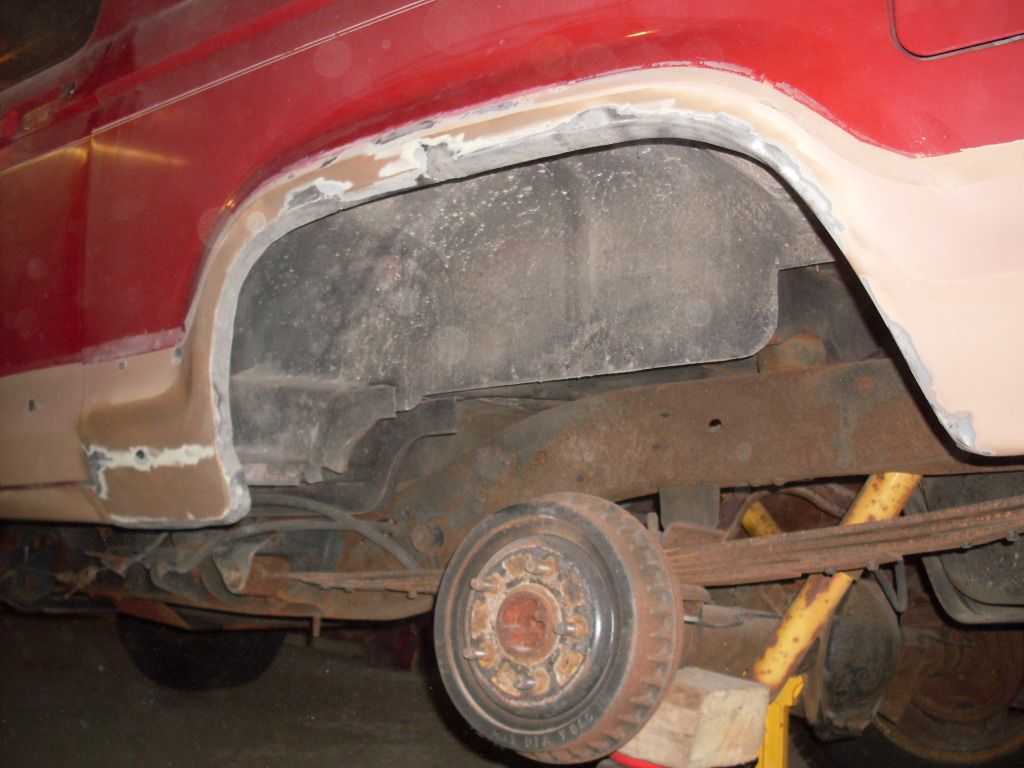
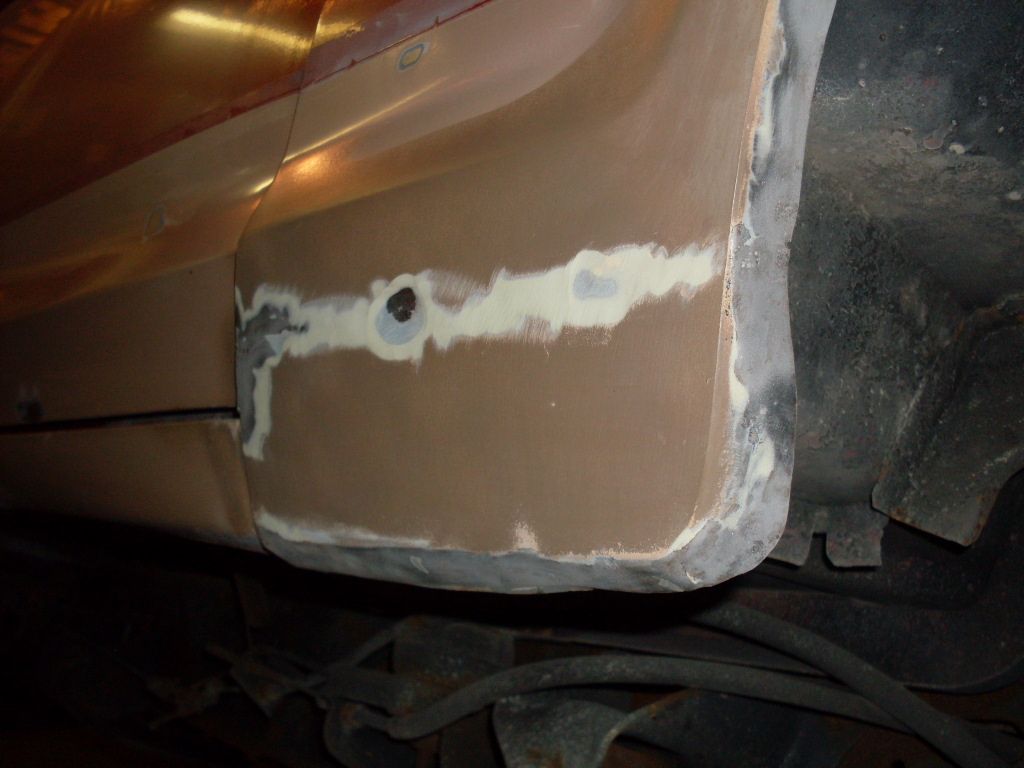
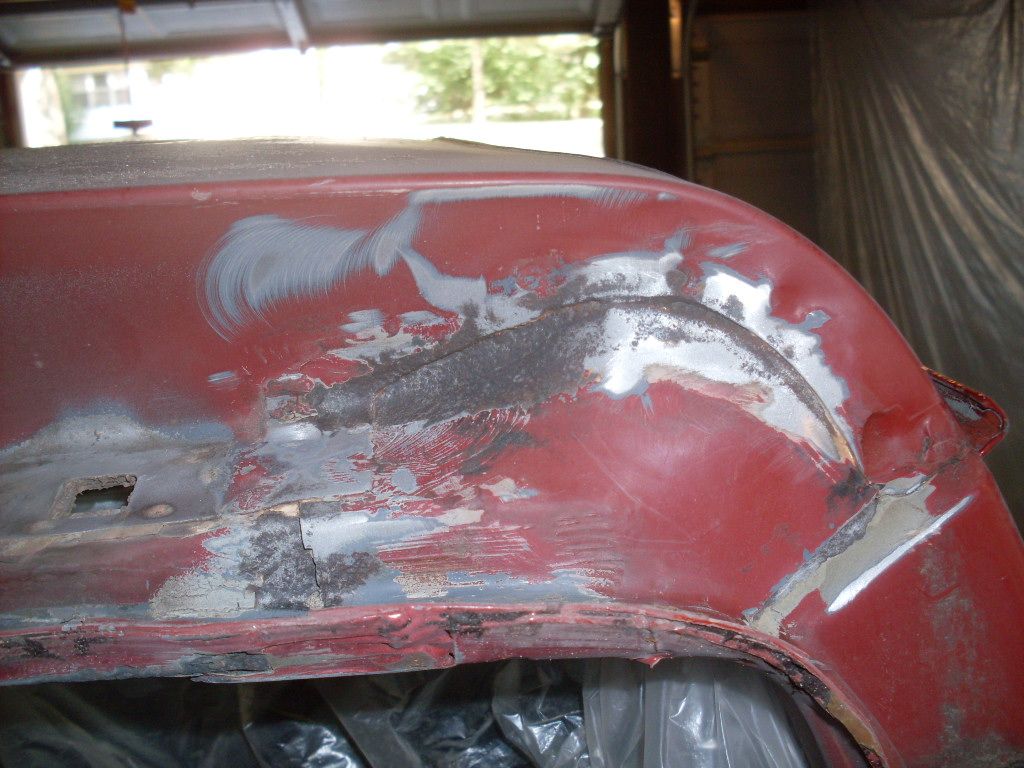
That is important too, dad had a guy weld wheel arches on his F-350, about 8 years later you could tell exactly where he welded it because that is where it rusted through again.

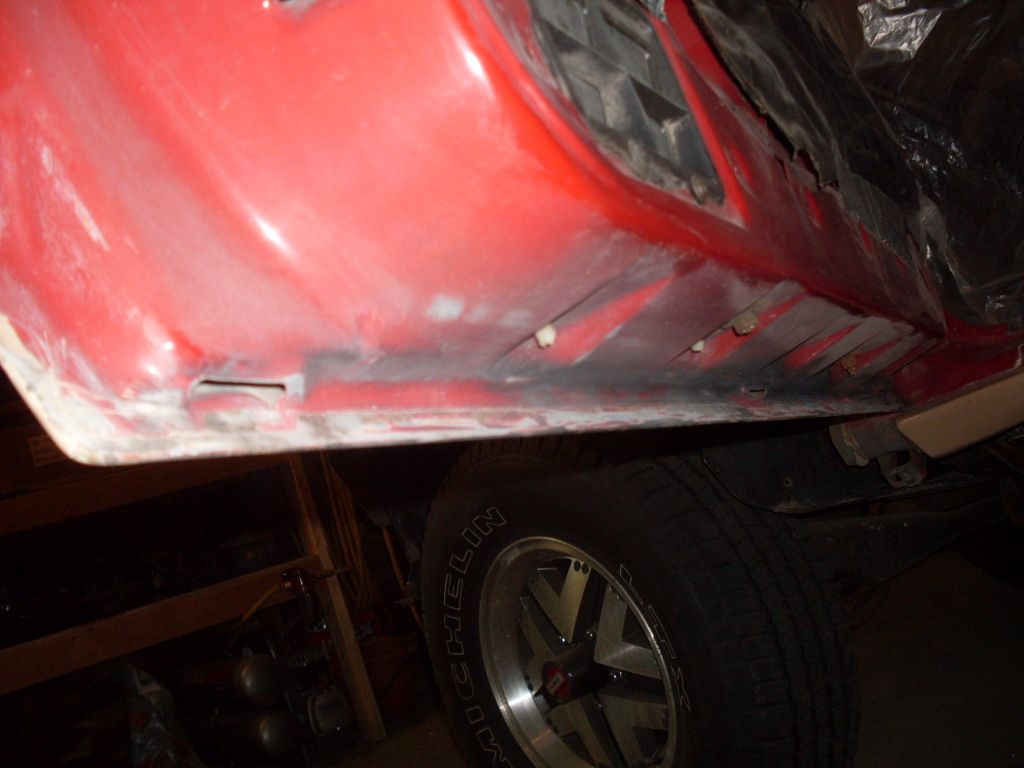
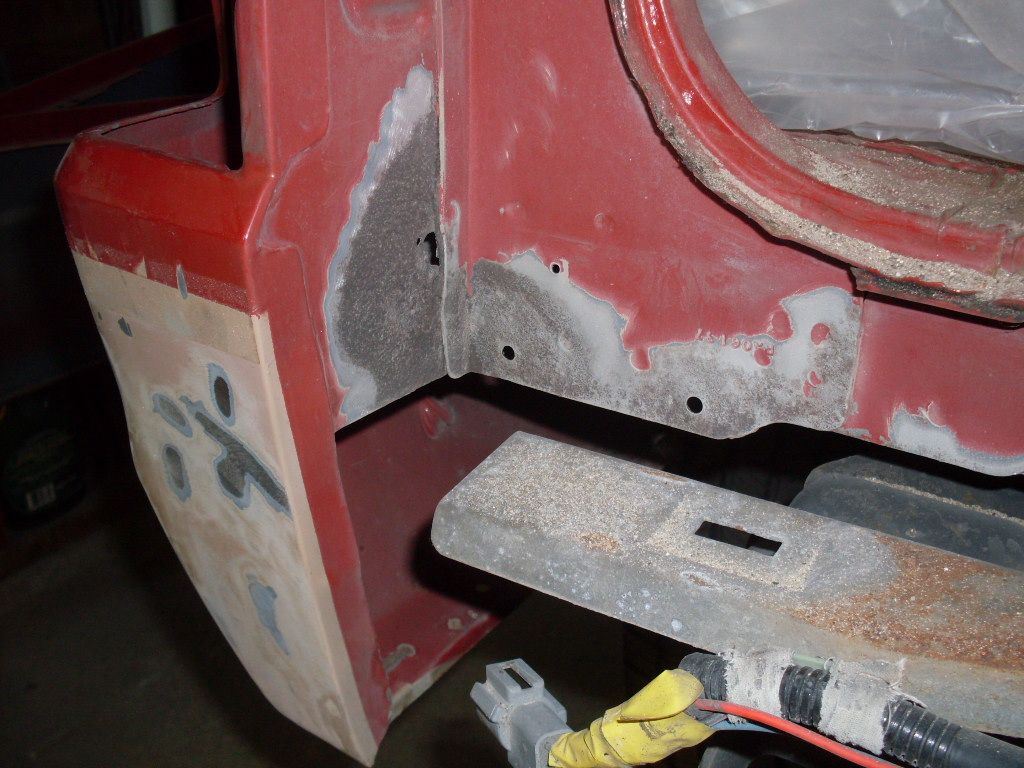
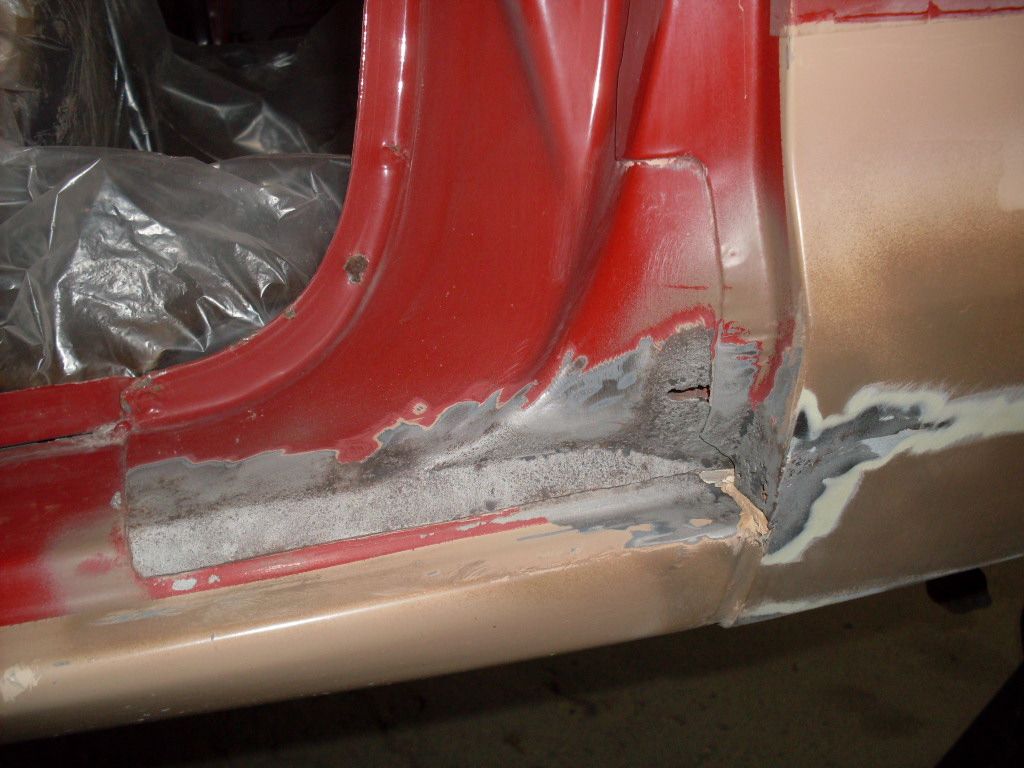
I need to do cab corners on my truck, I am tempted to weld on the piece that is available along with the rocker panels but short of finding a really, really nice truck in a JY I can sawzall corners off of (very unlikely) it will be getting a little bit of 'glass right behind the bottom rear corner of the doors. All of it terrifies me because there isn't a good way to coat things on the inside of the cab...

Otherwise I am going to wimp out and just find better steel, a whole box, fenders (already have one new one) and hood.
 
Last edited:


PetesPonies

Member
Joined
Jan 1, 2008
Messages
654
Reaction score
6
Points
18
Location
east coast
Vehicle Year
1984
Vehicle
Bronco II
Why don't you buy the after market corners? It's a much better repair.
 

85_Ranger4x4

December 2013 OTOTM
V8 Engine Swap
Joined
Aug 7, 2007
Messages
97
Reaction score
79
Points
18
Age
39
Location
SW Iowa
Vehicle Year
2022
Vehicle
Ford
Engine Size
2.3
Suspension Style
4wd
Why don't you buy the after market corners? It's a much better repair.
I can't get the part I need. I need right behind the corner of the door, the cab corners I can find are just the shell from behind the door that wrap around the back of the cab (which it also needs) Nothing with that complicated pile of steel inside the doorjam. It looks like there are at least three layers affected, and every truck I look at in the JY are the same or worse (most are worse)

http://www.lmctruck.com/icatalog/fr/865w/0023.jpg

http://img.photobucket.com/albums/v623/85_Ranger/1985 Ranger Restore/105_0308.jpg

Prove me wrong, please :icon_twisted:
 

Jim Oaks

Administrator
Administrator
Founder
Article Contributor
Joined
Aug 2, 2000
Messages
334
Reaction score
33
Points
28
Location
Roanoke, Texas
Here's the problem,

Newbies come along and they're trying to do their own bodywork. Some things really need new sheetmetal welded in. Some things can be fixed with glass. When you guys come in and say that the only way to fix something is welding in new metal, you're making it so that the newbies are forced to line the pockets of bodyshops, or putting the project out of reach.

I ripped out a 7-year old fiberglass cab corner that was still solid, and should have just been left in place.
 

Shran

New member
Solid Axle Swap
V8 Engine Swap
Joined
Mar 4, 2008
Messages
0
Reaction score
4
Points
0
Location
Rapid City SD
When you guys come in and say that the only way to fix something is welding in new metal, you're making it so that the newbies are forced to line the pockets of bodyshops, or putting the project out of reach.
I don't think it's putting it out of reach at all - assuming you're starting with nothing, no tools, welder, compressor, etc - the cost of buying a brand new welder and angle grinder from Harbor Freight is pretty small (like $120 total.) I have done a ton of really amateur body work and that's all I've needed. Patch panels are cheap, too, or free if you make your own.

"Right way" and "wrong way" definitely have very broad definitions based upon any particular person. Just seems to me that when you weigh the long term cost of fixing something twice vs doing it right once, the first option doesn't make sense.

Should mention that I am by no means a professional, I have no training and I only get paid in beer that I have to buy. That said I have been doing this stuff for long enough that I have seen the end result of my own half ass work and have learned from it.
 

PetesPonies

Member
Joined
Jan 1, 2008
Messages
654
Reaction score
6
Points
18
Location
east coast
Vehicle Year
1984
Vehicle
Bronco II
Life should be about learning . . always. So if someone is shown how to do something correctly, why keep yourself ignorant?? Like was said above, it doesn't take a huge investment to step up a level on repairs. When the vehicle warrants it, do it right. If it doesn't, then do as you feel is best. If you read my post above for comprehension, you would see that I already mentioned that.
 

85_Ranger4x4

December 2013 OTOTM
V8 Engine Swap
Joined
Aug 7, 2007
Messages
97
Reaction score
79
Points
18
Age
39
Location
SW Iowa
Vehicle Year
2022
Vehicle
Ford
Engine Size
2.3
Suspension Style
4wd
"Right way" and "wrong way" definitely have very broad definitions based upon any particular person. Just seems to me that when you weigh the long term cost of fixing something twice vs doing it right once, the first option doesn't make sense.
I have never seen one body shop guy that said another bodyshop guy has ever done anything "the right way"

IMO if you take your time and do it right there doesn't have to be one set way to do anything. The shop tractor at work has a bulge in the hood (to fit a turbo that by no means was ever meant to be on the tractor) it is steel mesh brazed to the hood with fiberglass and a little bondo around the edges. It is not showroom perfect but keeps the weather out and looks pretty decent for a shop loader tractor. It always sits outside and I can't imagine the temp swings from the turbo right under it, the diesel engine is bolted directy to the chassis/transmission so there is no vibration dampening... been there 10 years and hasn't cracked anywhere yet.

http://img.photobucket.com/albums/v623/85_Ranger/09-10 Blizzard/100_1222.jpg

http://img.photobucket.com/albums/v623/85_Ranger/09-10 Blizzard/100_1223.jpg

Welding in steel isn't a for sure end all cure either. Steel rusts, and aftermarket steel is rarely as good at fighting that as what was there to start with. In reality "the right way" to fix mine would be to find another truck or at least a cab.
 

PetesPonies

Member
Joined
Jan 1, 2008
Messages
654
Reaction score
6
Points
18
Location
east coast
Vehicle Year
1984
Vehicle
Bronco II
Well glad to meet you:icon_cheers: because I compliment plenty of restorers and builders, body men etc. If you are an intelligent person, you see worth in lots of things. Judging one's quality of a repair is just one of those things. I see lots of good stuff . . but I have certainly seen lots of crap too:) So now you can say you know one guy who can compliments another's work. Think about it, if you are a teacher, you have to be able to evaluate work correctly, know when it is done good and when it is not. So whether it is a student's work or another professional, evaluating is what I do :) And I like good work, even if I wasn't the one that did it:icon_thumby:
 

88B2EB

New member
Joined
Mar 26, 2012
Messages
59
Reaction score
2
Points
0
Location
Detroit, MI
Vehicle Year
1988, 1994
Vehicle
Ford
Engine Size
2.9L, 2.3L
Decided to change gears a bit over the weekend and focused on disassembly. Most of the interior has been removed which will allow me to tape off just inside the door jambs so the paint line isn't seen when finished and also allows me to sandblast and spray the wheelwells from the inside. It's a LOT of work going this far but it prevents seeing the overspray in the door jambs and tape lines in the final work. Not shown here is that I actually had to remove most of the dash panels just to get the antenna wire out! It was one of those cases of take one part off to get to another and so on. Also found a PO spliced in the radio instead of buying the wiring adapter so that's something else to fix. Did find he had replaced all the stock speakers with nice Kenwood 3-ways so not all bad I guess.


This next image shows most of the front end removed. I have new fenders so those will be painted off the frame along with the hatch (still to be removed) and the front rail (just above bumper). I did find a hide-a-key inside one of the fenders and from the look of it the original owner had put it there. That makes 5 sets of keys now! Before painting I'll tape plastic over the entire front clip to keep everything in the engine compartment nice and clean.


Once the hatch and door latches are off I should be able to move around the truck fixing rust pretty fast. As mentioned before I'll see how bad the other rust spots are before deciding whether to take it to a shop for welding or not. I'm also planning to remove the rear curved windows using the instruction thread here on TRS, one's leaking anyway, but will need to coax a friend into coming over to help for the day before that can get done.
 
Last edited:

Jim Oaks

Administrator
Administrator
Founder
Article Contributor
Joined
Aug 2, 2000
Messages
334
Reaction score
33
Points
28
Location
Roanoke, Texas
I don't think it's putting it out of reach at all - assuming you're starting with nothing, no tools, welder, compressor, etc - the cost of buying a brand new welder and angle grinder from Harbor Freight is pretty small (like $120 total.).
But a word of warning, those cheap mig welders have a high and low setting, and even on low, you can easily burn a hole in body panels try to weld them. I have one and the can be a challenge to work with. Strangely enough, body work is all mine's ever used for.
 

Shran

New member
Solid Axle Swap
V8 Engine Swap
Joined
Mar 4, 2008
Messages
0
Reaction score
4
Points
0
Location
Rapid City SD
But a word of warning, those cheap mig welders have a high and low setting, and even on low, you can easily burn a hole in body panels try to weld them. I have one and the can be a challenge to work with. Strangely enough, body work is all mine's ever used for.
Yeah it takes a lot of practice to get it dialed in just right. Wire speed has a lot to do with how well it works too.

I have a Craftsman 110v MIG, AKA Clarke 110v, AKA Harbor Freight 110v... funny how everybody sells the same stuff.
 

PetesPonies

Member
Joined
Jan 1, 2008
Messages
654
Reaction score
6
Points
18
Location
east coast
Vehicle Year
1984
Vehicle
Bronco II
I have used Clarke MIGs for over 20 years. I like them. I even bought them for my school and taught with them. They offer some good quality equipment at a reasonable price. If they are supplying for elsewhere, I can't vouch for what they are using. But the one's I have used and own have been high quality.
 

alwaysFlOoReD

Blang - not bling
Forum Moderator
Joined
Apr 13, 2009
Messages
205
Reaction score
45
Points
28
Location
Red Deer, Canada
Vehicle Year
'91, '93, '98
Vehicle
Various
Engine Size
4.0, 4.0, 4.6
Suspension Style
4wd
It looks like you have the hatch with the wiper. Could you take pics of the water and elec. routing? Especially where it goes through the roof. I forgot on the one I removed and the body is crushed.
Thanks,

Richard
 

Shran

New member
Solid Axle Swap
V8 Engine Swap
Joined
Mar 4, 2008
Messages
0
Reaction score
4
Points
0
Location
Rapid City SD
I have used Clarke MIGs for over 20 years. I like them. I even bought them for my school and taught with them. They offer some good quality equipment at a reasonable price. If they are supplying for elsewhere, I can't vouch for what they are using. But the one's I have used and own have been high quality.
Same here, my only complaint is the duty cycle on high...but what do you expect for an inexpensive tool. That's what I have my 220v stick welder for anyway.
 

alwaysFlOoReD

Blang - not bling
Forum Moderator
Joined
Apr 13, 2009
Messages
205
Reaction score
45
Points
28
Location
Red Deer, Canada
Vehicle Year
'91, '93, '98
Vehicle
Various
Engine Size
4.0, 4.0, 4.6
Suspension Style
4wd
Pm received.
Thanks,

Richard
 

88B2EB

New member
Joined
Mar 26, 2012
Messages
59
Reaction score
2
Points
0
Location
Detroit, MI
Vehicle Year
1988, 1994
Vehicle
Ford
Engine Size
2.9L, 2.3L
Took off the liftgate last night by ratchet strapping it to the garage rafters, unbolting, and lowering the straps one by one. I do the same thing when taking the box off my Ranger and it really makes easy work of an otherwise impossible job. Will need another day or so to remove the remaining door latches, weatherstripping, etc. and then finally can get back to the rust.
 

88B2EB

New member
Joined
Mar 26, 2012
Messages
59
Reaction score
2
Points
0
Location
Detroit, MI
Vehicle Year
1988, 1994
Vehicle
Ford
Engine Size
2.9L, 2.3L
Well after spending most of the weekend in the garage I was able to finish grinding/sand blasting off all the rust. That picture I posted before of the passenger wheelwell seemed to be the worst of it.

If you remember from before I'd been nervous about the driver wheelwell since there was evidence of previous body work there but was pleasantly surprised to see it had been done right, so it stays. In the picture you can see the outline of a patch panel just behind the door and another centered over the wheelwell.


Here's a closeup of the patch panel.


Under the driver door, pretty solid.


Above the hatch door, really glad I took the liftgate off and found this.


Passenger side was much better.


Found a small hole starting behind the driver side tail light. It'll get tapped in with a hammer and covered with fiber reinforced filler.


Same with the driver door corner. At least 4 body panels come together at this point and it just seemed to catch all the rust.


Well that's the worst of it. Everything else was just surface rust. I'd hit any paint bubble with a grinder until I got to good metal and then sand blast the 'black' off the metal and follow up with Duplicolor 'Rust Fix' to protect the spot until it's time to paint.

Me working on the driver door with the die grinder. That stupid headband flashlight definately gets my tool of the year award.


An overall in the garage. Where's a pole barn when you need one?


Next is fiberglass/resin for the passenger wheelwell and new putty for a few of the panel joints (Some direction on both of these would be really helpful).

Until next time :icon_cheers:
 
Last edited:

88B2EB

New member
Joined
Mar 26, 2012
Messages
59
Reaction score
2
Points
0
Location
Detroit, MI
Vehicle Year
1988, 1994
Vehicle
Ford
Engine Size
2.9L, 2.3L
Yes that is a good patch. You are in good shape.
Glad to hear that coming from an Auto body instructor I know it's good. I had fully expected to find bondo over a big rusty hole there (plan for the worst I guess) but was relieved to find the professional patch job. There's also what appears to be closed cell insulating foam sprayed on the repair from the inside that I would guess helps keep air off the patch. Is that common? It surprised me quite a bit when I took the interior trim off and saw it.

If anybody could offer some direction on replacing some of the panel joint epoxy (along drip edge, etc.) and tips on applying fiberglass it would really help.
 

Top