Many times people complain about leaky trucks in one way or another, be it liquid found on the passenger side floor, or water found in the rear. The main thing is it is annoying and we want to fix it. And the hard part is trying to find where it is coming from.
The first step is determining approximately where the leak is, passenger side floor, driver’s side floor, rear hatch area, rear seat area etc. Then if you determine that it is the passenger side floor, and it seems to be wet all the time, not just when it rains, then you probably don’t have a leak in the body, most likely your heater core has started leaking coolant. To check this, remove the heater core cover (plastic panel below dash on passenger side), the heater core is there and very easy to replace. Check your repair manual for further details.
Here are the common areas:
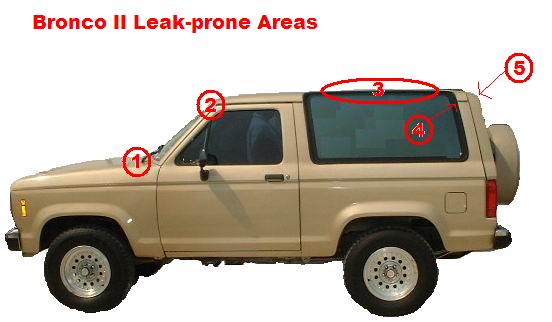
1. Cowl Area or Windshield corner
2. A-pillar/roof joint/drip-rail
3. Side-glass seals
4. Rear drip rail
5. Area behind top of rear hatch
1: Cowl vent. This is mainly a problem on the first-generation (84-88) Bronco II. Leaves and other debris will clog the drain vents and will cause moisture to sit and create rust holes. Symptoms: Wet front carpet, water in glove box. If caught in time, it is possible to remove the access covers under the hood and spread seam-sealer in the holes, but if its a fairly large hole, the fenders have to come off, the cowl panel has to be removed (lots of spot-weld drilling) and the rusted metal has to be replaced. I should mention this isn’t as much of a problem on later (89-90) Bronco II’s because the cowl was changed from slots to a “mesh” pattern to prevent most debris from entering.
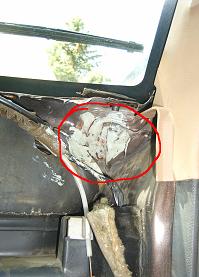
Note that on the inner side of the fire wall, in the passenger compartment where the bottom corners of the windshield is, is a very common area for water to leak in. This area tends to rust and allow lots of water in when it is wet. It usually happens first on the passenger side, then later on the drivers side rusts. In order to access this area the dash must partially be removed. The old sealant will have to be removed, and all rust ground away, then new sealant installed. See photos below:
2: A-pillar/roof joint/drip-rail. This is a VERY common leak on Bronco II’s no matter the year. The seam sealer gets brittle with age and either cracks or crumbles away leaving an open seam. It can also be hidden behind the windshield trim. Symptoms are wet floorboard and a drip from the headliner just past the windshield. A temp fix is to smear silicone down in the cracks and joints with your finger. This will stop the leak for a little while until the rest of the seam sealer cracks. Best fix is to dig all of the old seam-sealer out and put new sealer in.
3: Side-glass seals. These are usually easier to spot as most of the time the leak will run down the inside of the glass when it rains. Symptoms are wet cargo-carpet and streaks on the inside of a foggy window. The fix is pretty simple, just time consuming. Basically you have to remove all of the interior trim for that side of the truck, un-bolt the glass, and with an assistant work a screw diver under the glass enough to run a piece of piano wire or some wire thin enough to cut what’s left of the seal. DO NOT try to force the glass out or else you will shatter the glass, end up with cuts, have a nice open hole in your Bronco II, and have to drop a good chunk of money for a replacement (and they’re not cheap.)
After the glass is out, clean the sealing surfaces as best as you can, and apply some “tar ribbon” around the sealing surface of the glass. You can get the tar ribbon at just about any automotive store or windshield shop. Everything else is reverse of removal.
4: Rear drip rail. Why ford put these on is beyond me, but they too can cause leaks. Basically the same was as number 2. Seam sealer dries, cracks, leaks. Symptoms are wet cargo carpet. The fix is the same as number 2’s.
5: Area behind top of rear hatch. Once again, seam sealer is the problem, but this time there is a bunch of it. symptoms are wet rear headliner and wet cargo carpet. There really isn’t a good temp fix for this because there is so much seam sealer that you’ll spend more time smearing silicone over it than it would take to break all of the seam sealer out and replace it.
All of the leaks above can lead to rust that puts the strength of the body in question. Rust around the front and rear body to frame bolts can be a problem, especially in a collision. The best way to fix it is to catch it before it starts.
Resource:
Tech page written by Ben Hart & Harry Rathien
Additional:
‘joenorthcarolina’ Submission:
There is another spot or two I’d like to make you all aware of and that’s the rear wheel wells. At the top center of the wheel well/ tread area is a hole. If you don’t see a hole then you may see a little rubber nipple from the plug. If so, your lucky because mine are out. From what I can tell it doesn’t take much to push them out such as a slinging gravel/mud etc… So, all of my interior is out I’ve notice when driving in the rain the tire throws water up inside which then runs down to the rear floorboard and behind the door jam.
The other is behind the rear tires/under the gas cap. If you look under the truck there is Seam Sealer that joins two sheet metal pieces. If that Seam Sealer cracks it lets water in but not out. Ask me how I know. To make the situation worse, there is a second layer of foam sealant under that first layer which acts like a sponge. At this point I’ve just cleaned it all out and put aluminum foil tape/Metal Duct Tape there to keep the tire from slinging water inside. If you pay attention to the design, the gas filler neck lets water in then it can’t escape easy which makes the situation more frustrating. At least with tape I can peal it off to let air in and clean it out if needed. A true fix would be drill the gas filler neck mount/sheet metal to drain better or cut it off completely. I thought about a mud flap but that’s a weird shaped area. If anyone else as resolved this issue please share.
‘M78’ Submission:
I recently had found the floor boards and carpet soaked in my Bronco II. It’s usually parked in the garage, but it had to sit out for a month in the rain. I pulled the seats out, propped up the carpet in a few places, put a fan and a dehumidifier inside, and dried out the carpet.
Keep in mind that this is a 1987 Bronco II that has been garage kept since new.
After searching for the source of the water, I found the cowl to be the problem. The caulking where the floor board and the cowl seam is dried and cracked.
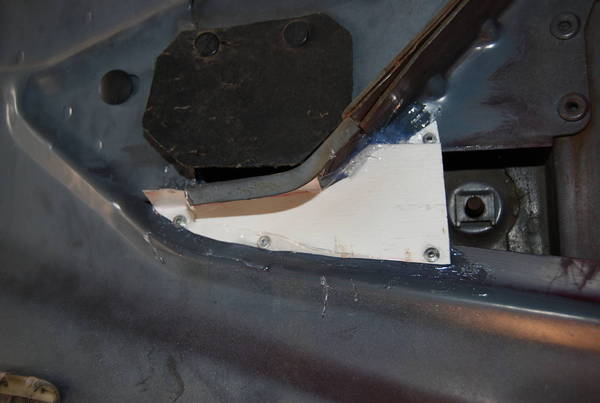
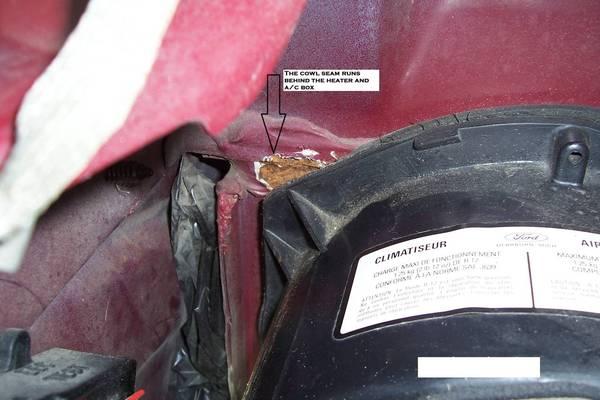
I slipped my camera into an access hole behind the clutch reservoir, so this picture was taken from the inside. It also shows the rubber flap that covers the drain hole and the caulking where it leaks. Here’s an older picture of the bronco.
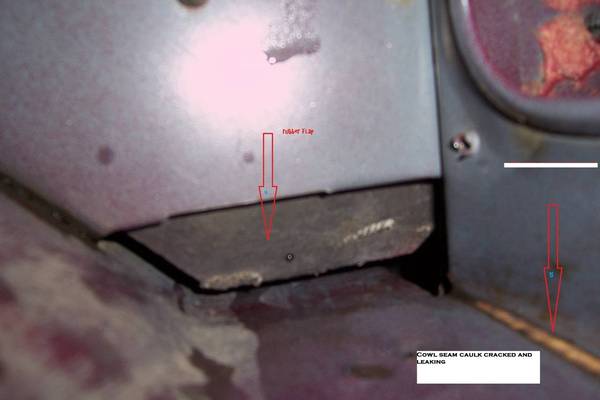
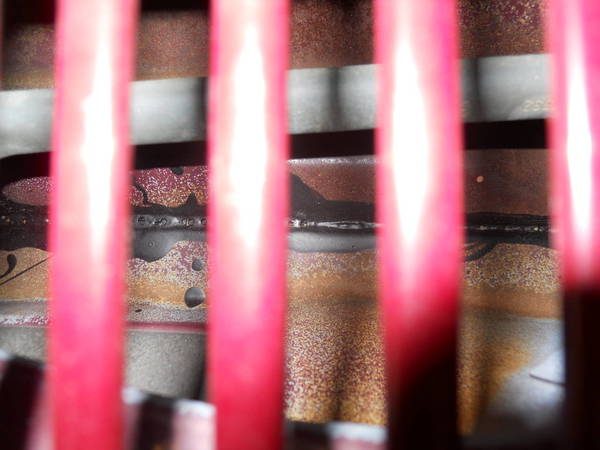
The cowl also has about an 1-1/2″ down grade from the passenger side to the drivers side. And there is no drain on the passenger side. Here’s 180* from the 1st picture
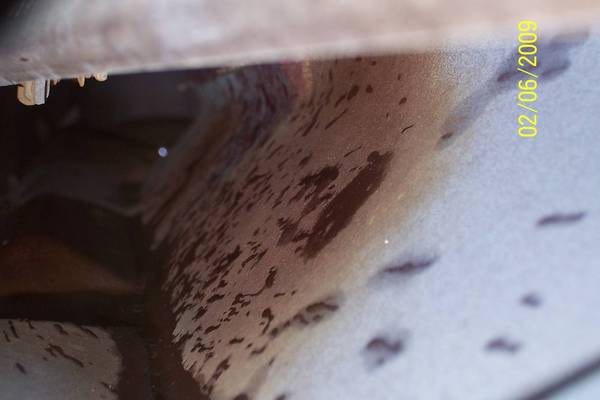
I took the drivers side fender off too see the outside of the drain hole. when I ran water in the cowl I could see the water following the sheet metal back under the hood.
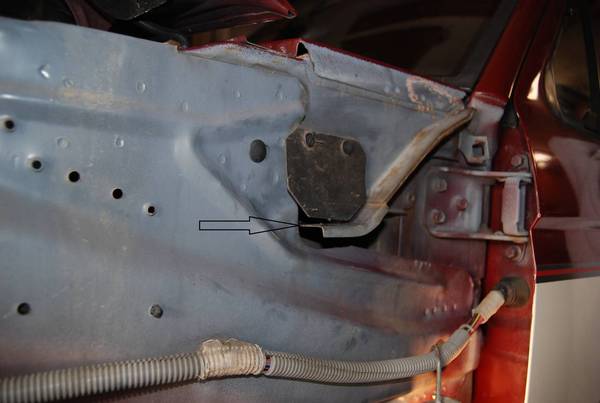
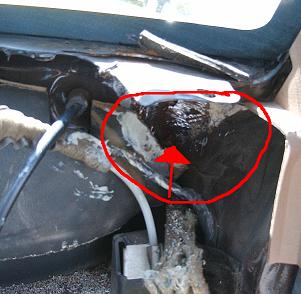
It would follow the edge back to where the firewall meets the side kick panel and get inside there too. Here you can see where the water can run down the seam at the kick panel. And also the leak between the cowl and firewall.
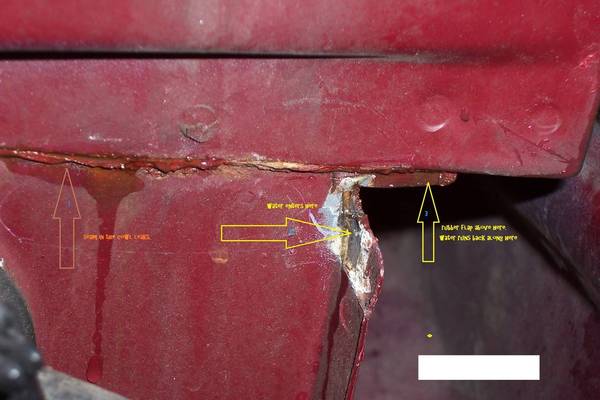
The cowl to firewall seam also goes behind the A/C, heat and fan Plenum’s and can leak into the passenger side floor. When I parked the Bronco II, it was leaning so that the passenger side was lower. Causing the water not to drain out properly, and leak here.

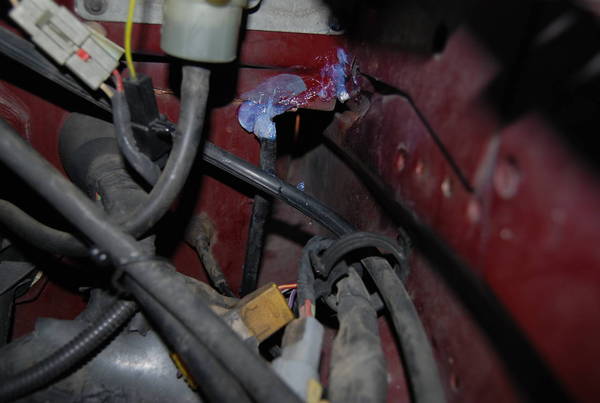
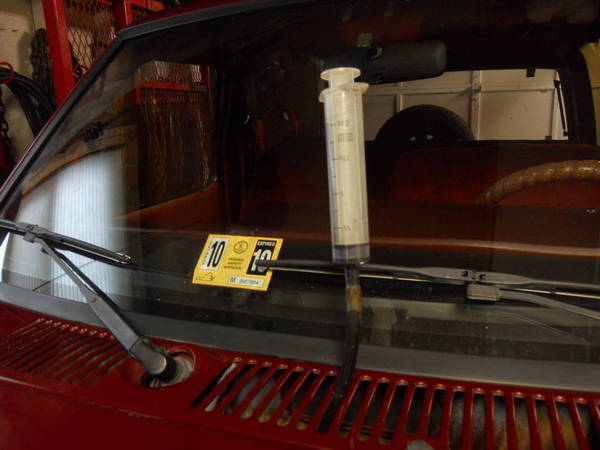
I stopped the water getting through the cowl to firewall seam buy injecting rubber sealant that I thinned out, by putting a rubber hose on a big syringe. Through the antenna hole and the grate.
I stopped the water getting into the kick panel to firewall seam by blocking off the area below the drain hole ( behind the fender ) with a piece of aluminum and adding silicone to the seam in the engine compartment.