
By Jim Westling
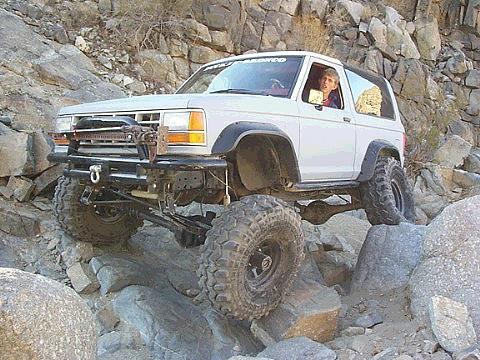
When I first purchased my 1989 Bronco II several years ago, I was convinced that the only off-roading adventures it would see were dirt roads and mild Forest Service routes. However, as the ever-growing desire for more difficult trails blossomed, it became apparent that the Dana 28 and Ford 7.5″ differentials were just not enough. So, after several outings observing some highly modified rigs from a local 4-wheel drive club, I decided that the mild-mannered Bronco II would soon become a rock crawler. The front axle of choice for me, considering the benefit of a wide stance for stability and the high pinion configuration to raise the height of the driveshaft, was a high-pinion Dana 44 from a 1979 full size Bronco. Also, since the Bronco II would be visiting many rocky roads, I decided to replace the front coil springs with leaf springs. The leaf springs were relatively easy to install, can survive substantial abuse, and require minimal maintenance. The articulation, droop, and flex in a coil spring suspension vs. leaf spring suspension are on-going colorful debates, but the final decision should be based upon your particular expectations and performance needs.
The following description and photographs of the Dana 44 solid axle swap in my Bronco II illustrates that this conversion requires some fabrication and welding. Also, please note that my intention in performing this particular upgrade was to enhance the performance of the Bronco II on extremely rough trails and rock crawling, since this rig is not a daily driver. As a consequence, the road handling characteristics have been greatly affected, and thus must be considered prior to any decision on completing this modification. This and any other change to your vehicle’s drive train or suspension must be done at your own risk.
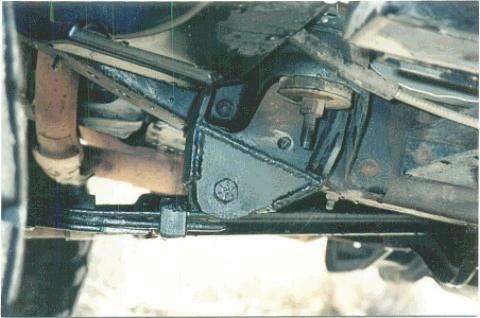
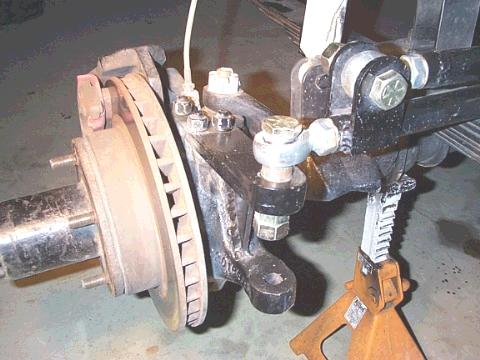
The Dana 44 axle from the 1979 Bronco came complete with disc brakes, tie rod, and radius arms. Since my project included a leaf spring conversion, the radius arms were not needed. However, one feature of this particular axle housing that requires some attention before the leaf spring perches can be attached are the radius arm mounts. These mounts are cast and cannot be cut off, so some grinding is required to provide a suitable platform for the spring perch installation.
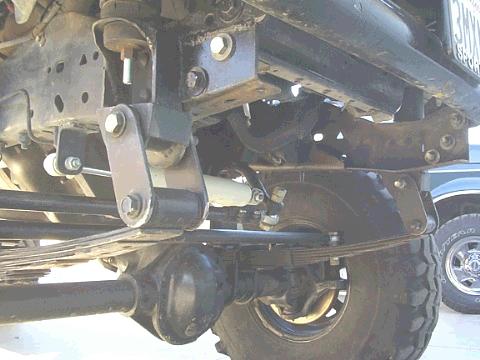
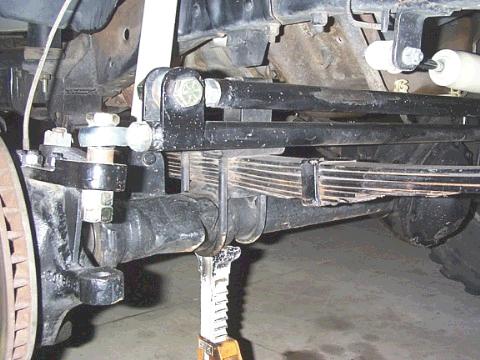
The first step in this conversion is to install the front and rear spring mounts for the leaf springs. The spring packs that I used were the fronts off a 1993 Jeep Wrangler. The springs proved to be too soft, so a few extra leafs were added to stiffen the pack (there are now 7 leafs in each pack). I chose to use a front shackle setup to reduce the low-hanging hardware behind the front wheel that you would find on a rear shackle system. Once the rear mount location for the front spring pack has been established, the rest of the axle alignment issues fall into place.
On my installation, using the front eye bolt of the rear axle spring as a reference point, the distance from there to the rear spring eye bolt for the front spring is 46-1/4″. At this measurement, the wheelbase is 95″. Since the frame rails at that location are too close together to attach the spring hanger under the frame, the hangers were attached outside the frame rail right under the body mount. Although welding anything to a frame rail is not recommended due to the potential for weakening, this was the method I chose for attachment for the front and rear hangers. The hanger was fabricated using 1/4″ steel; however, a pre-made hanger would work as well. The on-center measurement for the distance between the spring packs is 32″. This provided sufficient clearance between the spring and a 38″ tire (mounted on a 15″ x 8″ rim with a 3″ offset) at a full turn.
The front hanger was also mounted outside the frame rail, directly under the front body mount. The distance from the rear hanger spring bolt to the front hanger spring bolt is 44″, and the front hangers are also 32″ apart, on-center. The shackles’ length and strength selected will again depend on your specific application. The shackles on my setup are 4″ and were cut from 1/4″ steel stock.
Once the hangers and springs are mounted (this task was the most time-consuming for me since I didn’t have any reference points), the most difficult part of this conversion has been completed. The bolt-up of the Dana 44 to the leaf springs is now a matter of centering the axle and determining the proper pinion angle (the pinion angle is a critical measurement that affects caster and driveshaft angles – a professional in this field should be contacted for assistance). Since the axle on my project had the cast radius arm mounts, grinding on the axle and spring perches was required to obtain a proper mounting fit. The spring perches were located on the axle 32” on-center, equidistant from the axle tube ends. The U-bolts and U-bolt plate from the Wrangler were used for the axle installation.
Now that the axle is in place, there are only a couple of items left to address – brake lines, driveshaft, bump stops, shocks, and steering system:
I had earlier installed extended brake lines, so the length was sufficient for the Dana 44. The threads on the caliper on the Dana 28 were the same as the Dana 44, so there was no need for using an adapter. If any concerns or questions surface regarding the brakes or brake lines, consult a professional for advice or assistance.
The length of the driveshaft will most likely need to be altered – this is a job for the professionals.
The bump stops and shock mount configurations are variable depending upon each individual installation. These items are still in the research and developmental stages on my project so until I can come up with a workable solution, this will be up to you.
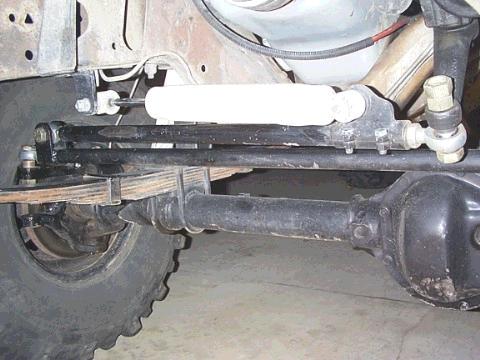
The steering component configuration with a leaf spring conversion will require some imagination and fabrication because the tie rod and drag link now have to pass over or under the springs. Proper steering geometry and handling characteristics are issues that may need to be addressed by a qualified mechanic. For my needs, the tie rod and the drag link had to be located above the springs so that they are out of harms’ way. To accomplish this, I started by grinding a flat surface on the top of each knuckle. Steering arms were fabricated from 1/2″ steel and bolted to the knuckles with 3-1/2″ grade 8 bolts. Also, a gusset plate was welded to the underside of the steering arm and attached to the knuckle. The tie rod and drag link are composed of a 1-1/4″ tube with a 1″ tube inserted into it, and the ends are 3/4″ x 3/4″ Hime joints. The Pitman arm and the steering box are stock. I added an AGR power steering pump for some added pressure to help maneuver the 38″ tires.
Overall, this setup has proven to be very trail worthy and durable. The design and intent of this modification is for off-road use – specifically, extreme trails. Because of the potentially hazardous road handling characteristics of the leaf springs, I personally would not recommend this type of alteration for highway usage. As with any vehicle modification that affects handling characteristics of a vehicle, it is your responsibility to operate the vehicle safely, and to attempt any modifications at your own risk.