
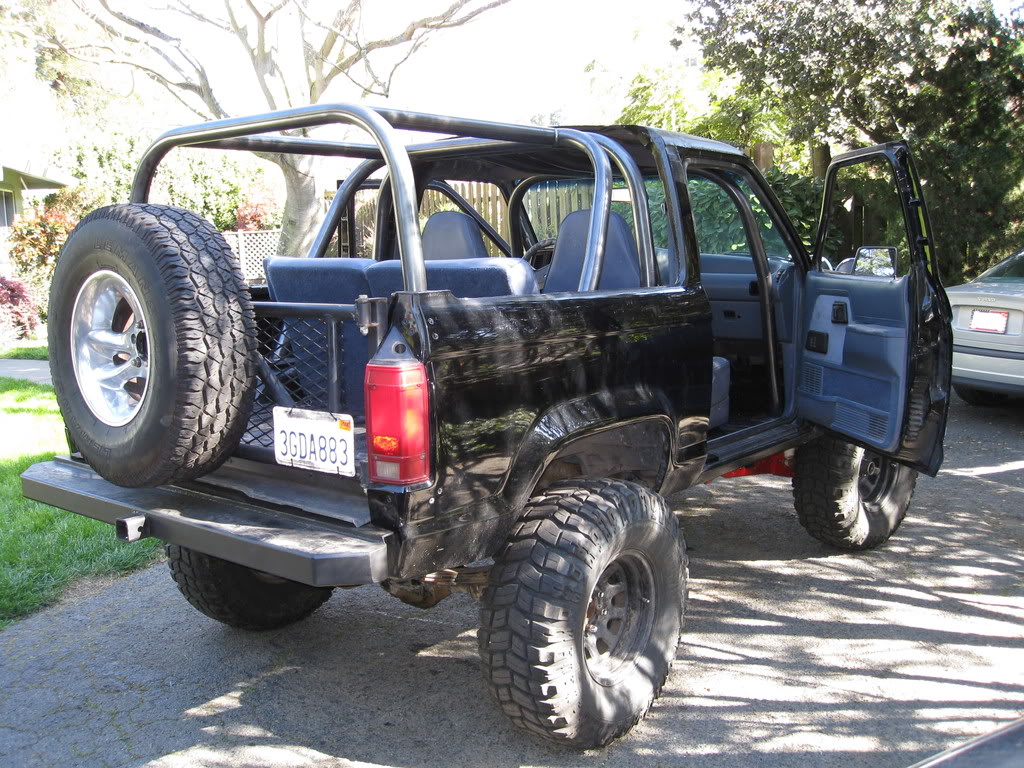
(Photo of smash9002’s 1989 Bronco II)
Disclaimer!
If you choose to engage in these activities it is by your own free will and at your own risk. Any and all modifications will likely cause a vehicle to behave differently than stock. Some modifications may significantly increase your risk when driving the vehicle or be dangerous in some driving situations. Use your brain and common sense when engaging in any activity or making any modifications. Do not take unwise risks. Consult a certified professional if you are not sure of something. I, Shaun Cheatum assume no liability for how any particular individual chooses to use the information presented here. This modification WILL void your vehicles warranty.
What you will need:
-
Cutting tool (Sawzall, Plasma Torch, Handheld Jig Saw, Etc)
-
Hammer
-
Phillips Head Screwdriver
-
(2) Large Flat Head Screwdrivers
-
8mm, 9mm & 10mm Deep Sockets & Rachet
-
Penetrating Lube
-
(3) 2×4’s
-
(1) Can of Rustolium Flat Black Spray Paint
-
(1) Roll Of 1-Inch Masking Tape
Preparation:
First things first. Remove all of the rear interior trim panels. These are all held in place by small screws. The handles are held in place by 8mm bolts which have to be removed. You can reuse all of the lower panels, if you so desire. In the front, the last panels are stuck behind the seatbelt. To get past them without having to remove the lower torques bolt (Which tend to be rusted, or locktighted in place), simply use a knife and cut the panel from the upper belt opening to the edge. Then, slide the belt out of the panel.
Your going to have to remove the head liner at some point during the chop, now would be a good time. If you plan to re-use the headliner, be careful not to bend it.
Back Hatch Removal:
Have a friend help you with this one. Use a 2×4 to support that hatch, or have a friend hold it while you do this.
Strut Removal: Seeing as you will not need these later, place a screw driver behind the lower mount, and pry them off. You can leave the upper mounts connected.
Hatch: Using the 10mm socket, remove the bolts. Two per side. Be prepared to have the hatch move abruptly. Once that last bolt is removed, that hatch will easily come off.
Rear Window Removal:
The following should only be done on a hot day. Or you can cheat by keeping a hair drier on hand.
Begin by using the 9mm socket to remove the retaining nuts. They are not really tight, so two ratchets should loosen them enough to take them off by hand. remove All of the nuts on both windows. Don’t worry, the windows wont pop out and smash on the ground. The windows are held in place by glue. This glue, once warm, becomes somewhat pliable. When it has reached this warm stage, you should be able to push on the interior corner of a window, and have it separate from the glue. Using the two flat head screwdrivers, carefully pry the window loose. DO NOT pull any corner of the window more than 1 1/2 inches from its seat until you have separated the entire window. Going over 1 1/2 inches could cause your window to shatter. One big mess. This will take some time and patients to do. In other words, take your time here. Lets say it together again, “Take your time.” After removing your windows, use a flat head screwdriver and scrape off what ever glue you can. Its no big deal, but it will help when your cutting away.
RABS Computer:
On some models, the RABS computer is located on the drivers side wall, behind the seat. Now would be a good time to move it to a place under the dash to avoid possible water damage. (The one time it will rain, is when your top is down.)
First, disconnect the wiring loom from the box. One disconnected reroute the loom to the fire wall. This loom runs from the drivers side firewall and along the floor to the right of the drivers seat. Make sure to disconnect the ground and save the self tapping screw, as you will need it later. Unbolt the box and set it aside. I have found that the box tucks in nicely behind the kick panel on the drivers side. The bolt that originally secured the box will fit into an existing hole.
Reconnect the loom to the box, and use the self tapping screw to connect the ground to the firewall.
Chopping The Top:
Rear Supports:
Mark where you want to cut with masking tape. Either the top, or bottom tape line should be where you want to cut. If you plan to do some metal work afterwards, leave about two inches of steel to work with on the rear supports. Otherwise, your cut should be in line with the window seam. Using the spray paint, lightly dust the tape and metal around it. Once this paint has dried, remove the tape. This will leave a distinct line for you to cut along.
Top:
Run the tape from where the window seam just begins to curve from the side to the top, and along to the other side. This should run the line of the tape exactly parallel to the top’s support beam. To check this, use the sharp edge of a screwdriver, and tap a dent into the top along the support beam. The dents should be just on the edge of the tape, if not a little in front of it. Adjust the tape until you feel that you have it where you want it, making sure that it is still in line with the dents. Dust the tape and the surrounding metal with the spray paint. Once the paint has dried, remove the tape.
Cutting:
Wear eye protection and work gloves!
Using the 2×4’s brace the front of the roof, just behind the cut line. Use two to brace the sides, and run the third along the top. It should look like this |““`| Feel free to screw the wood into the roof, for added support.
You will want to cut the rear support beams first. The beams are box steel with a inner support structure. They may take a few moments to cut. If you are using a plasma cutter, it would be wise to pull out the tail light assembly before cutting.
Once cut, DO NOT pull the supports out of place.
To cut the front, you may have to climb onto the roof of your truck. (Or, just use a ladder.)
Cut the sides first, stopping just before the middle. Once both sides are cut, check the bracing and rear supports. Finish by cutting the last section. If the bracing is properly intact, the top should not move much. The top can be carried off by one person. Finish the process by sanding, or hammering down any sharp edges. Give any exposed metal and coating of spray paint.
Congratulations! You now have a chopped top!
Hard Top:
Now the part of this that I didn’t save in WordPerfect.
To make a hard top, you will need another Bronco II to chop the top on. The wrecking yard is a good place to find this, hell, they will even help you out here.
The rear supports on the Bronco II have two sections in it. An outer box, and a inner support core. Which is simply another line of steel running to the base of the vehicle. Keep this in mind.
You will have to leave approx. 3″ of each support attached to the new bedrail.
On the top of the vehicle, leave 4″ of sheet metal from where you were instructed to cut. Leaving a overhang.
Your truck is now prepped to receive its new hard top. To create this hard top, you will have to chop up another Bronco II. This time, following the provided instructions. You can have the wrecking yard do this for you if you don’t want to bother.
On the rear supports of the top, cut a line approx 5″x1/4″ err, 5″ tall, 1/4″ wide. With a jig saw, cut out the inner core support from the top of the original support cut. With the support core removed, pry open the tops support. This is so it will slide over the stubs that were left on the project vehicle. You WILL need to trim further to fit perfectly. You will need to test fit the glass and hatch often to get it perfect.
Slide the top over the support stubs on the project vehicle. If it does not fit perfectly, you may need to bend the tops supports further for it to settle all of the way down. Once it is down and looking like its placed correctly, *window seams lining up along with bolt hole patterns there in* Make three marks on the forward top flange. This flange should now be resting on top of the overhang you left on the Bronco II. These three marks should be placed like the following. About 2″ back from the chopped tops forward seam. One mark direct center of the top. “ie, between the drivers side and passenger side seats. *But still on the chopped top*” One inline with the driver’s seat, and one inline of the passenger’s seat. Drill these holes all the way past both tops. Use these holes to bolt the top down. Also should be used as centering pins.
In the rear supports, drill a hole through both the top and the support stubs. You will run a bolt into this to secure the rear. Bingo bango! You now have a hard top!
Or you can cheat and trim a fiberglass camper shell from a ranger to fit on your new bed rails.
Adding Bed Rails:
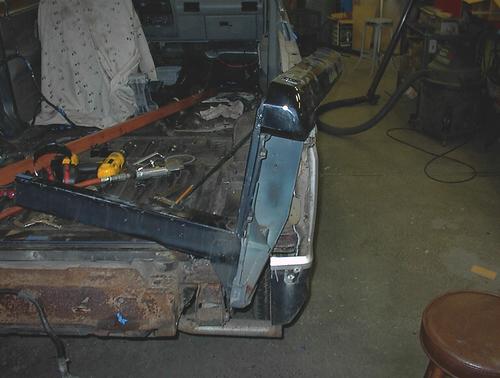
Most people who chop the top leave the back open. If you would like a nice clean factory look, go to a salvage yard and get a used early Ranger bed. Remember that the Bronco II and the 1983-1992 Ranger had the same body lines. In the photo below, you’ll see where someone has cut out the top of the bed rail and retained the rear corner for the taillight from a Ranger bed. This section will be welded in to replace the same area that will be cut out of the Bronco II for a nice clean factory look.
Adding A Tailgate:
A Ranger tailgate basically bolts right up. Use all the hardware from a Ranger bed. You may have to fab a spacer for the latch which can be a piece of angle iron with a few holes in it.
More Info:
Please Contact Us If you would like to submit photos or information to be added to this page.