
Submitted by: James “Cowboy6” Nadal
To start with, I looked at every web site and looked for Chopped top Fords. I saw numerous Bronco II’s that had been chopped to look like the Full size Bronco.
I owned a 1967 Ford Bronco and have had a CJ5, CJ7 and a Wrangler. I have owned convertibles since I was in high school, and this time I wanted to make something that was mine. Something that I created and built, everyone has seen the stickers that say “Built, not bought”. Well, I bought then BUILT what I wanted.
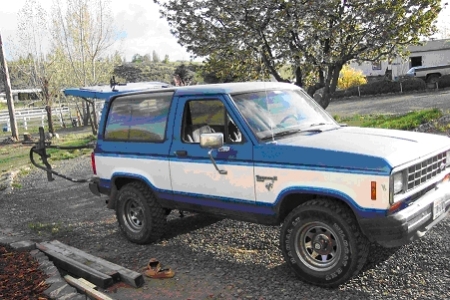
I started with a stock 1985 Ford Bronco II XLT package. I made the measurements. Taped off the lines I wanted, and waited. I looked at the web some more. Found a few that had been complete top removal projects. I really liked the look of the whole rig, and that is when I decided to chop the whole thing. Maybe it was from owning so many convertibles in the past, but it was my plan to chop the whole thing.
First step was to gut the rig. I pulled the carpet, all the interior panels, the headliner, the tailgate (part of the build to be discussed later), and the front seats. After taping and measuring, I removed the rear glass. The rear side glass does not come out easy, and both of mine ended up shattering into a million little pieces. After the glass was gone, I was now ready to take the final step.
To cut or not…. Well, I cut. And then cut some more.
I started 3 inches above the windshield trim to give myself room for error. There is a bodyline that you will see on the inside of the cab right above the sun-visors. Easy to cut off, but not to put back on. I then cut the B and C pillars at the bodyline at the bottom of the rear windows at the pinch rail. Once the pillars were cut….. remove the top, and now have a convertible. If you break your glass like I did. Use a box knife to cut the glue that was used to hold the glass on the metal. After the top is removed, the rear quarter panels need to be braced. Much like making a bed brace for a truck. The reason for this is the top of the panel right behind the door is now unstable, and has about 2-3 inches of flex. It has some play in it, and the metal needs to be braced to keep from stress tears. I used a piece of 3/4 inch conduit with flattened ends to make my support measured at 33 inches and flattened the ends about 4 inches each. I placed brace on the floor behind the seats and used rivets to hold in place and them tied the brace into the side of the wall. After the braces were riveted in place, the flex at the door is gone. After I put the 6-point cage in, I will use the cage to also help stiffen the panels and reduce the amount of body flex. I closed the pillars by using expanding foam and a piece of 1×3 flashing. The foam was to close the holes, and the flashing was to smooth the bodylines and make everything flow. The windshield frame was another project in and of itself. I actually rolled the metal back to the pinch line on the roof. I then used foam again in the cavity, cut the metal and shave the foam to the line I wanted, and then to close the metal with the body line that I left long.
I then took the tailgate and cut the top half along the same bodyline as the top. Then split it down the middle to make swing out doors and will use a hinge on the door and rear of the bronco to mount them. I also cut the top half of the doorframe off. The back of the door is along the bodyline, and the front is at the top angle of the frame.
For the rear of the body. I still had the pinch seam on the sides. I actually folded over 90* flat on the sides to help maintain the structural strength of the sides. (actually beat them over with a hammer and cresant wrench to start the bend). I also used a piece of 1×3 (90* bend) flashing cut at 53.5 inches to smooth the line on the top and close off the pillar tops. Rivets used and not welds.
Now for the inside. You can reuse the interior panels, just need to cut them to match the new body, ( this is mostly if you reuse the interior panels) or you can use diamond plate, or just about anything you like to finish the interior.
To Cage or Not to Cage.
This is almost a have to do project if you are going to do any type of wheeling. The windshield frame is not strong enough to support the roll, and there is no longer any overhead protection. I built a 8 point cage that was fabricated from 2 existing.
I built my roll cage from a 6 point CJ5 cage and a Rear roll bar from a CJ7
The front cage had to be narrowed by 5 inches and sleeved back together. 25 ¼ inch spreader bars tie the front hoop to the main hoop. The outside spreader bars were also shortened by about 6 inches, refit and welded into place. I used a piece of 2×2 stock and ran it from frame rail to frame rail and then braced under the floor to the floor plate on the main hoop. The front hoop has frame braces from the frame rail out to the plate and bolts in. The rear bar is 38 inches from the floor to the tops of each bend, and 39.5 to the center. Each spreader bar is 38 inches long and follows the front spreader back to give it a cleaner look. I used a piece of 2×3 angle iron to join the bar to the floor here. It is from outside to outside of the rear bar, and bolted through the floor. I also added a 1 inch spreader across the dash.
Remember that my rig was made for on the trail and hunting, not to enter the show and shine and top truck. I did not use body filler or metal working hammers. I bent and pounded the metal into the desired shape with pliars, vice grips, cresant wrenches and hammers
Recommendations if I was to do this again.
Get a sawzall for the cuts on the pillars. It makes fast work and gives you a better line to work with.
Ask a glass shop if they are interested the side glass and if so help to take the glass out.
Do the body lift before the chop. My body lined back up fine, but the door flex was a little worrying at first. Passenger door did not want to line up and close till the body was bolted and torqued.
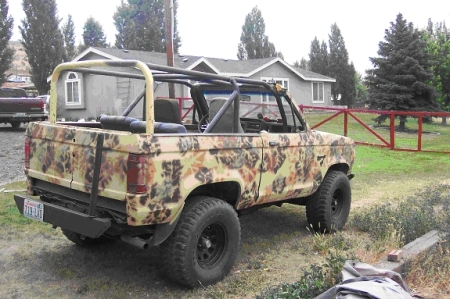
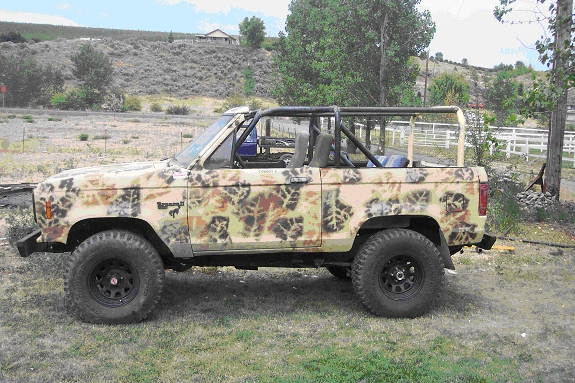
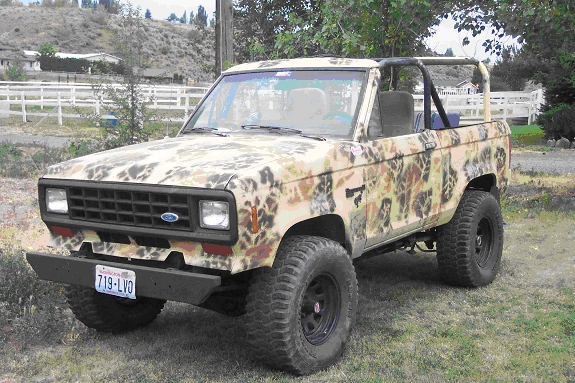
This is the finished product.
Resource: