
One very common thing people like to change about their Bronco II would be the front seats. There were a few different styles of seats available in the Bronco II so there are some easy choices; however, you are not just limited to Bronco II seats. With a little bit of wrench turning, there is a whole array of seats that can fit easily. Seats that will fit would be from:
-Fox Body Style Mustangs
-Tempo/Topaz
-Escort/Lynx
-Rangers (up to mid 90s with buckets or split bench)
-Explorers (first generation)
-Thunderbird/Cougar (80’s and early 90s models)
And possibly more than mentioned above. Seats that will not fit would be from full size vehicles (such as the full size Bronco and F-Series, since they are too wide). All Bronco II seats will easily bolt in place of each other with only removing the four bolts (see below). All the other seats on the list (including Rangers and Explorers) use different seat tracks that will NOT bolt to the Bronco IIs floor boards. So you will need to remove the stock seat tracks from your old Bronco II seats to bolt onto the new non-Bronco II seats.
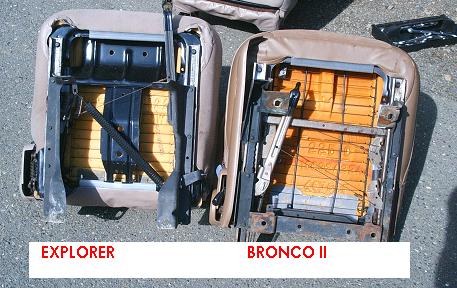
I had the stock Bronco II 60/40 split bench in my ’88 and found a pair of bucket seats from a 1992 Explorer. So here are the steps I took. First I removed the (2) bolts at the back of the seats using a 13mm socket. Then sliding the seat back I was able to gain access to the front (2) bolts (also 13mm).
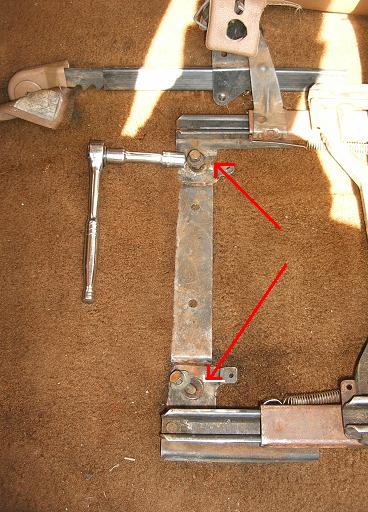
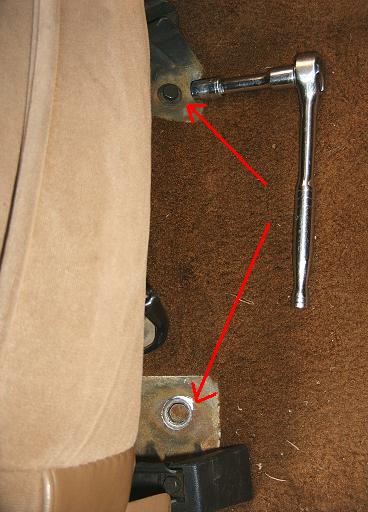
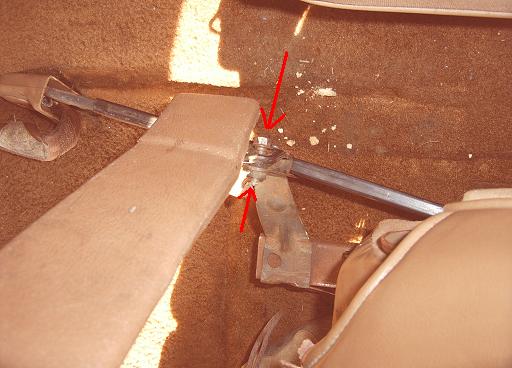
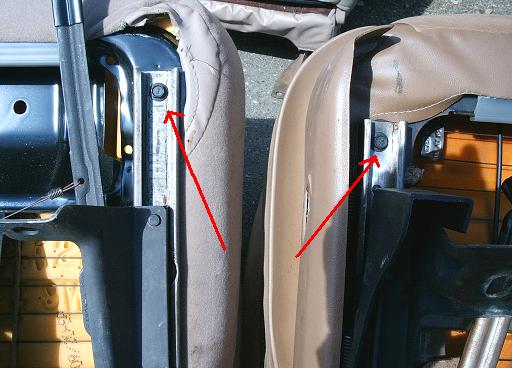
Once the bolts are removed you will still need to unbolt the seatbelt buckle from the seat. It is fastened to the seat via a single 10mm bolt attached on the inner side. I had to move the seat slightly out of position to gain access to this bolt.
Once both seats are out you can view the tracks on the new and old seats. Inside the tracks you can see (4) 10mm bolts (per seat) holding the track to the frame. You will need to use the slider on the seat to slide the tracks to gain access to these bolts. Now that both tracks are off you can install the Bronco II tracks on the new seat. Start by loosely bolting in the top (front) to bolts. Then you can move the slider/track and view the back (bottom) to bolts. These bolts may not align with the holes that the old bolts were in (as was the case with the Explorer seat) but there are pre-drilled holes where you need them, and the seat bolts are self-tapping so you can bolt them right into the correct hole. Now all you have to do is place the seat into the truck, bolt down the seatbelt bolt, and then the 4 13mm floor bolts you removed!
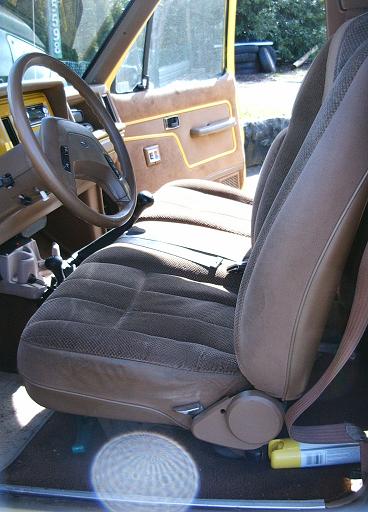
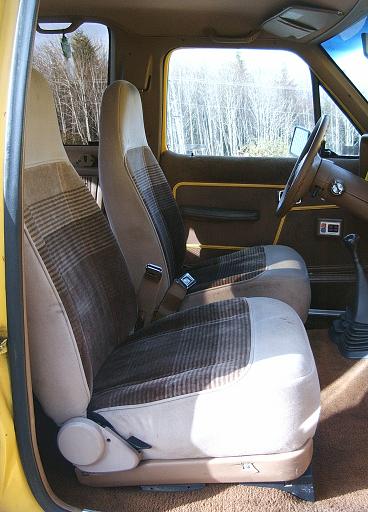
Now you can see the before and after of the seats! This swap should take you less than an hour and only requires a few basic hand tools (a 10mm socket, 13mm socket, and a ratchet with extension). It was very easy!
Tech page written by Ben Hart.
Resource: