When Laura decided to buy her son Joseph his first vehicle, she decided to find an older vehicle and decided on an old Ford Bronco II. Knowing that I have experience working on older Ford Rangers and Bronco II’s, she chose yours truly to turn a tired old Bronco II into something unique.
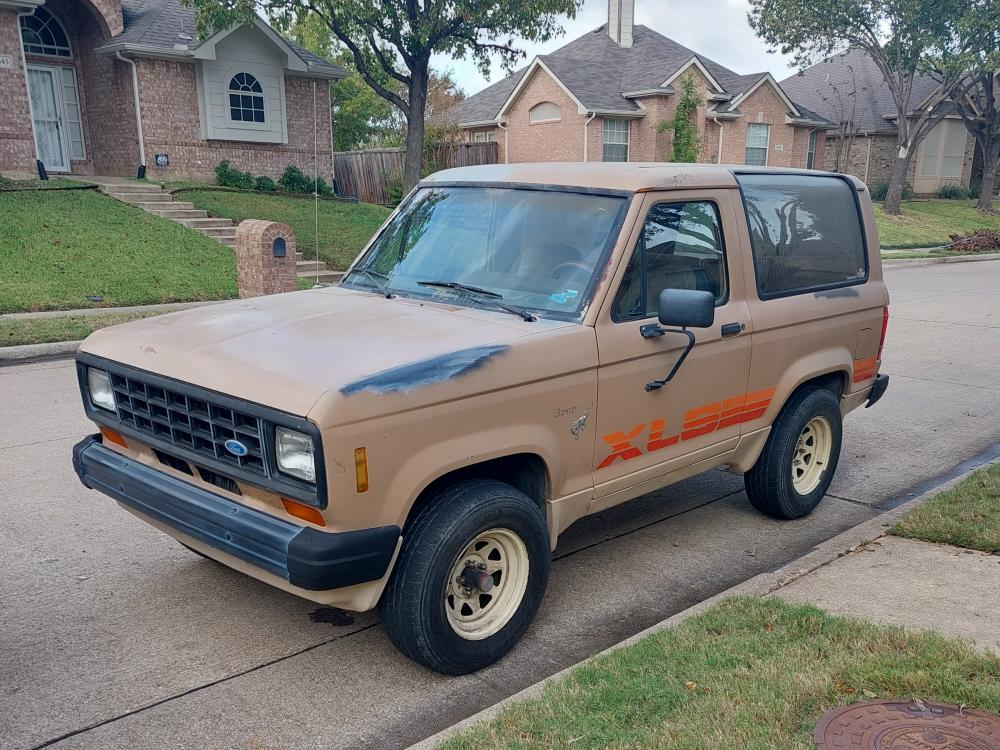
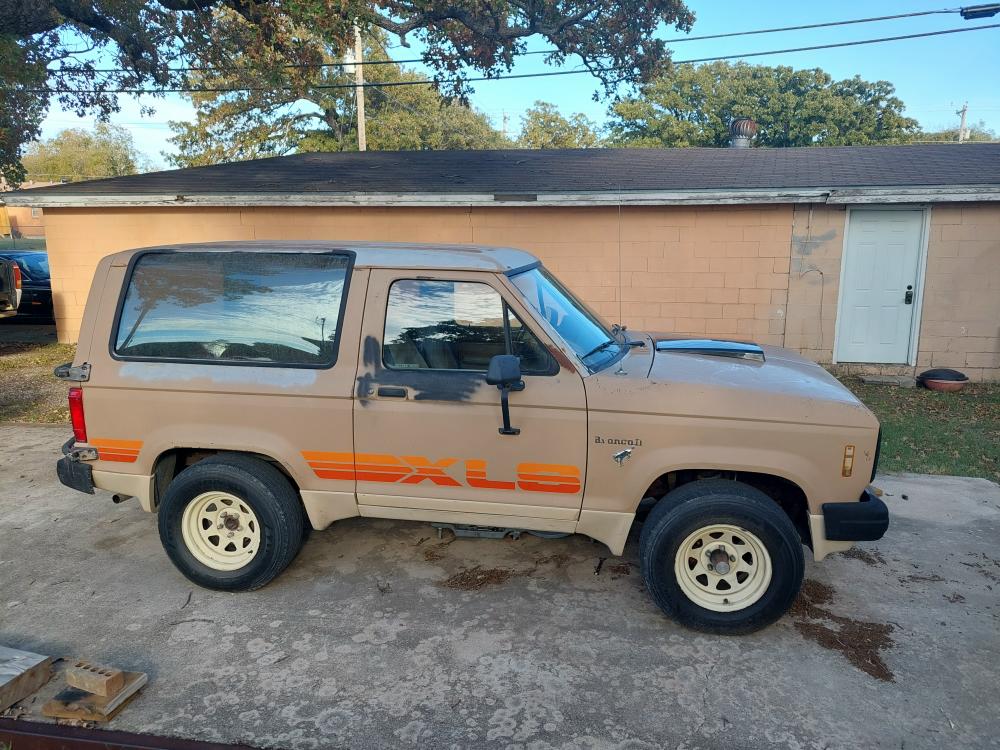
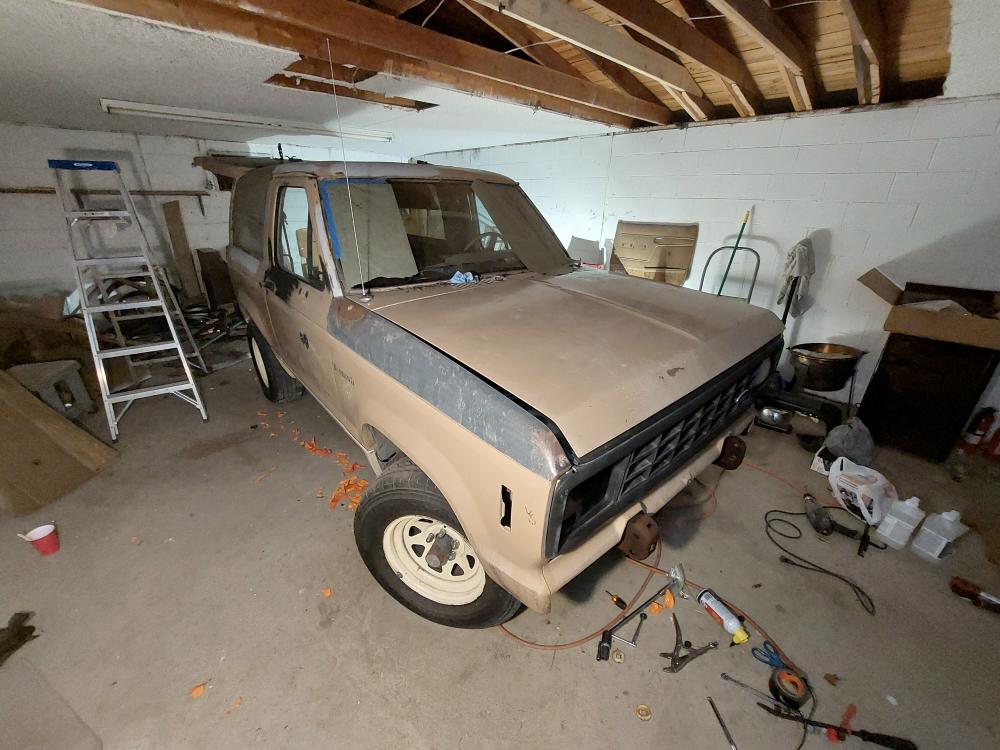
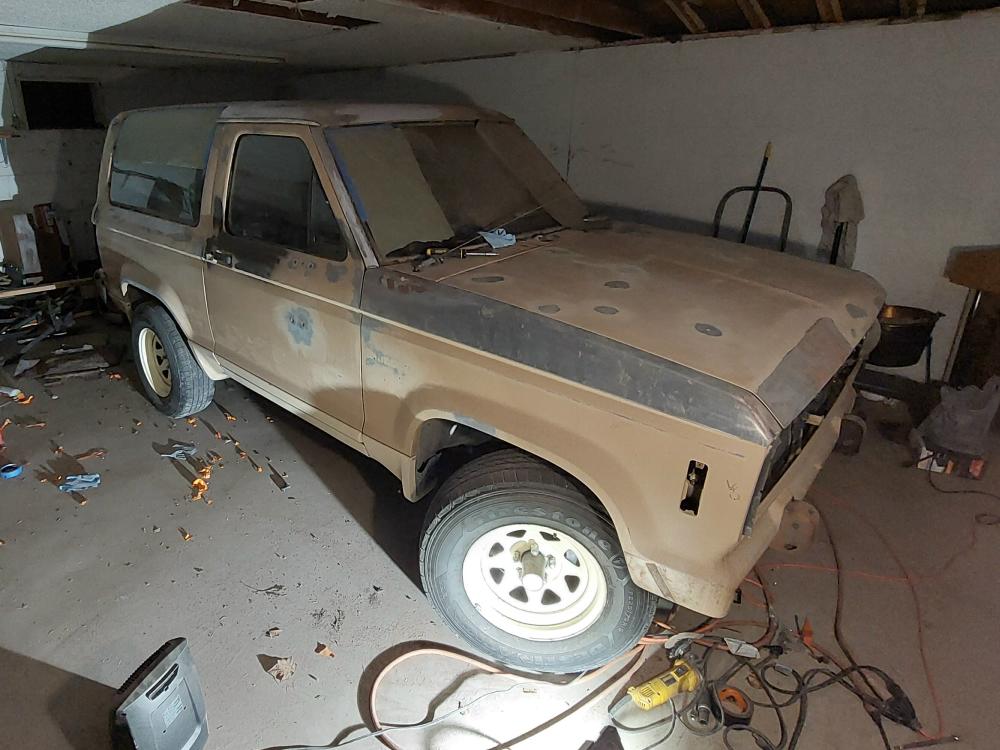
Searching Facebook Marketplace, I came across this 1984 Ford Bronco II XLS 4×4. I had seen pictures of these vehicles in sales brochures, but had never actually see one in person.

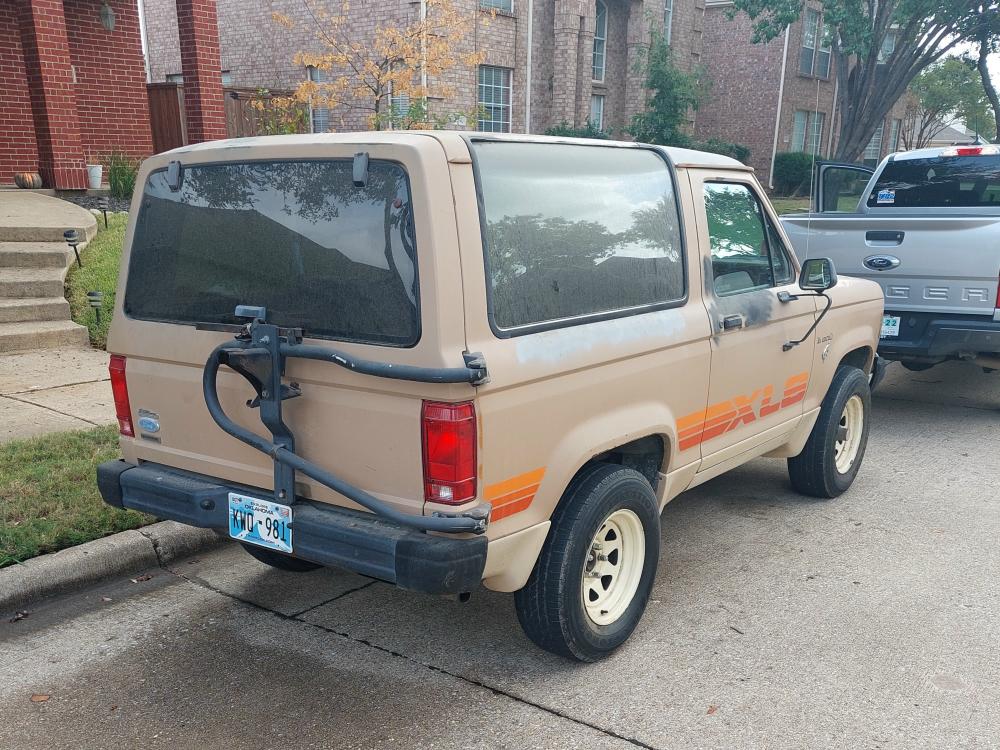
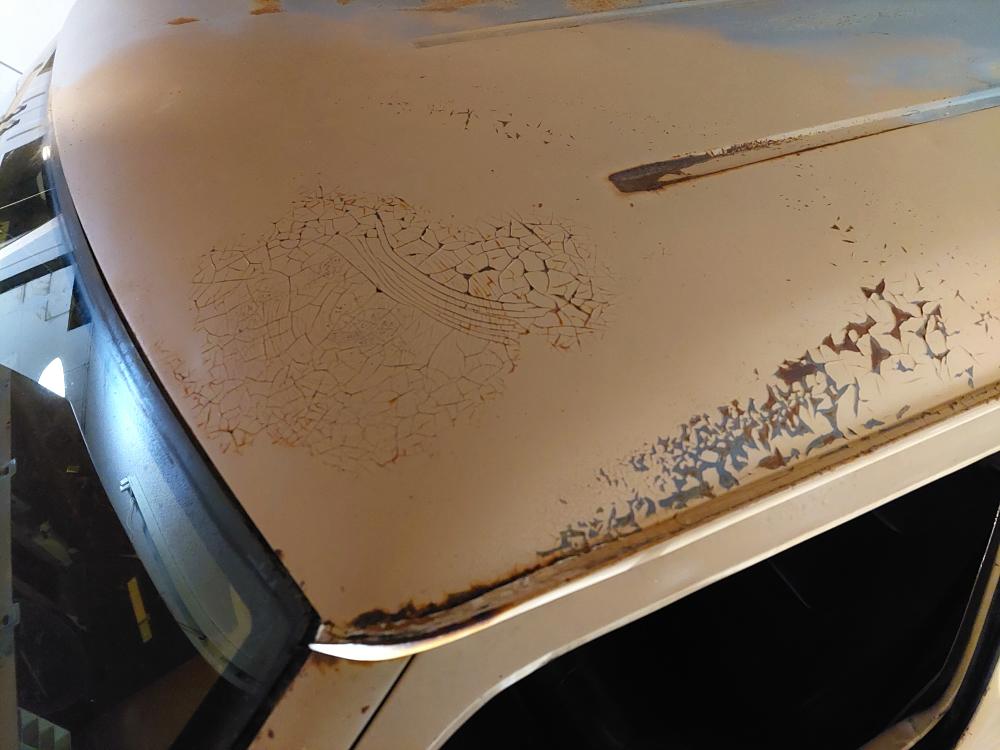
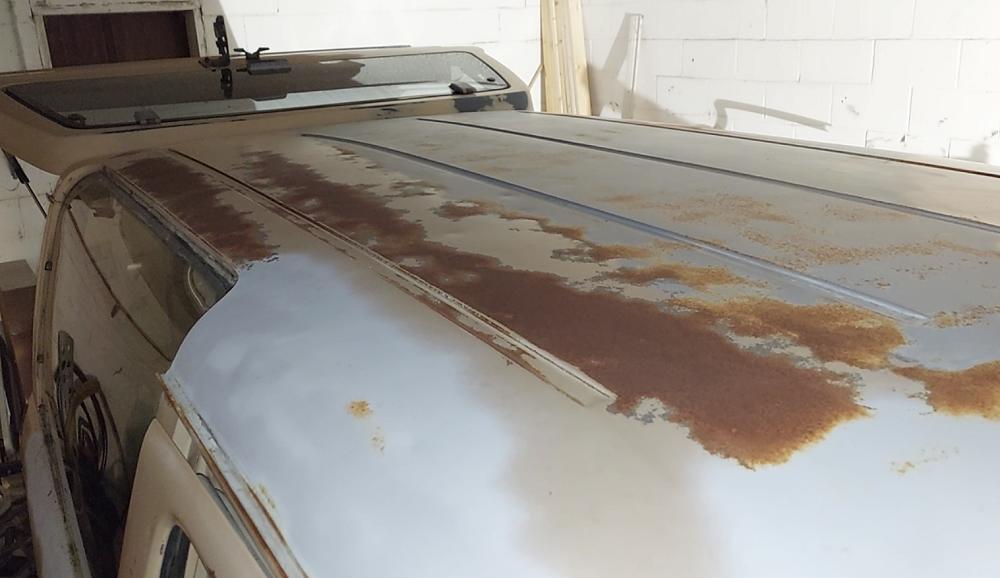
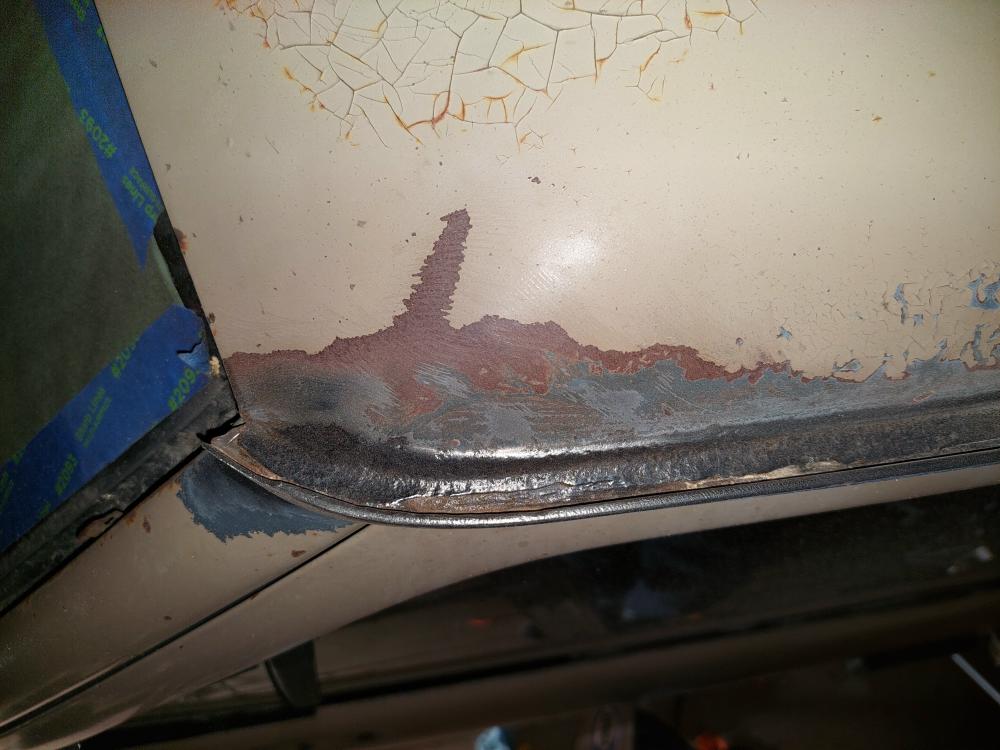
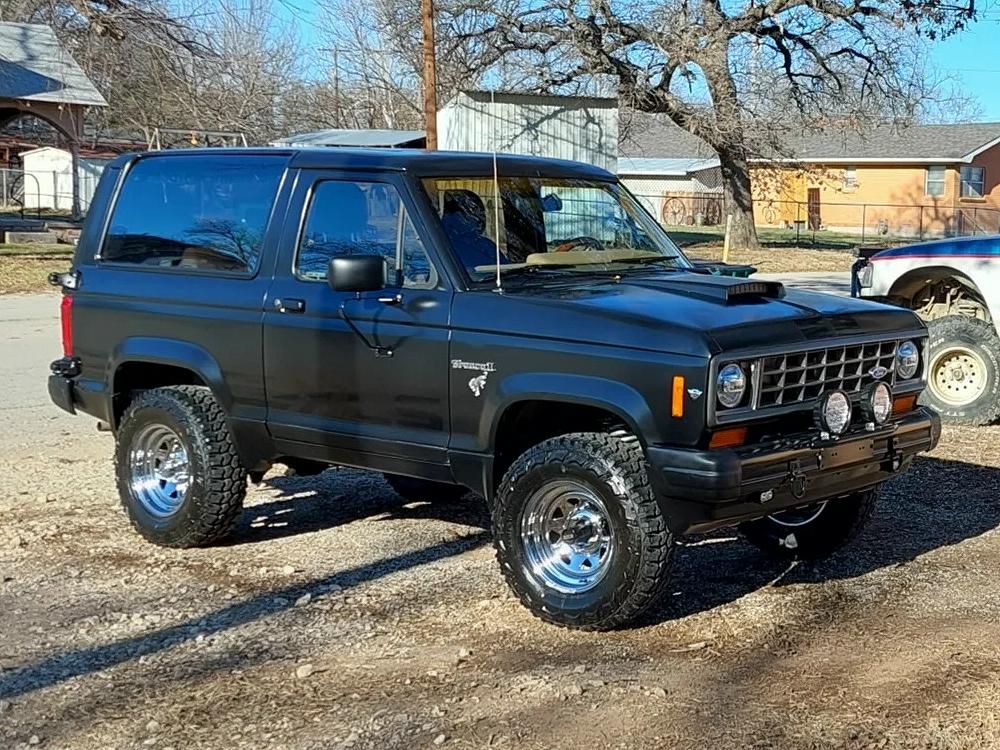
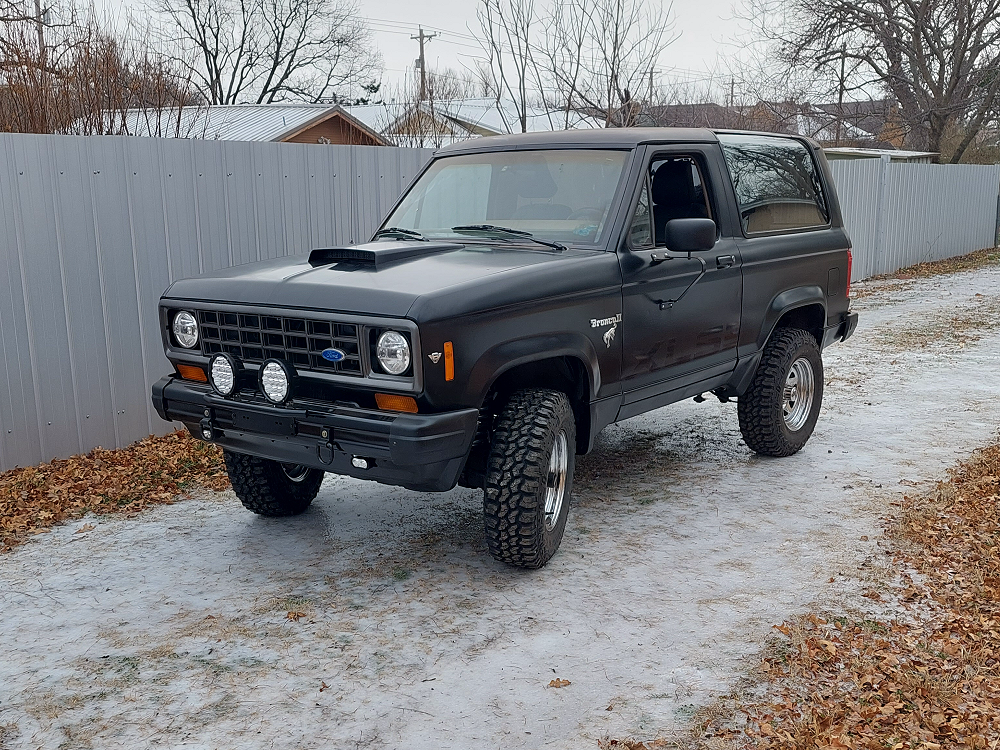
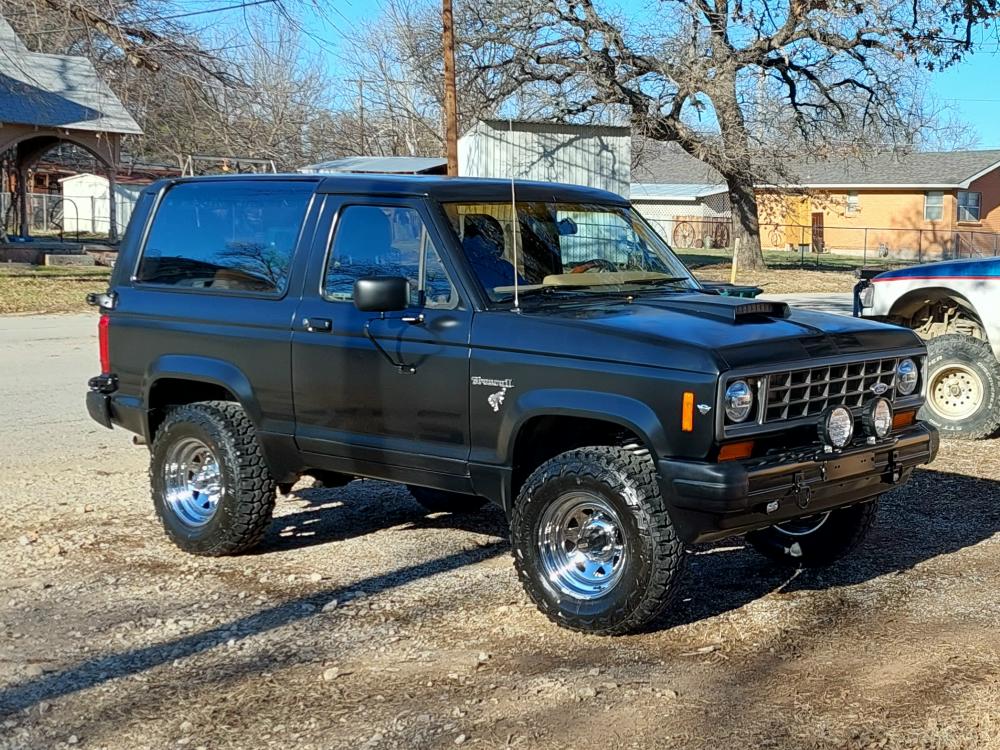
When we went out to see the vehicle, I was surprised to see that it had all of the fender flares and front air dam that came on the XLS package. The paint was rough and there was some surface rust in some areas, but the Bronco II was solid.
The owner told me that the starter wouldn’t engage the flywheel and suspected that the flywheel was damaged. Since it was a 5-speed manual. he was able to pull start the vehicle with the help of a side x side UTV.
The only noticeable problem was that the air conditioning compressor was missing, but we could rebuild the A/C system later if we wanted.
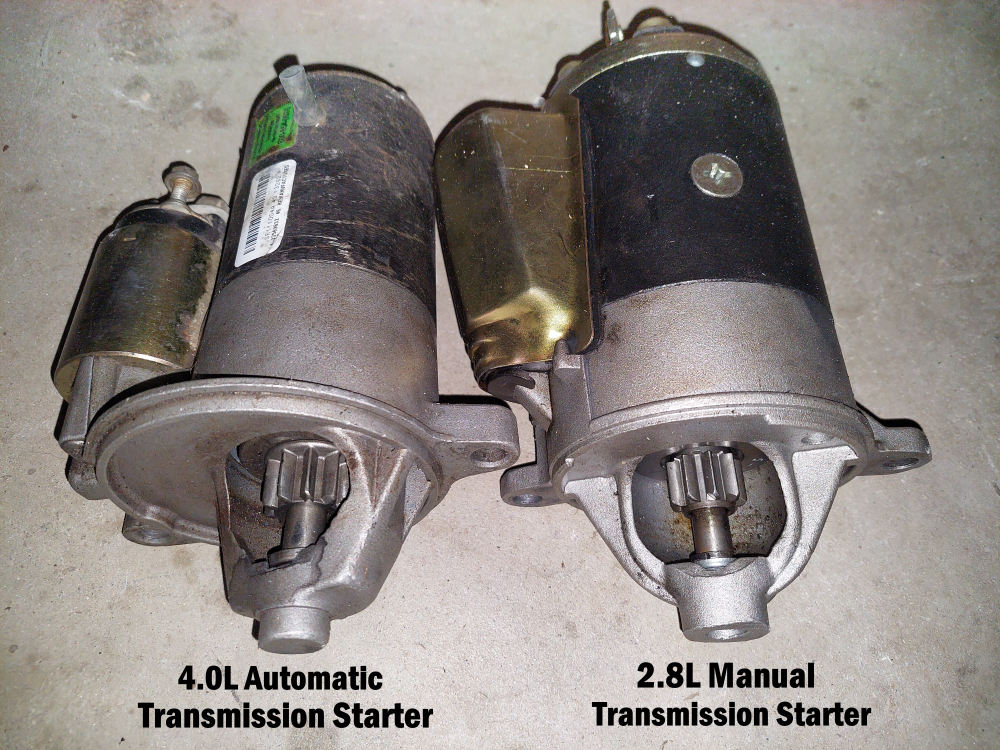
Once I got the Bronco II back to my shop, the first order of business was repairing the starter. These starters on the 2.8L V6 engines have been known not to fully engage in the flywheel sometimes. This could be from a weak battery or poor battery and starter cables causing the starter to not get enough voltage to generate enough torque to engage it. My solution was to install a starter I had for a 4.0L V6 out of a 1996 Ford Ranger that had an automatic transmission. These 4.0L starters are actually a little smaller and create more torque. You just have to do a little rewiring to make them work.

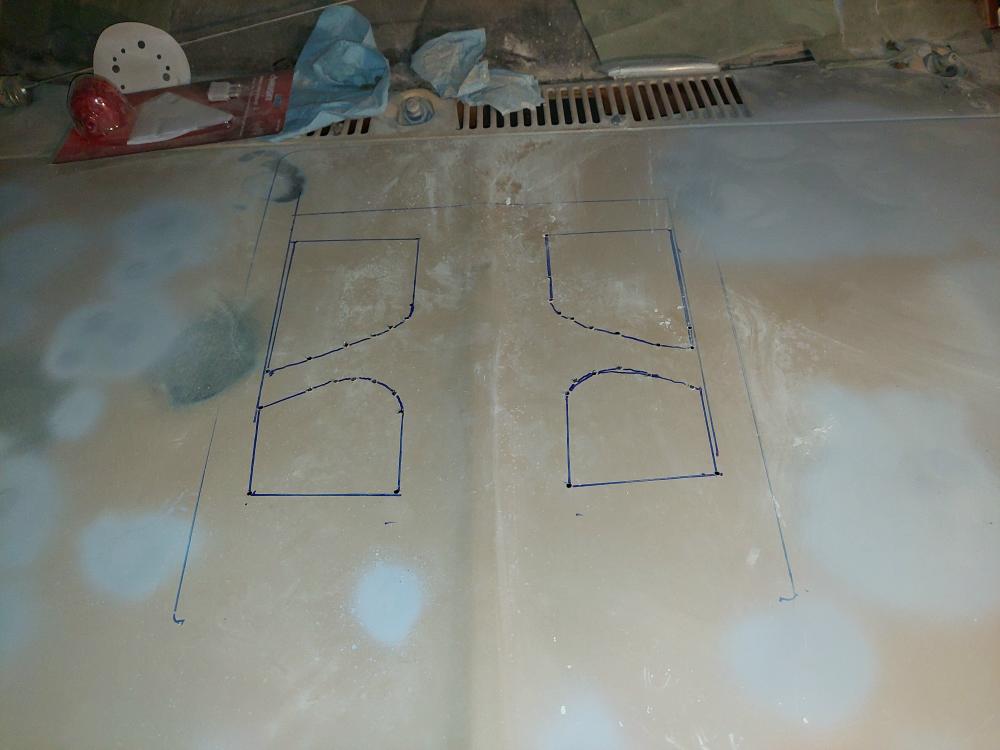
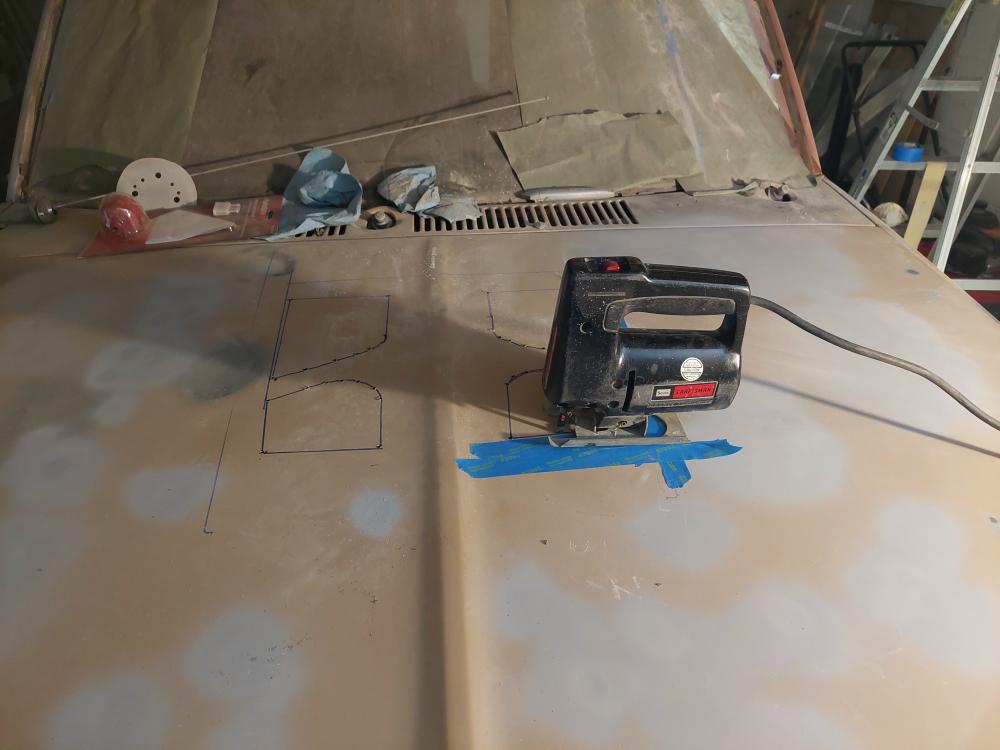
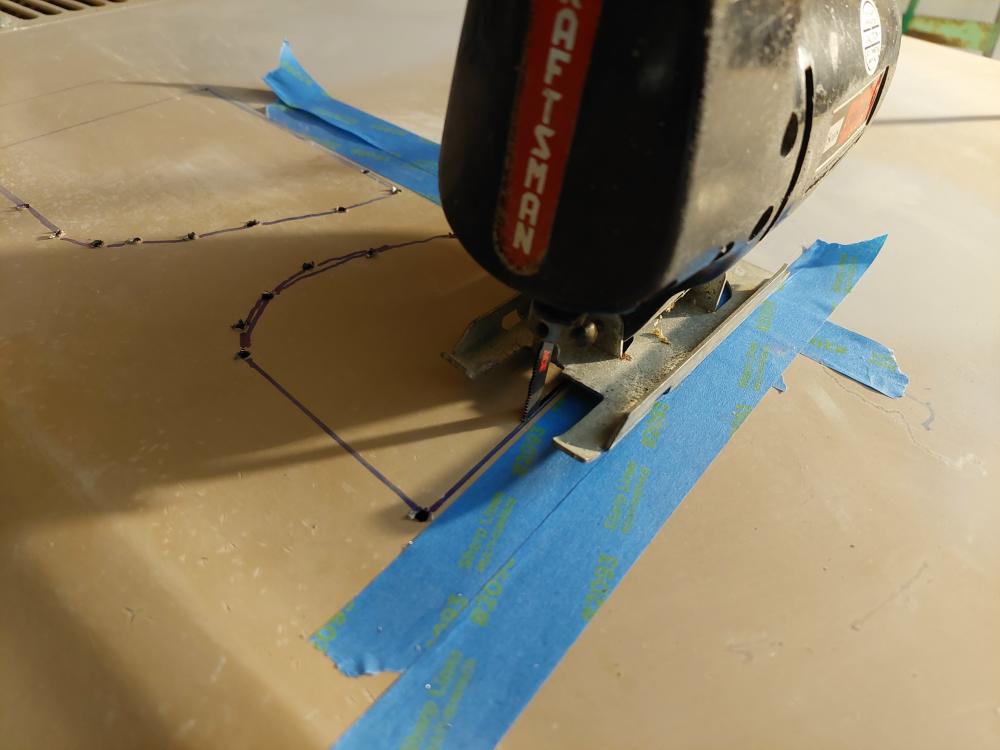
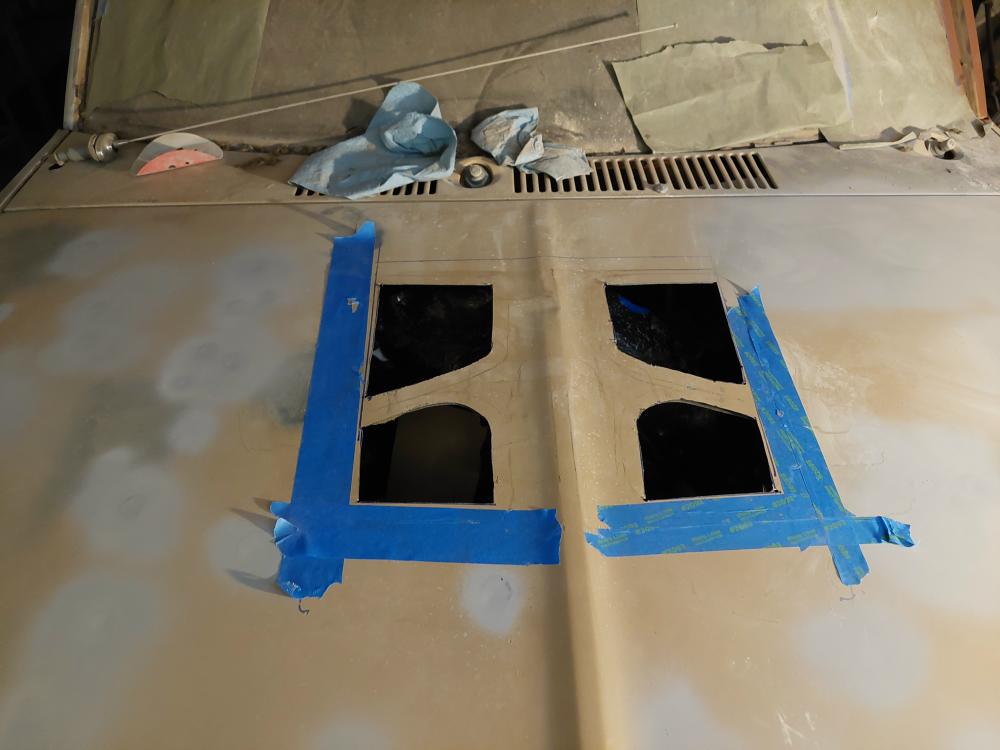
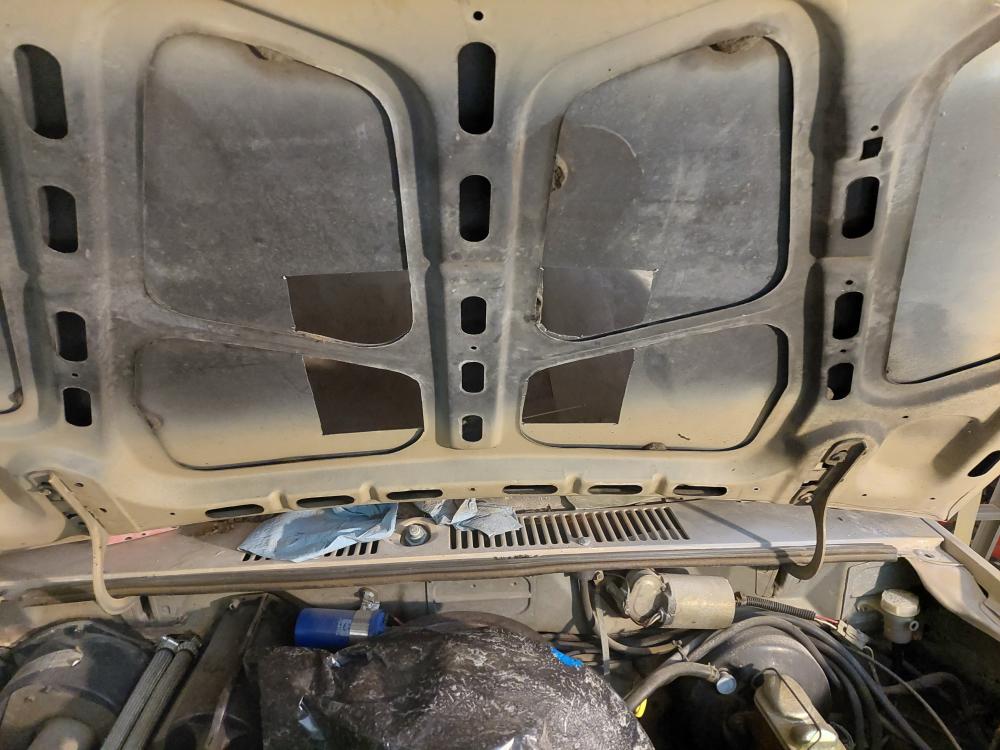
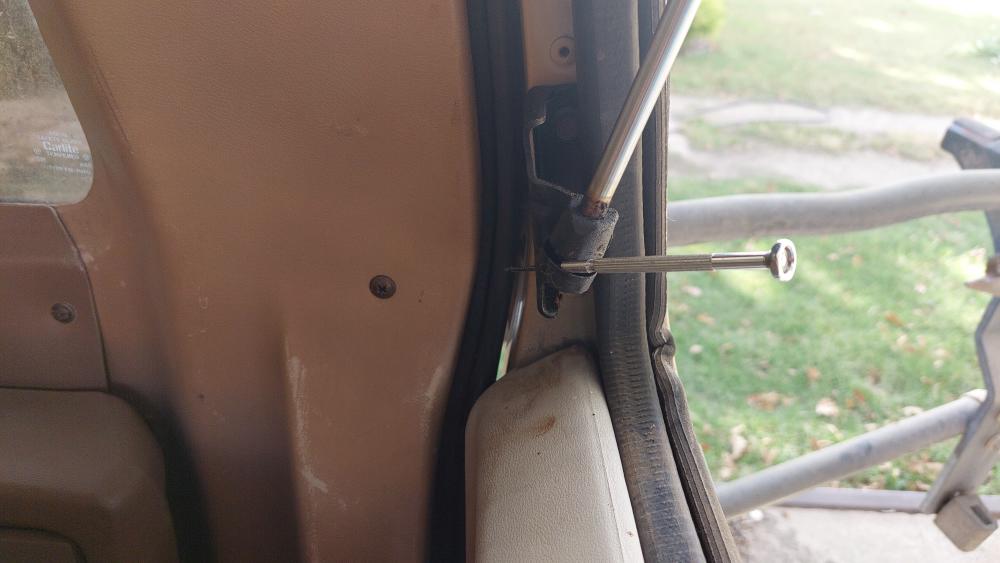
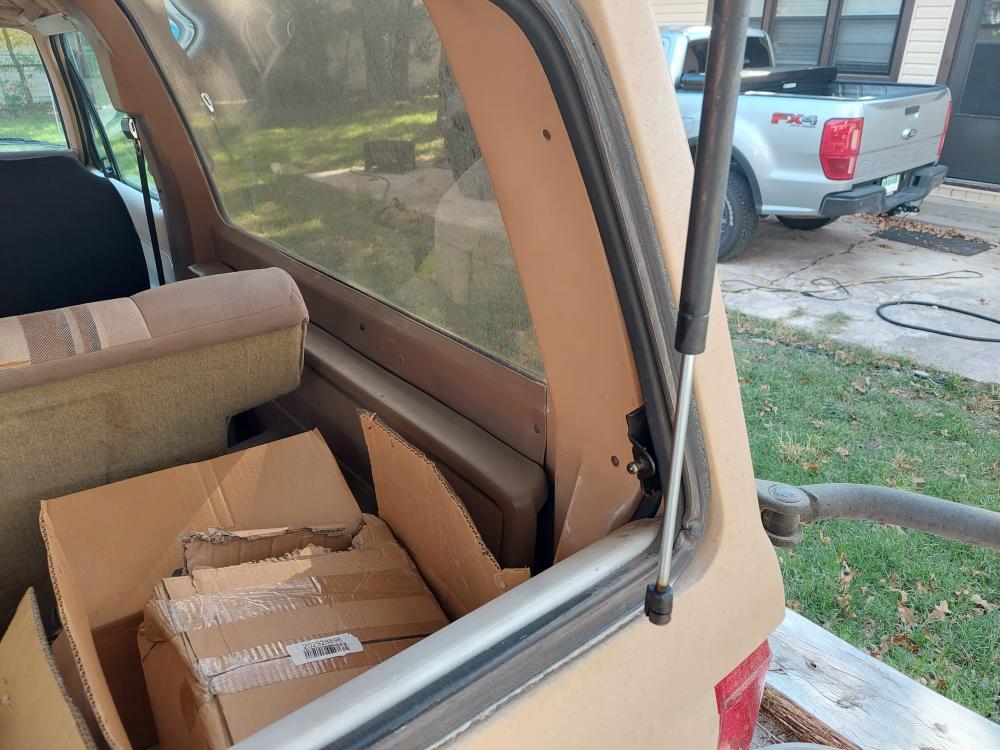
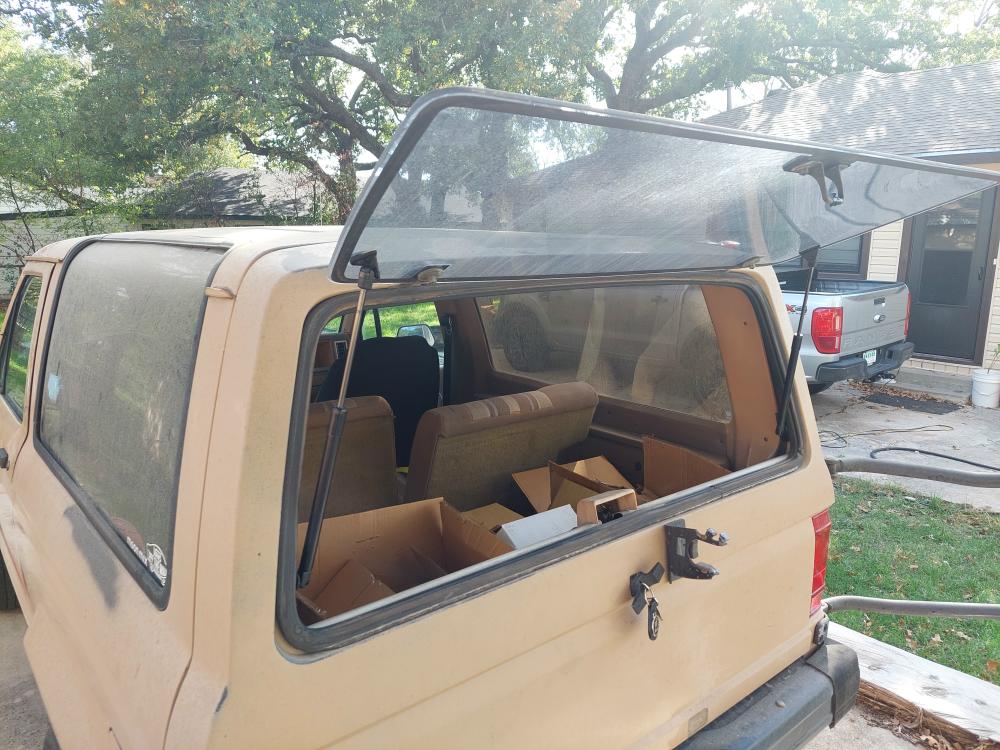
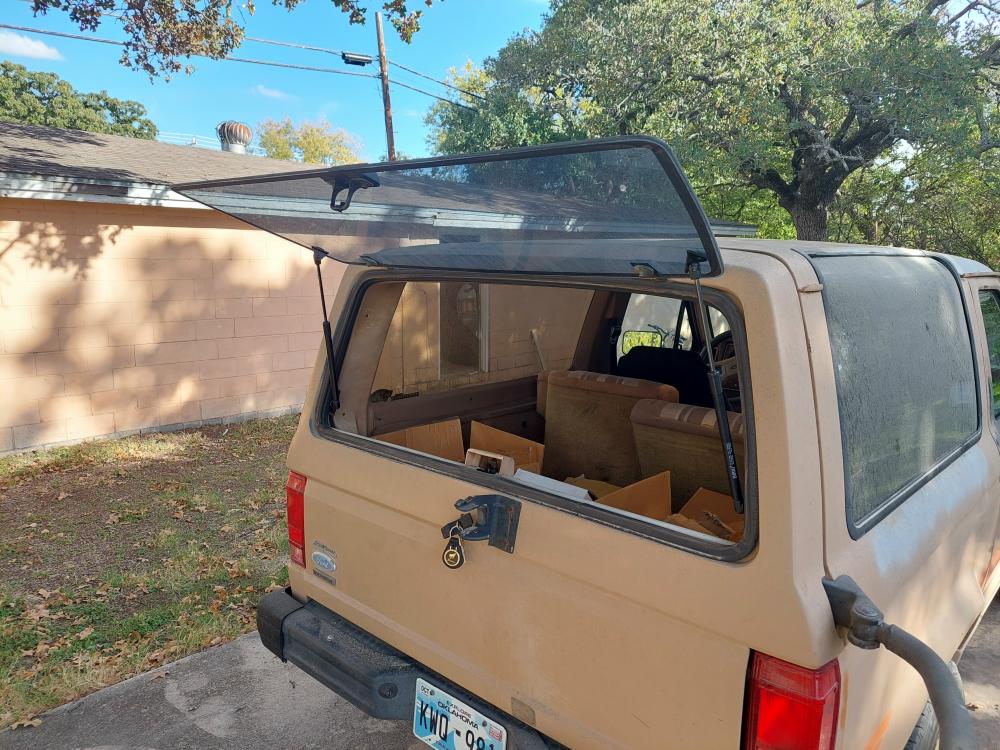
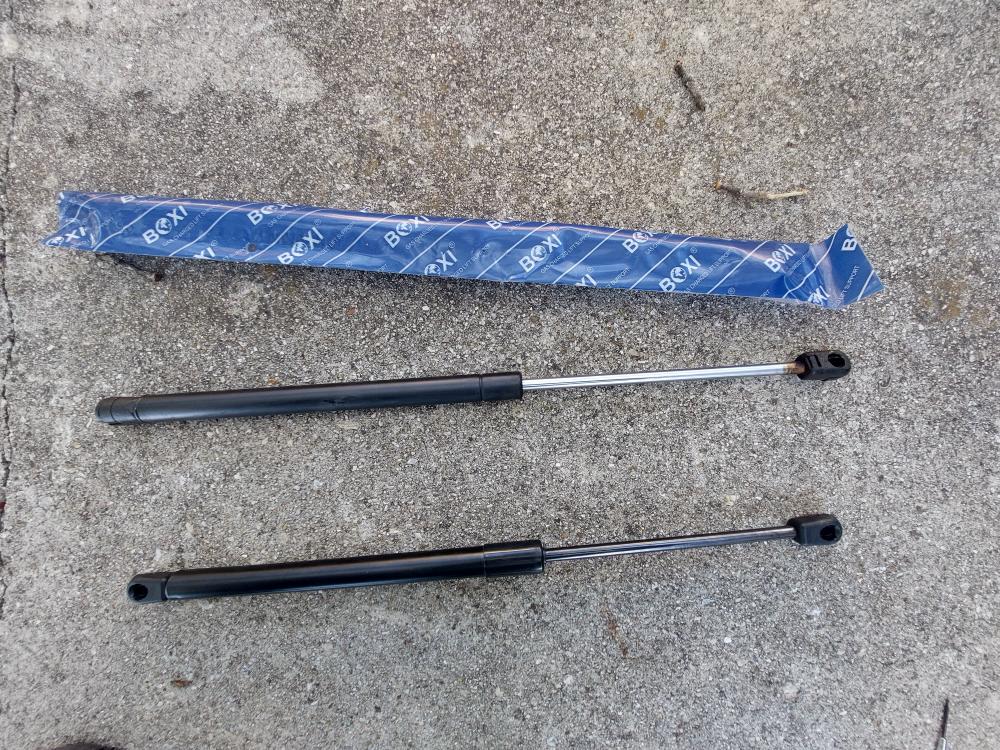
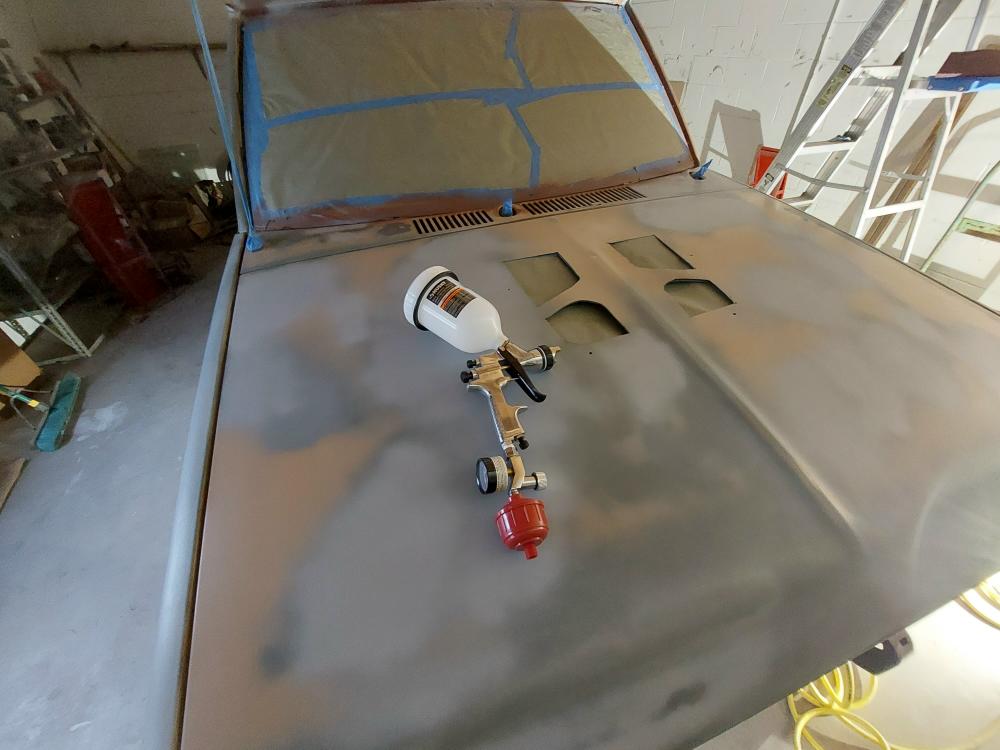
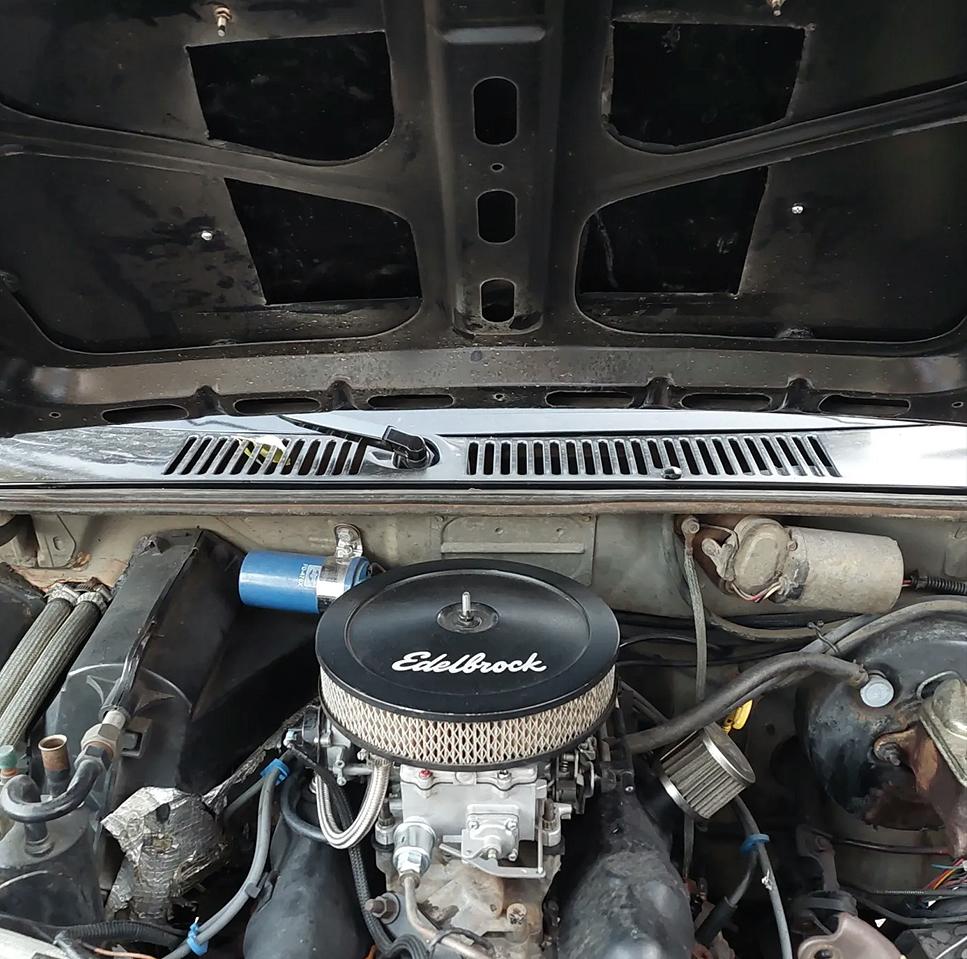
Next was replacing the worn out rear window struts so the window would stay open, and then I was able to find a hood scoop for a 2010-2012 Ford Mustang GT online at AmericanMuscle.com for $26.99.

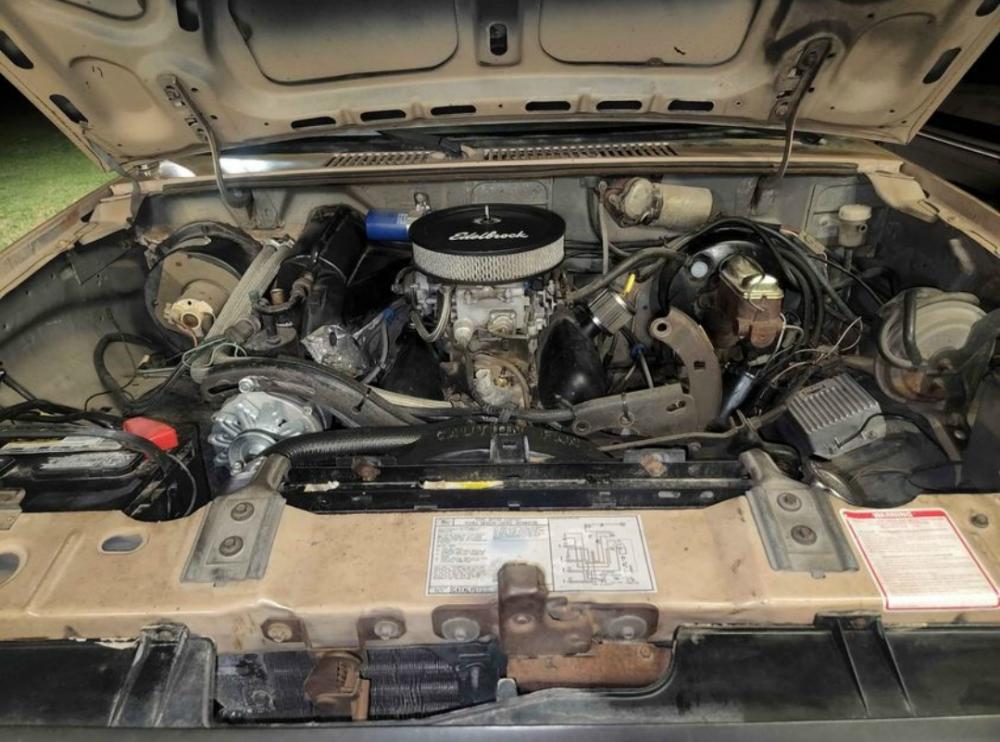
I made the scoop functional by cutting an opening in the hood under the scoop. Since this 2.8L V6 has an open element air cleaner on it, the scoop would actually function the way a scoop is supposed to a provide fresh cooler air to the intake.

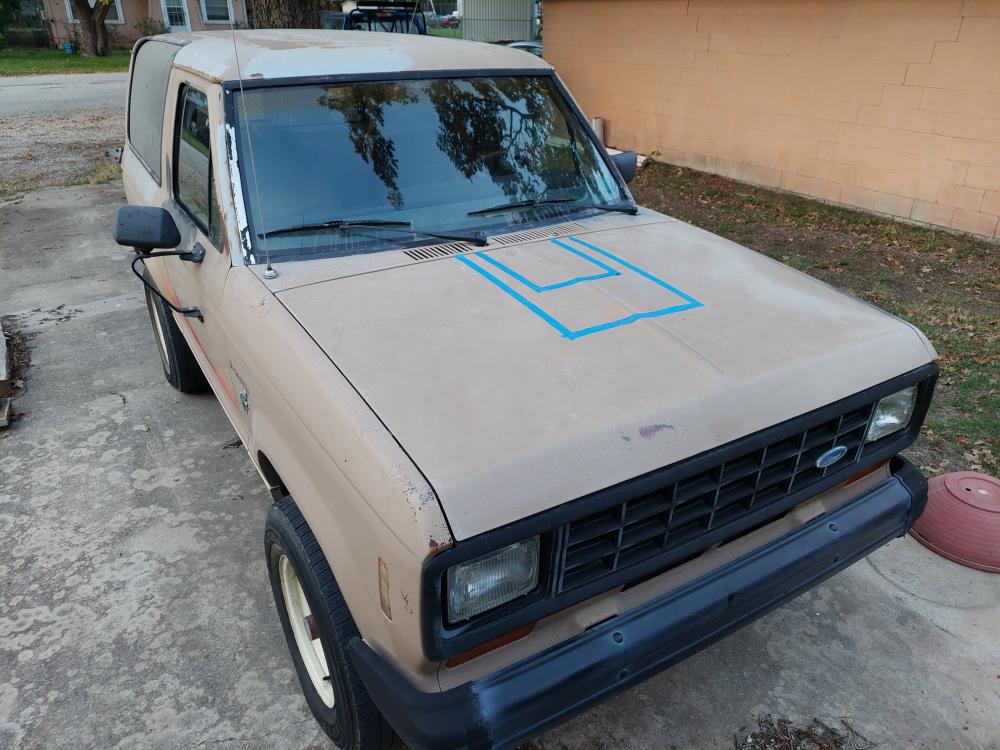
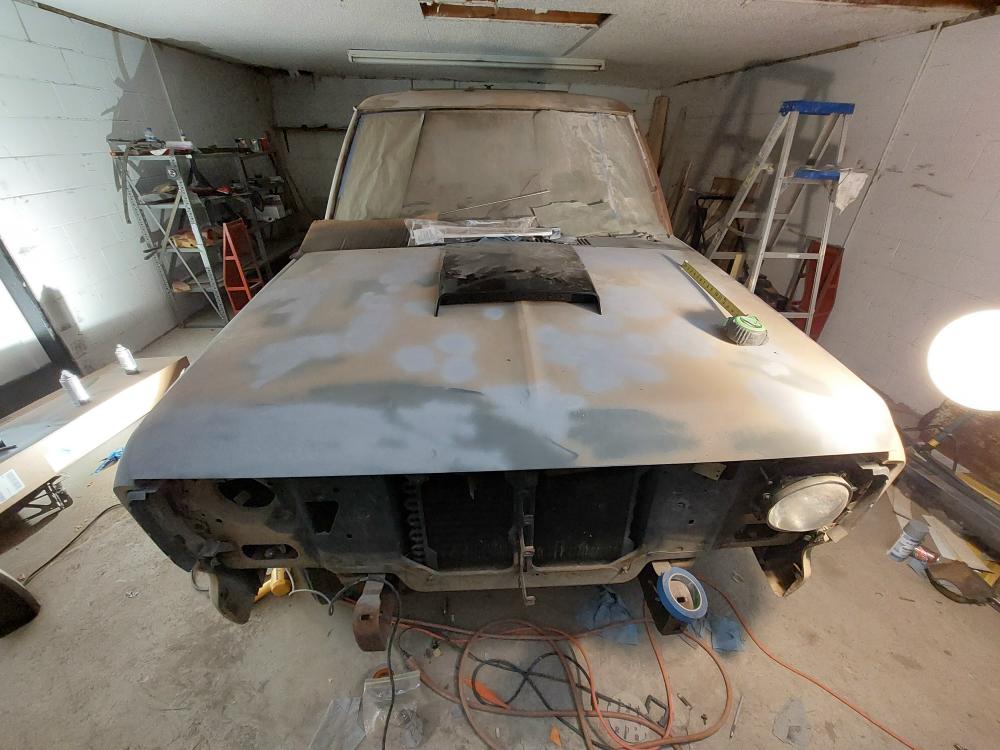
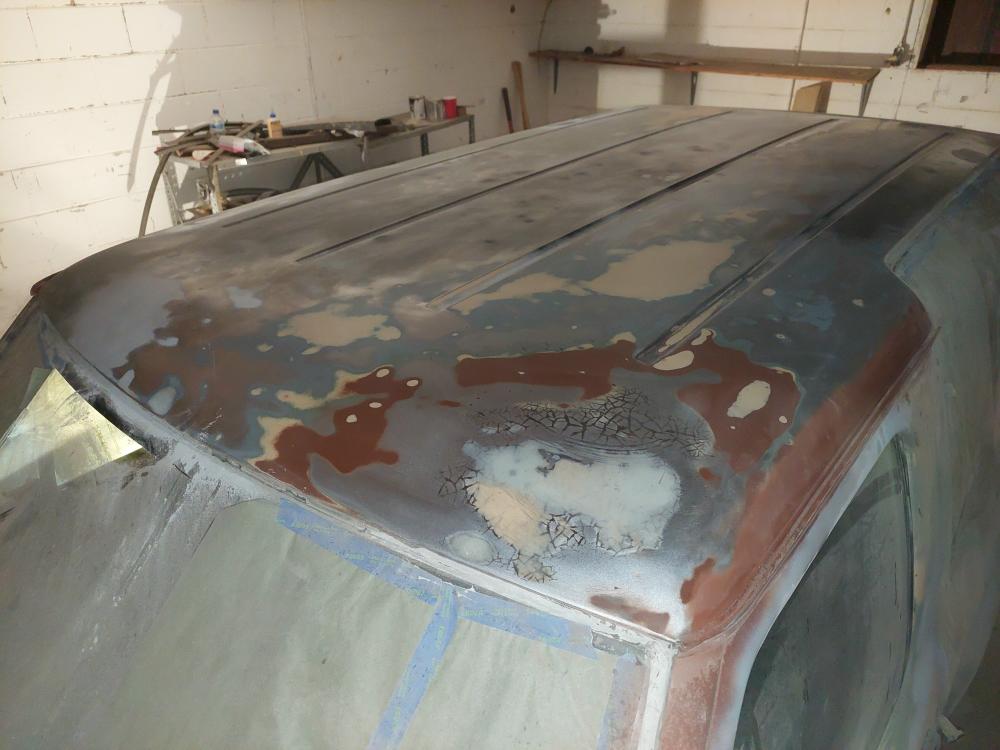
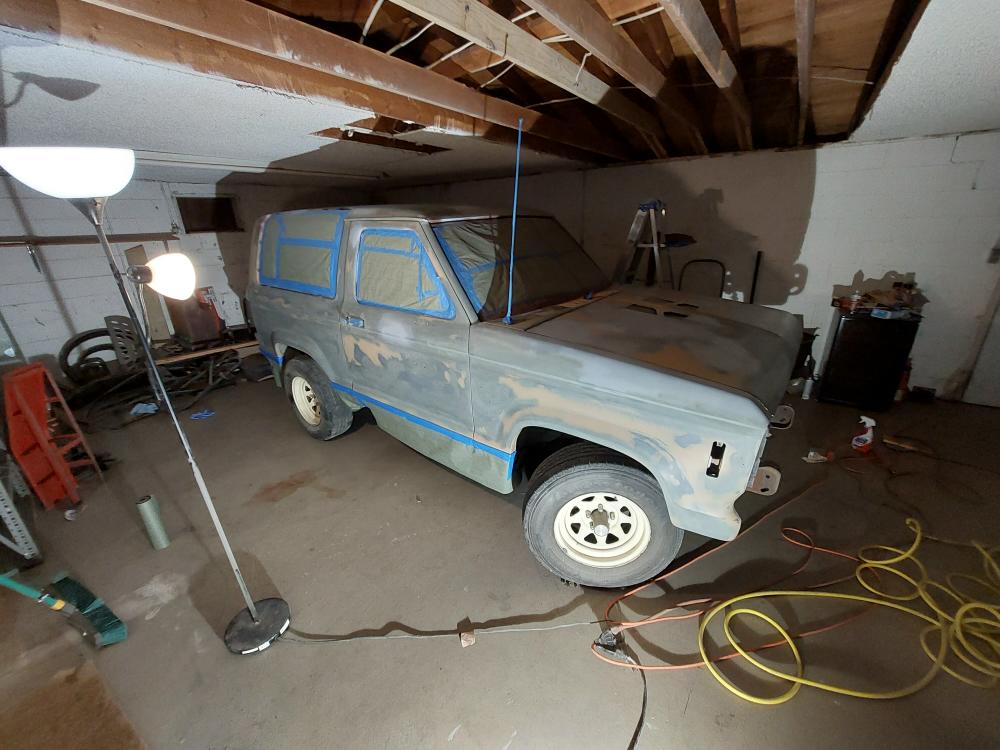
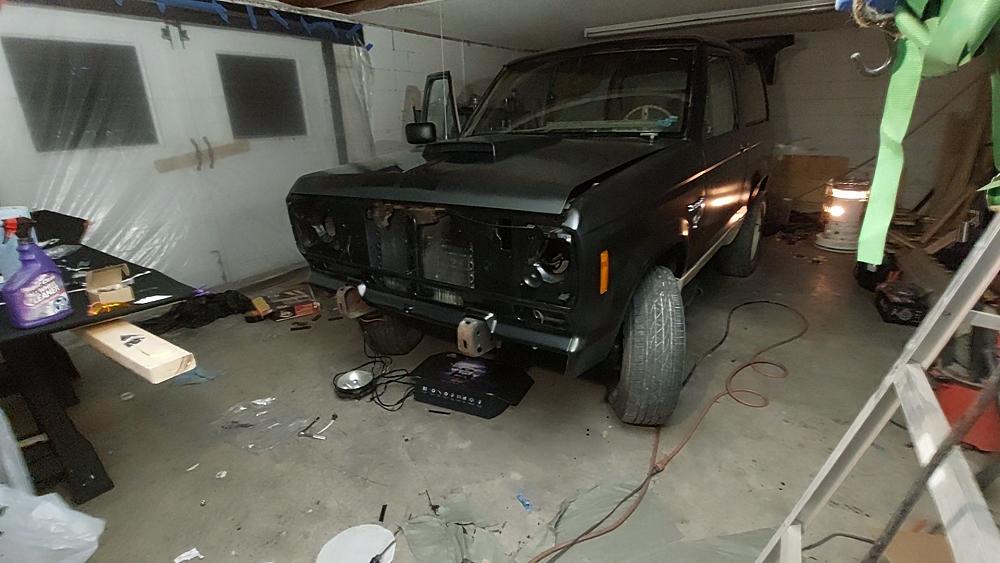
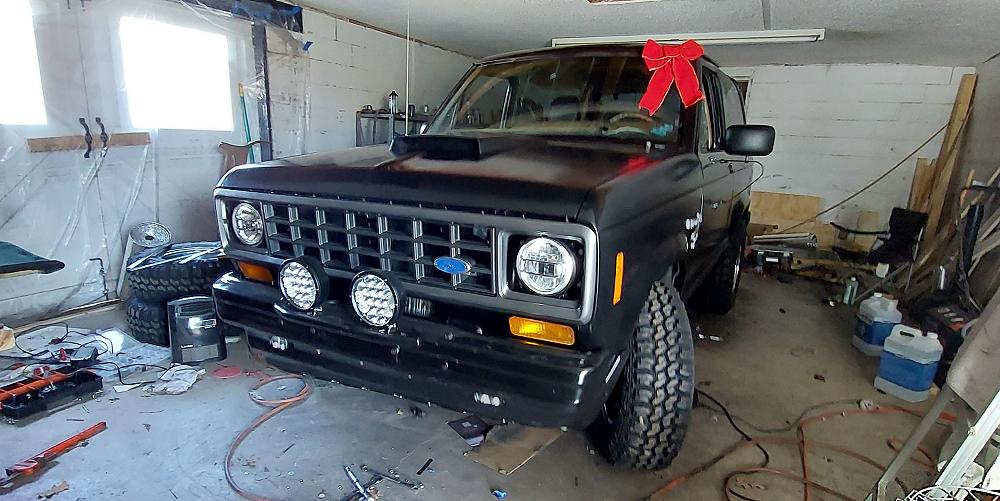
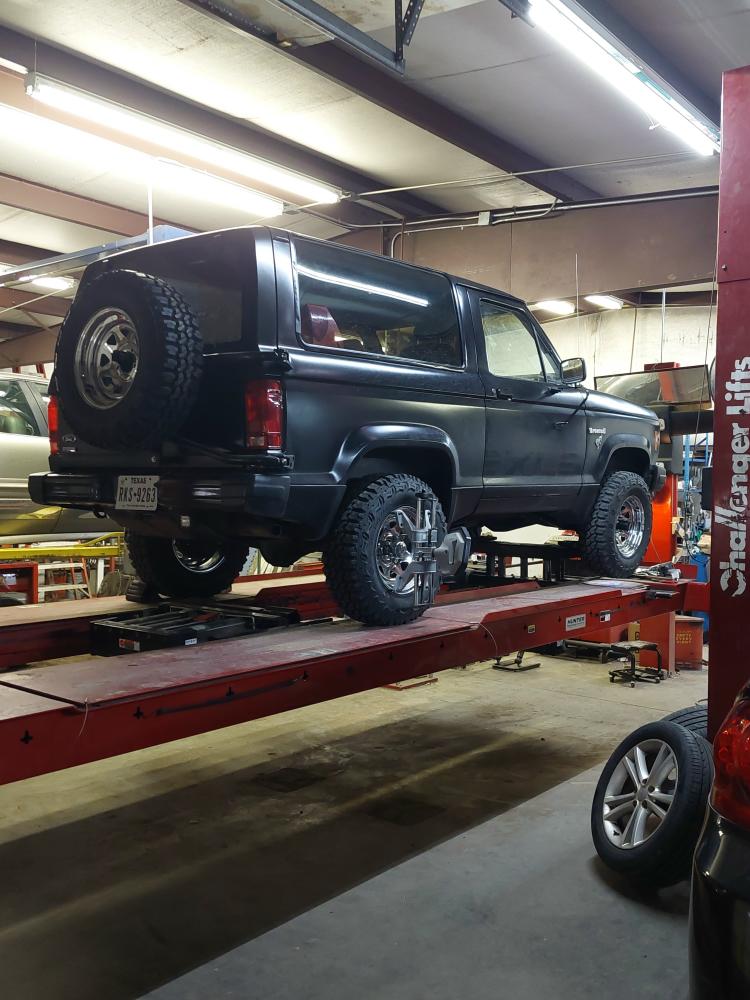
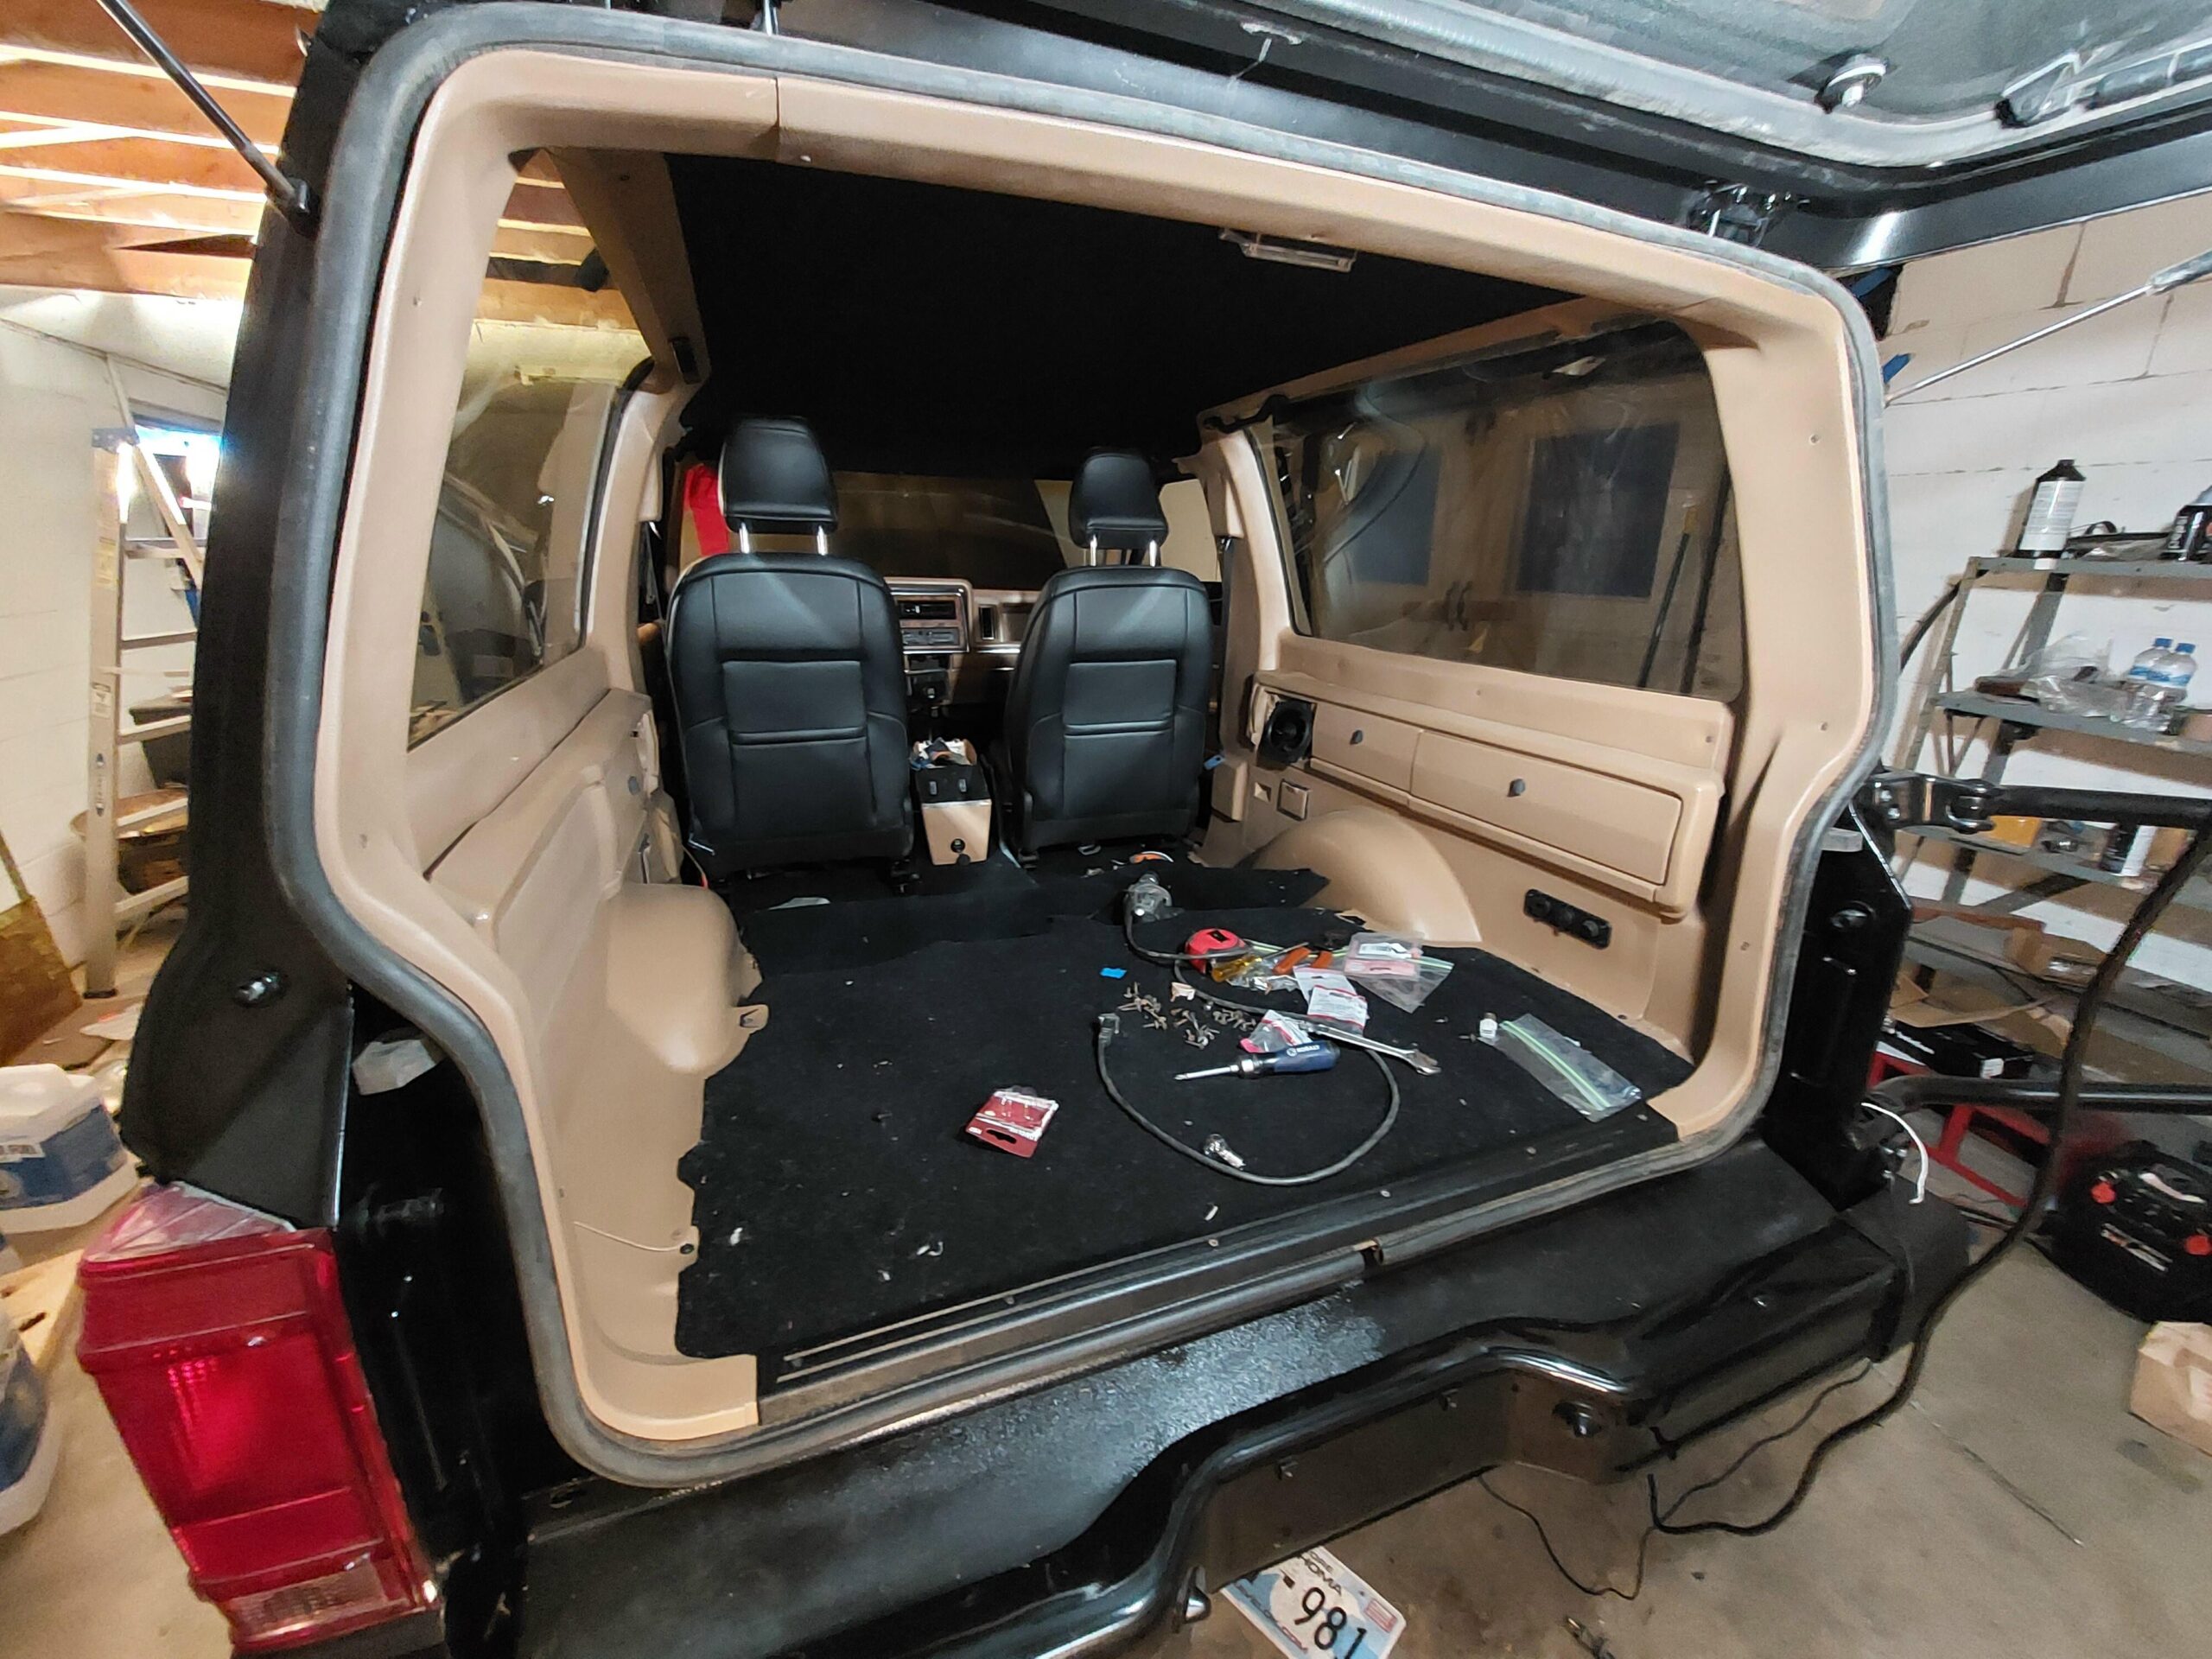
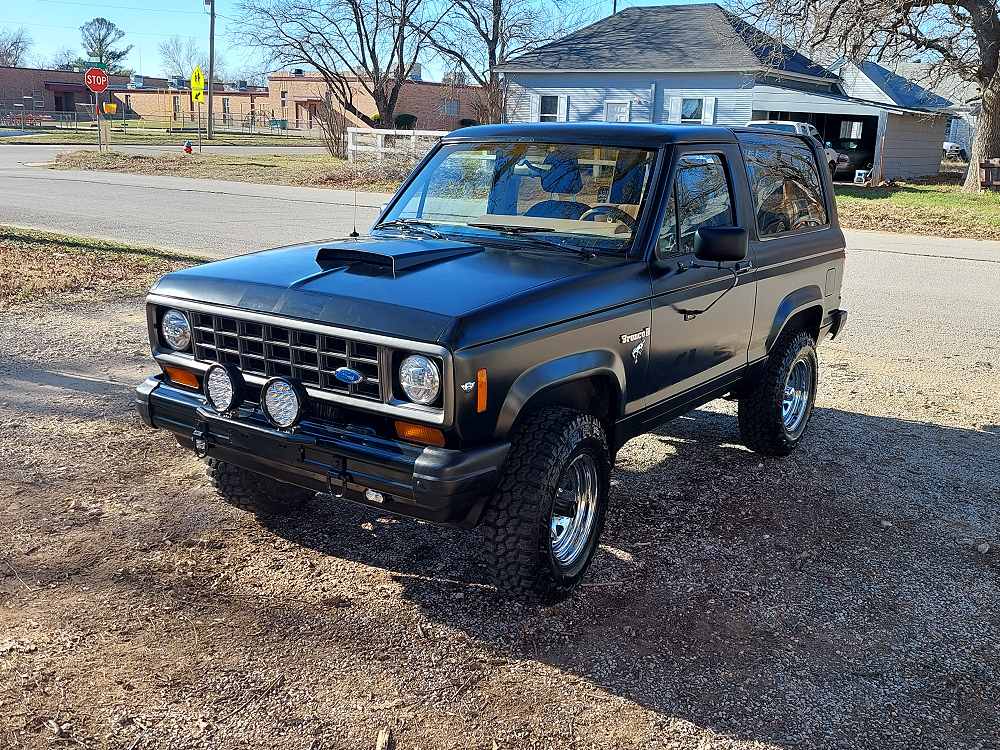
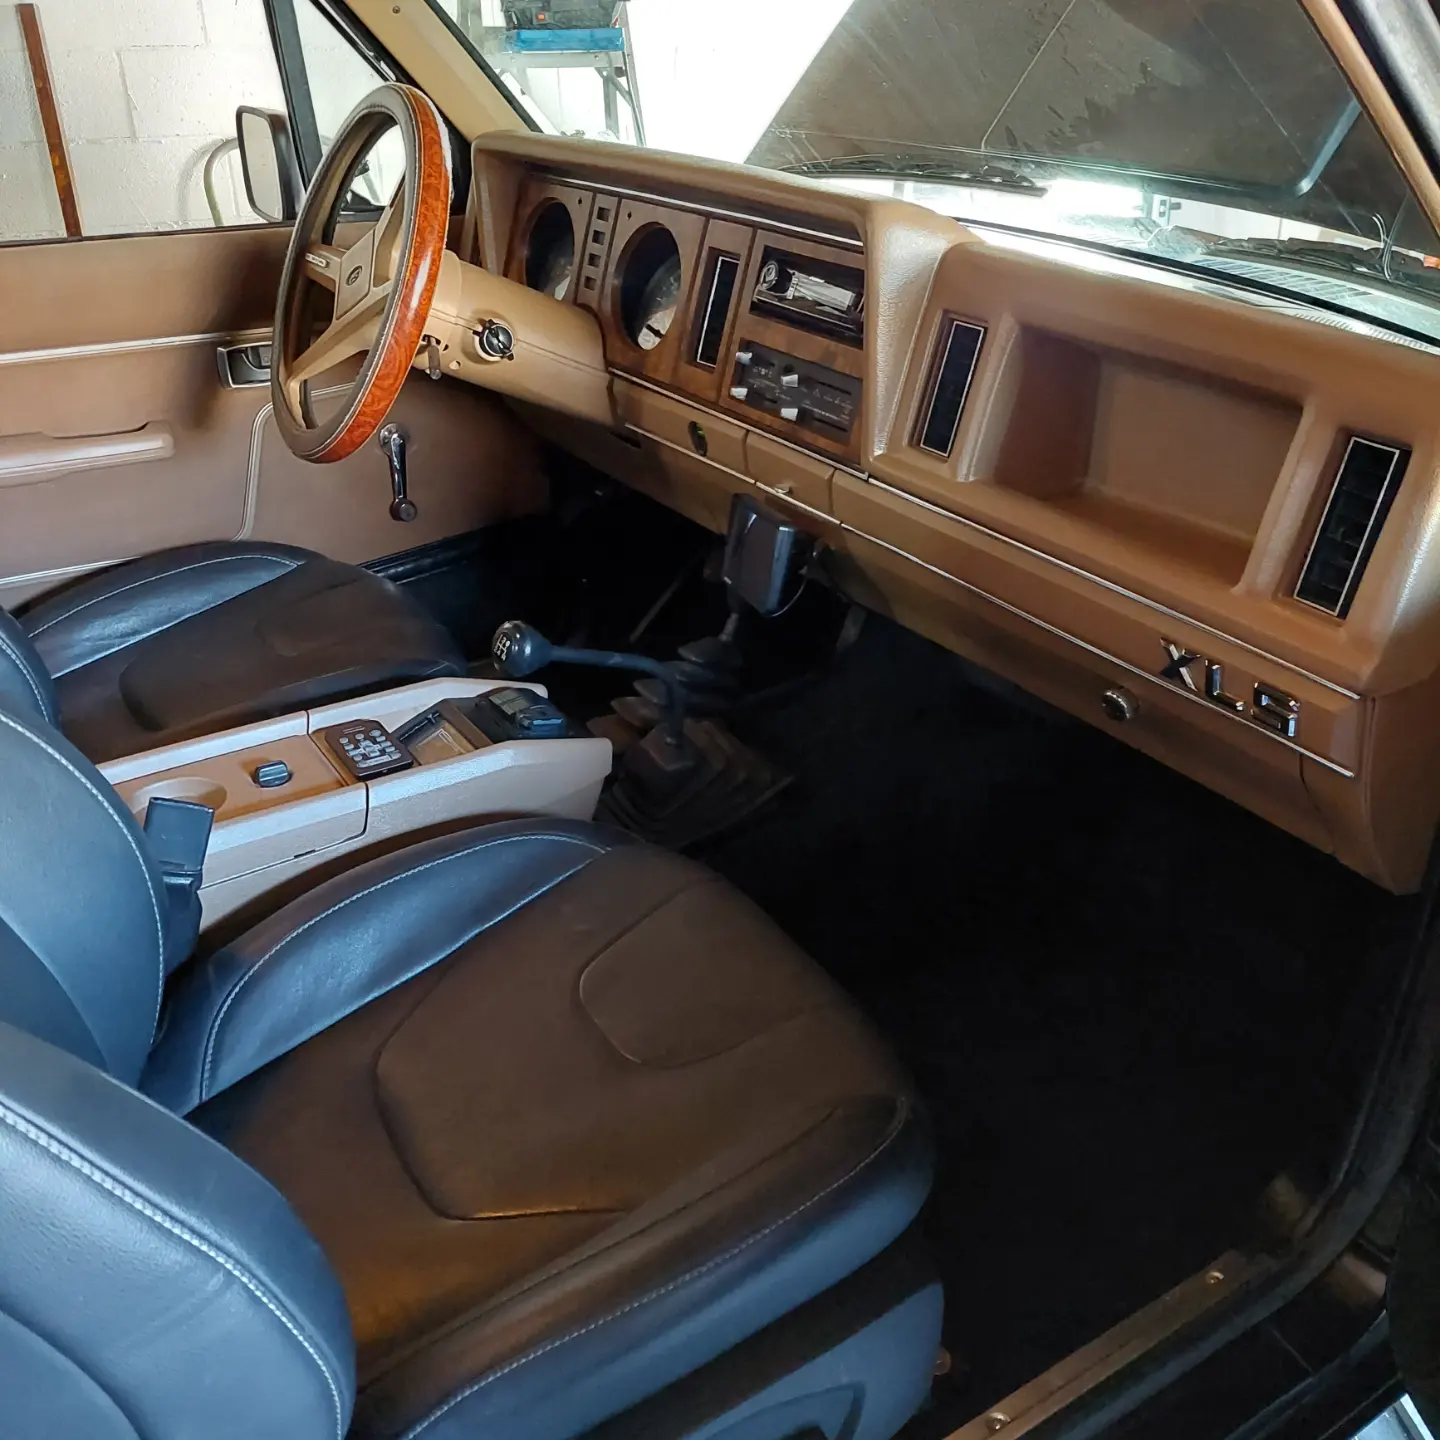
Next was sanding down the bad areas in the paint and painting the Bronco II black. I swore I would never paint a vehicle black because black shows every flaw in the body, but Laura insisted that black was Joseph’s favorite color. We also didn’t want to spend a lot of money on a paint job since this was his first car and he’s a new driver. The Bronco II was stripped down to a bare shell and even the interior was gutted.

I had heard about people painting vehicles with Rust-Oleum. Some have used a foam roller, and some have sprayed it with a paint gun. The foam roller idea sounded interesting, but the process and cure times take too long. I decided to paint it with Rust-Oleum satin black mixed in a gun with acetone and hardener. I felt like the satin black would lend more to the Bronco II’s rough look with its minor dents and dings.
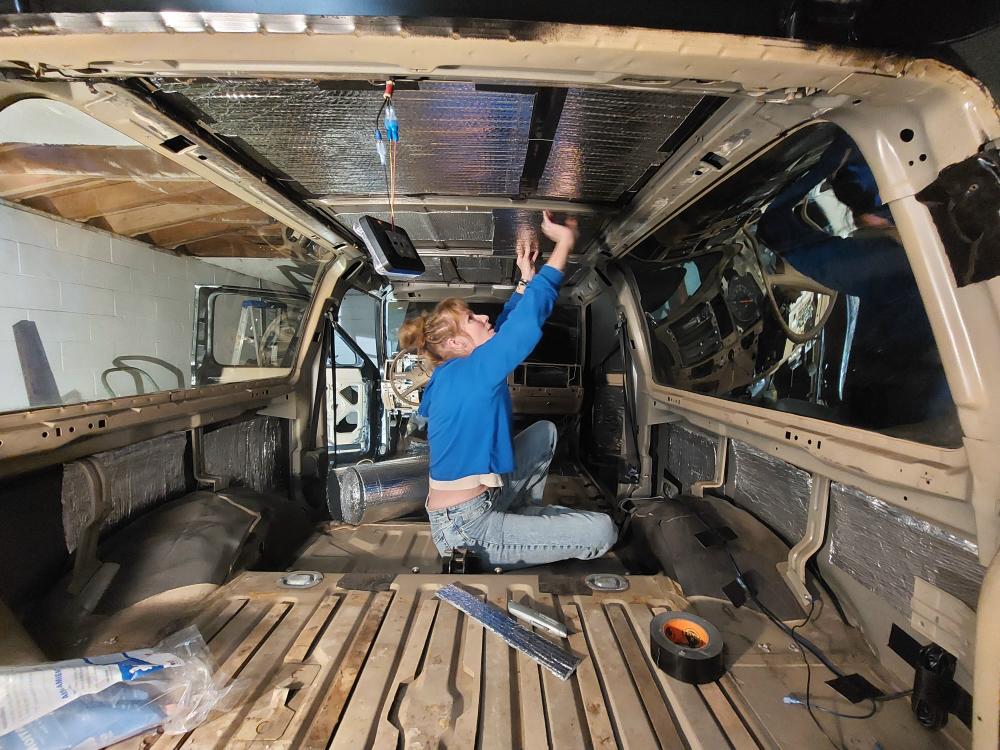
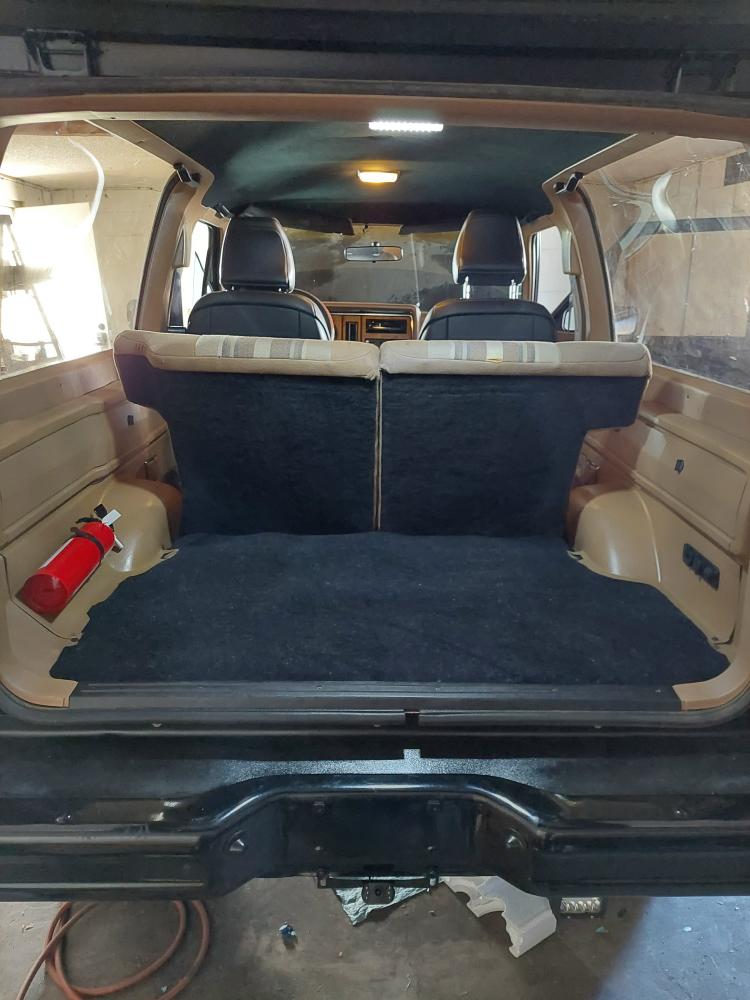
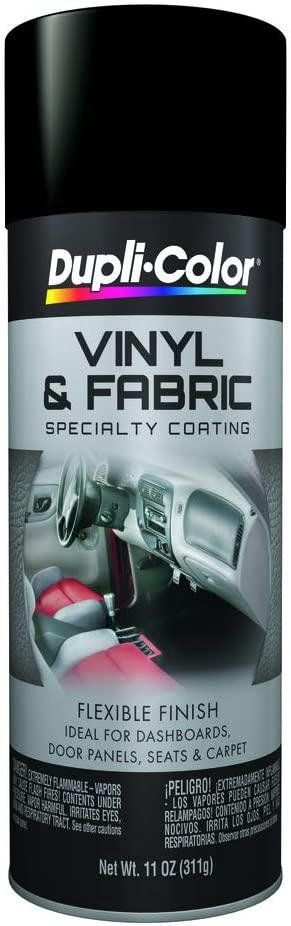
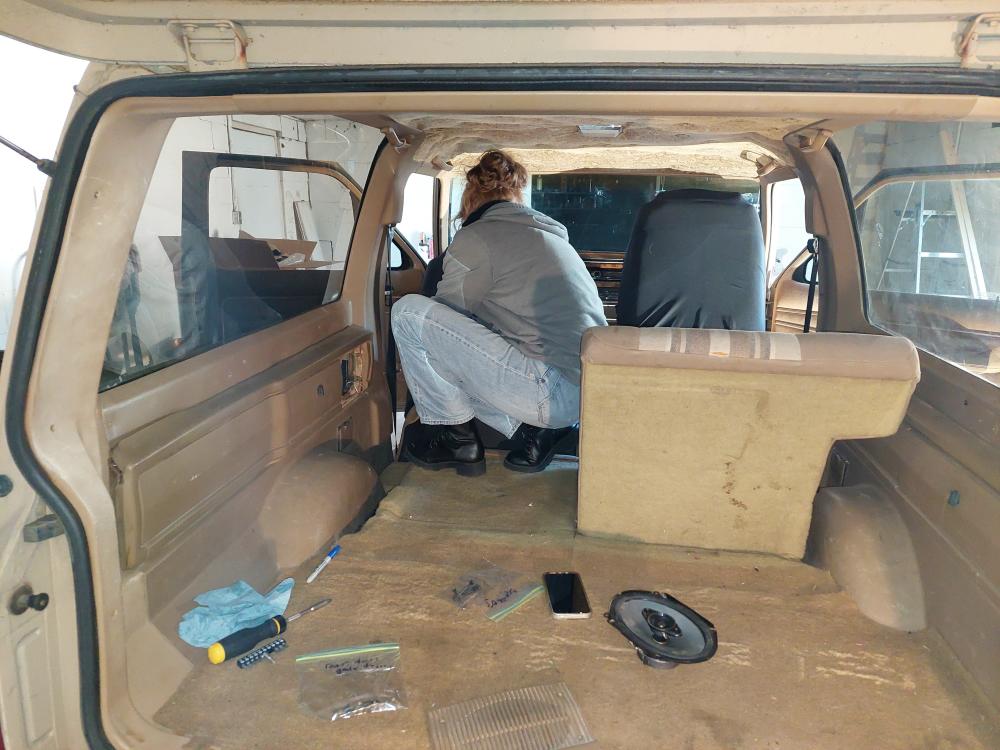
Laura installed insulation inside of the vehicle before we installed the headliner that she recovered. All of the interior pieces were repainted with Rust-Oleum Painters Touch Satin Nutmeg. The old carpet was replaced with a new black one, and the carpet on the rear of the back seats were painted with Dupli-Color vinyl and Fabric Coating to match.
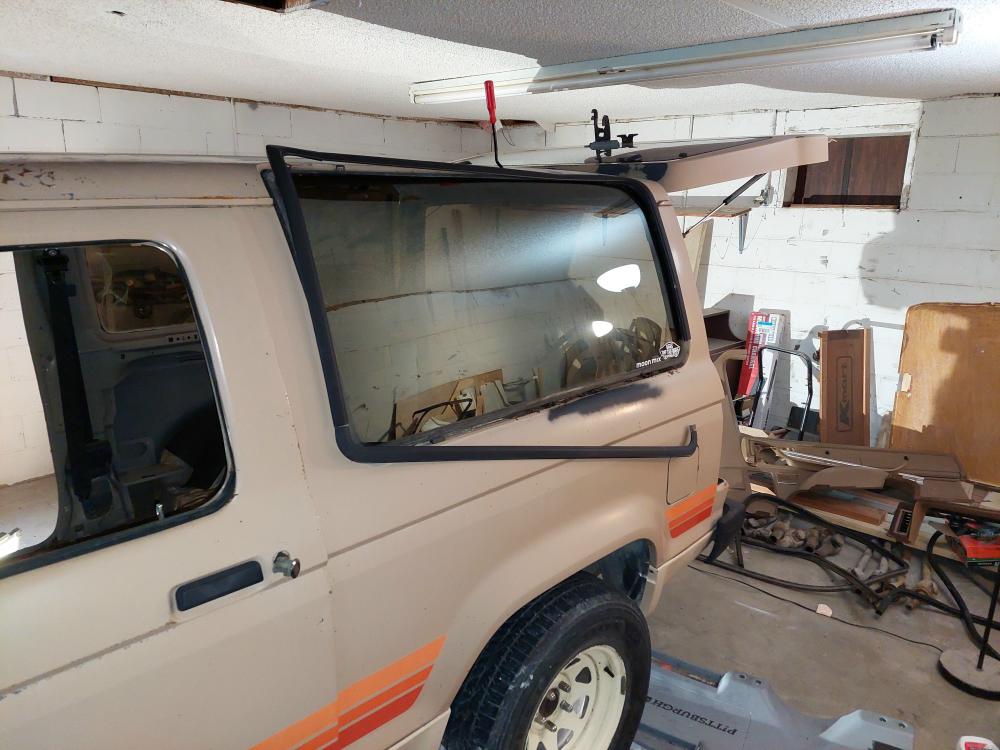
The Bronco II also received new seals around the doors and windows.

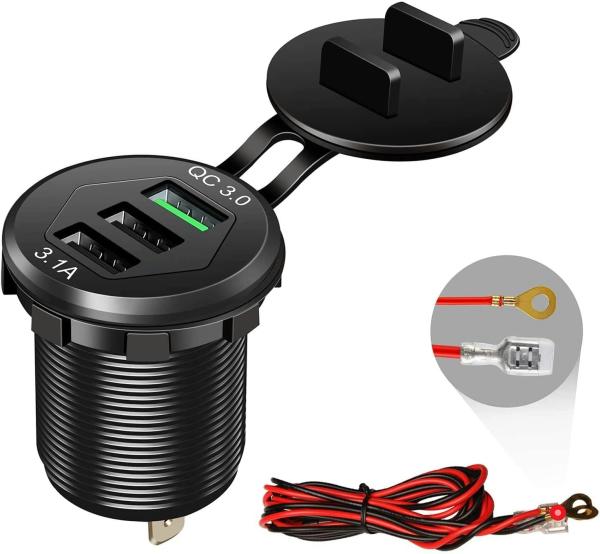
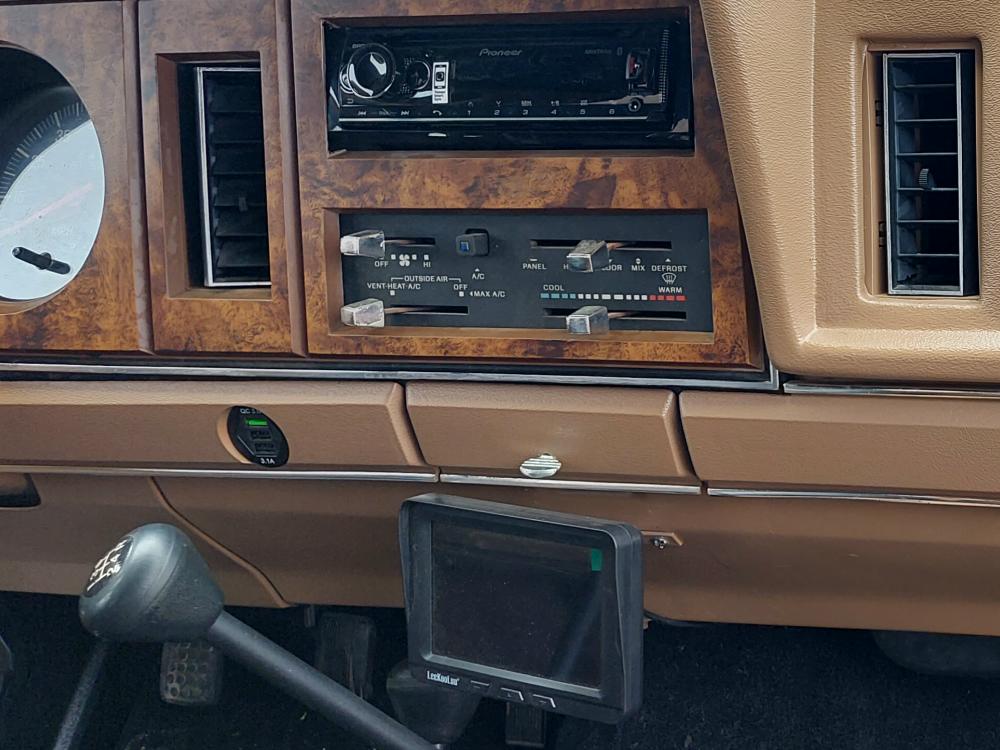
I added a 12-volt outlet / USB charging station in the rear of the Bronco II so Joseph could charge anything that he might be carrying or storing back there.
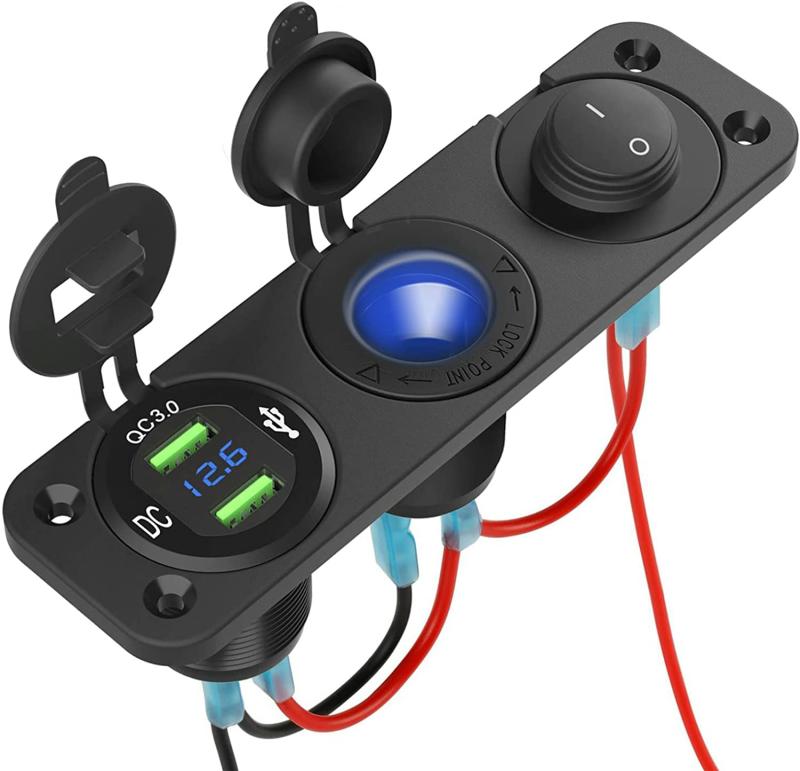
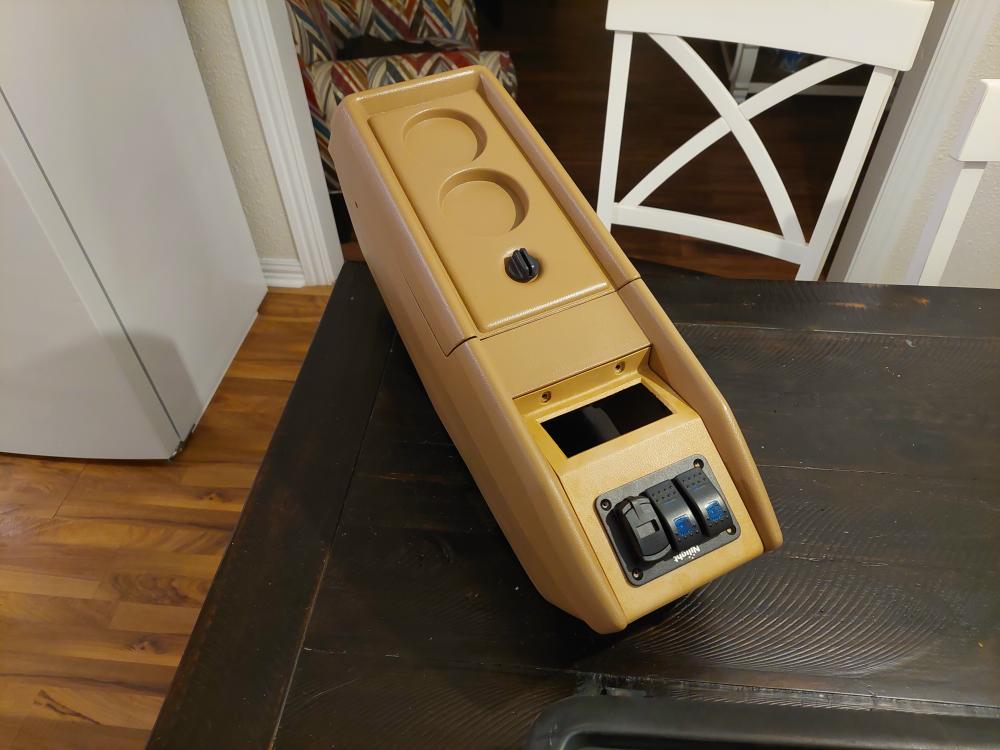
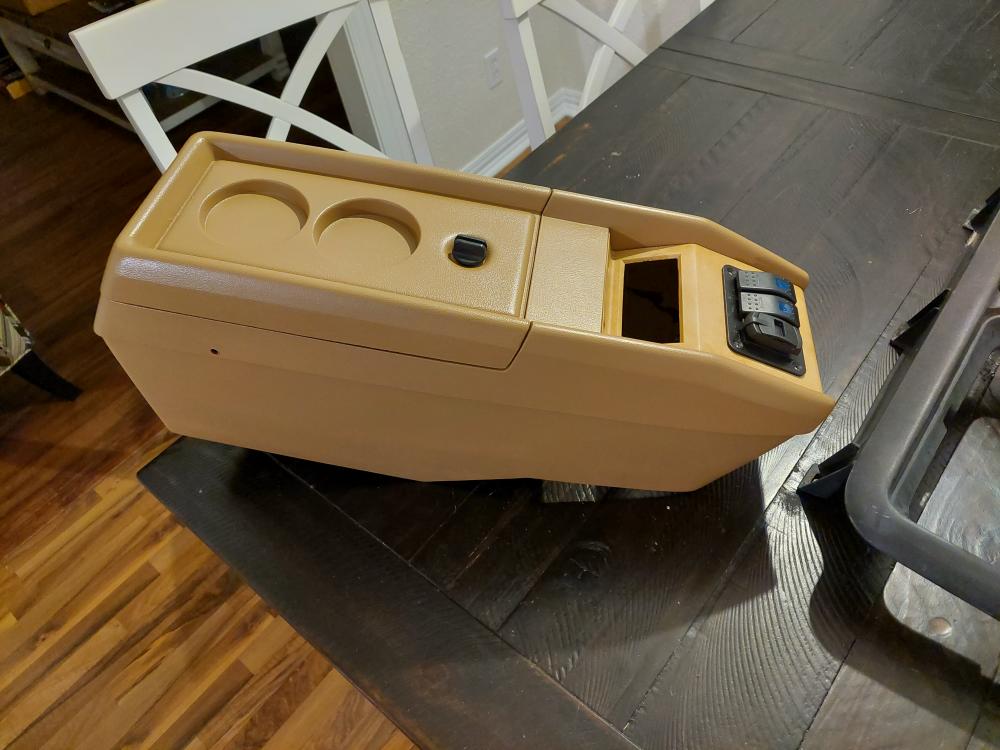
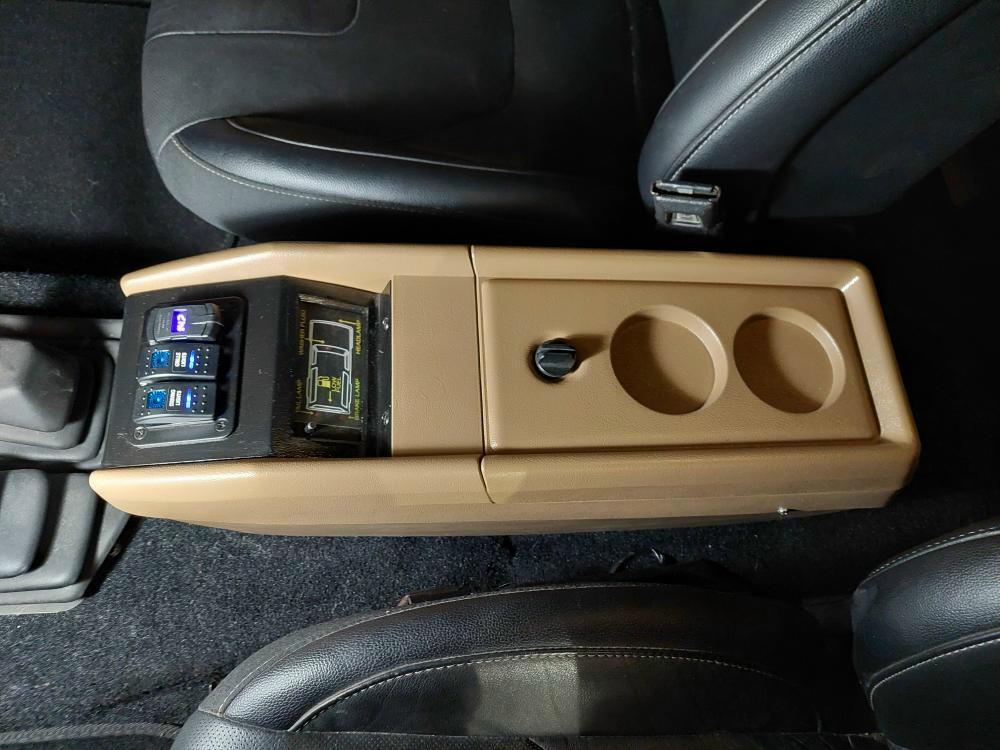
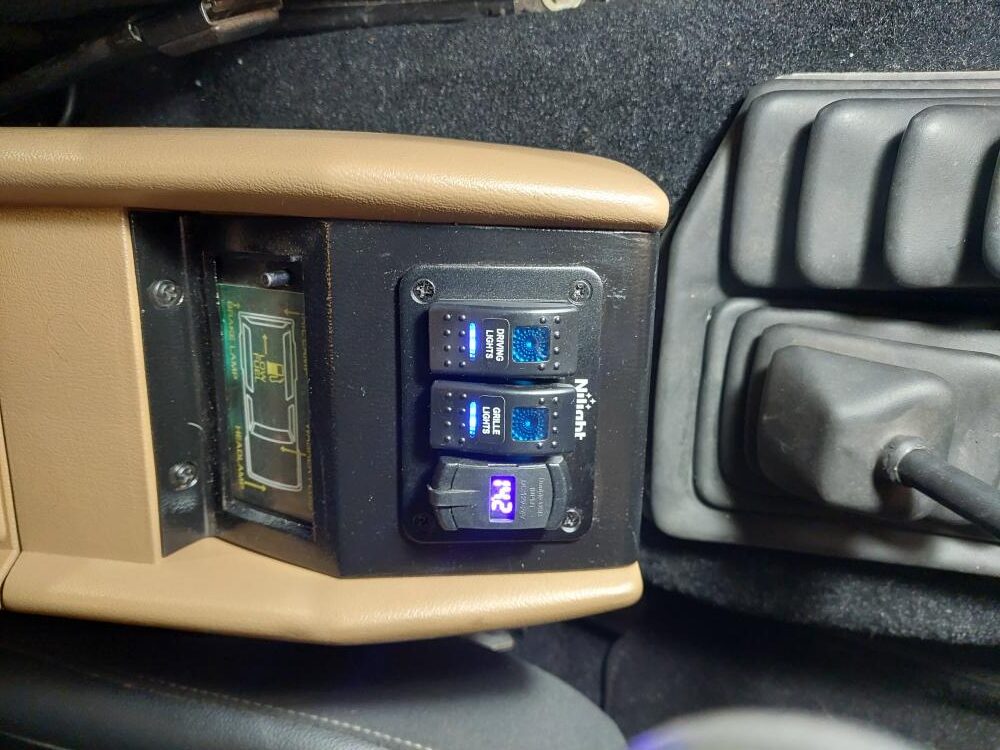
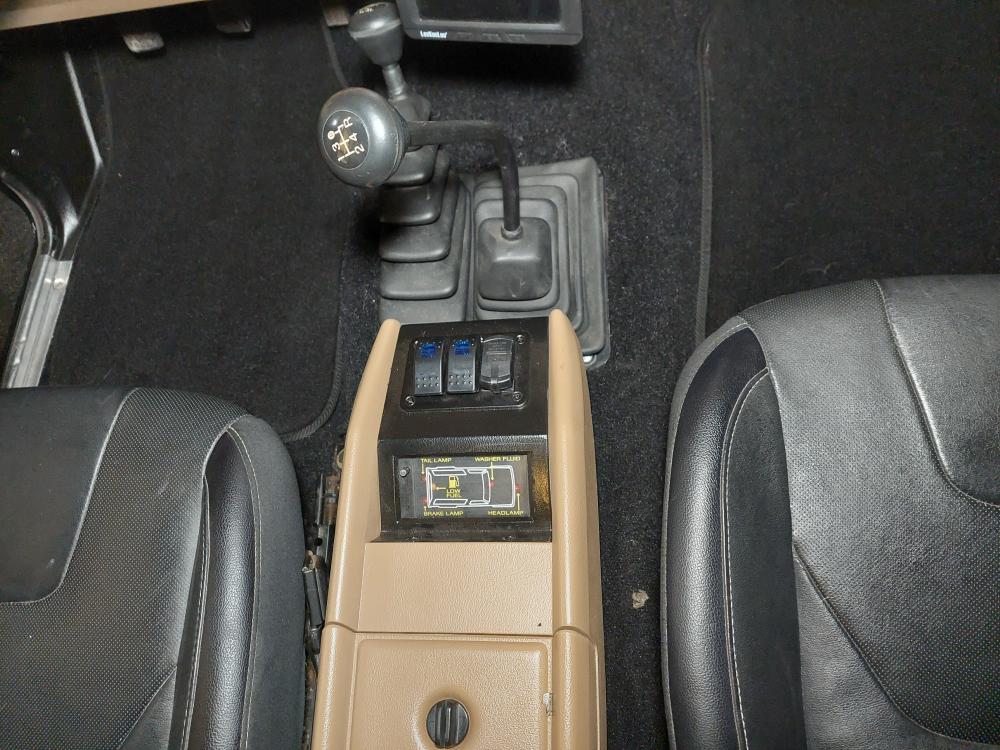
I also painted the center console, painted the front panel black, and added a Nilight 2-gange rocker switch panel that has a switch for the driving lights and off-road lights, and a USB charging port. I even added a USB charging port on the rear of the console so back seat passengers can charge their phones.

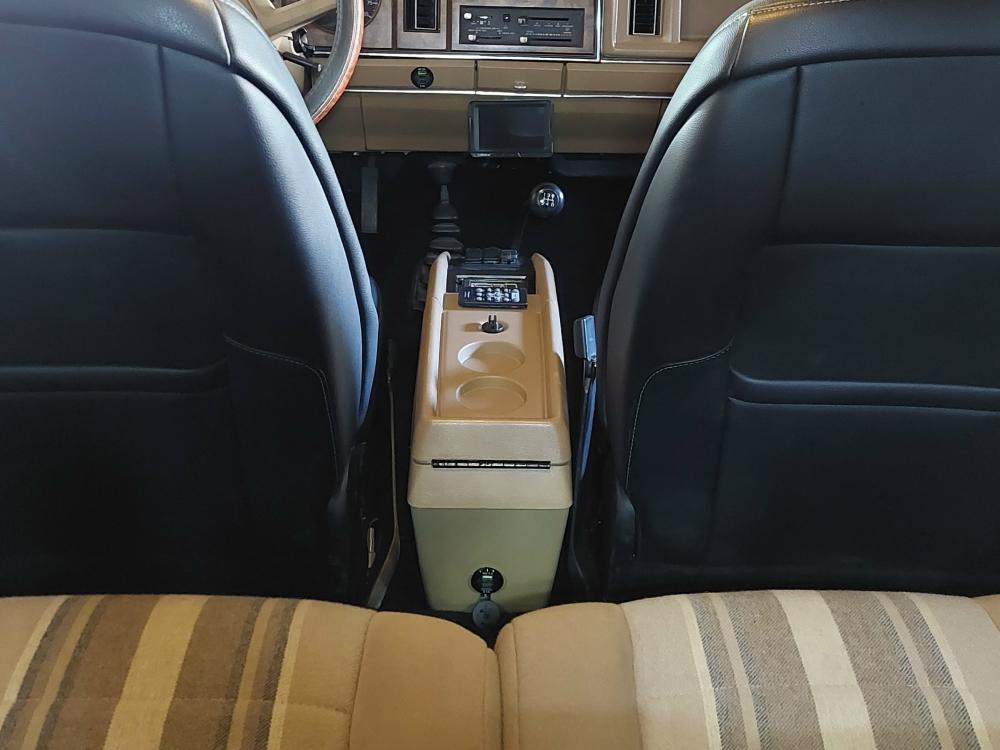
The worn-out front seats were replaced with power leather bucket seats from a Ford Fusion. I was able to mount them buy making spacers out of 1.5-inch square tubing to go between the seats floor mounts and the Bronco II’s floor. I then added an auxiliary fuse block and ran power to each of the seats.
The dash was rebuilt using a cover from Coverlay. The chrome ‘XLS’ letters on the dash trim came from Autozone.
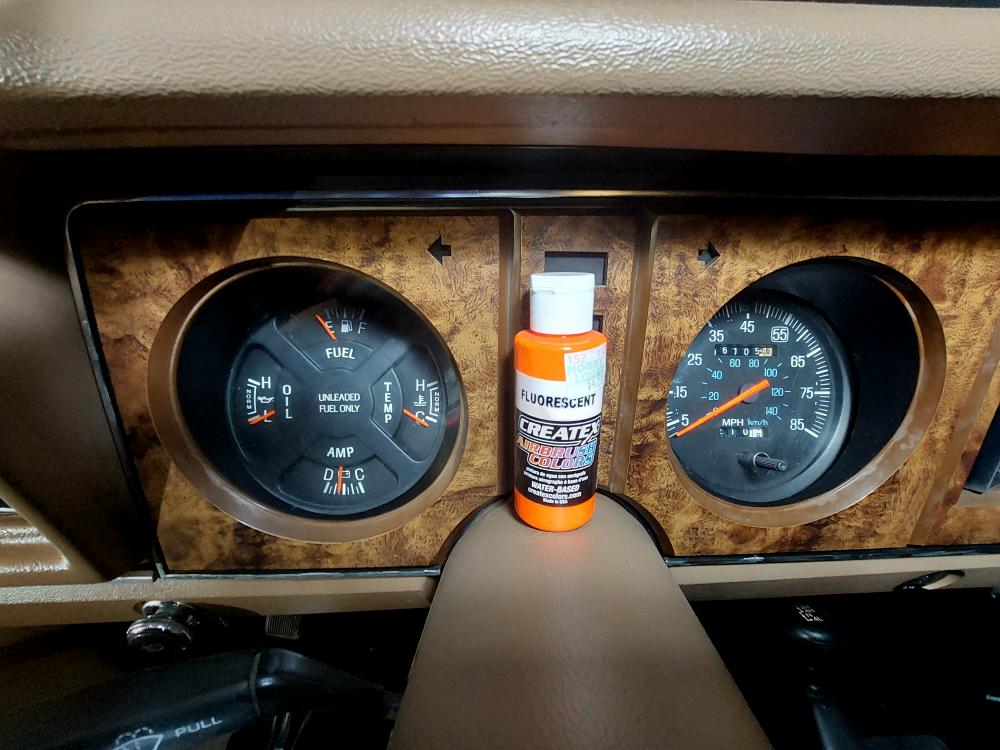
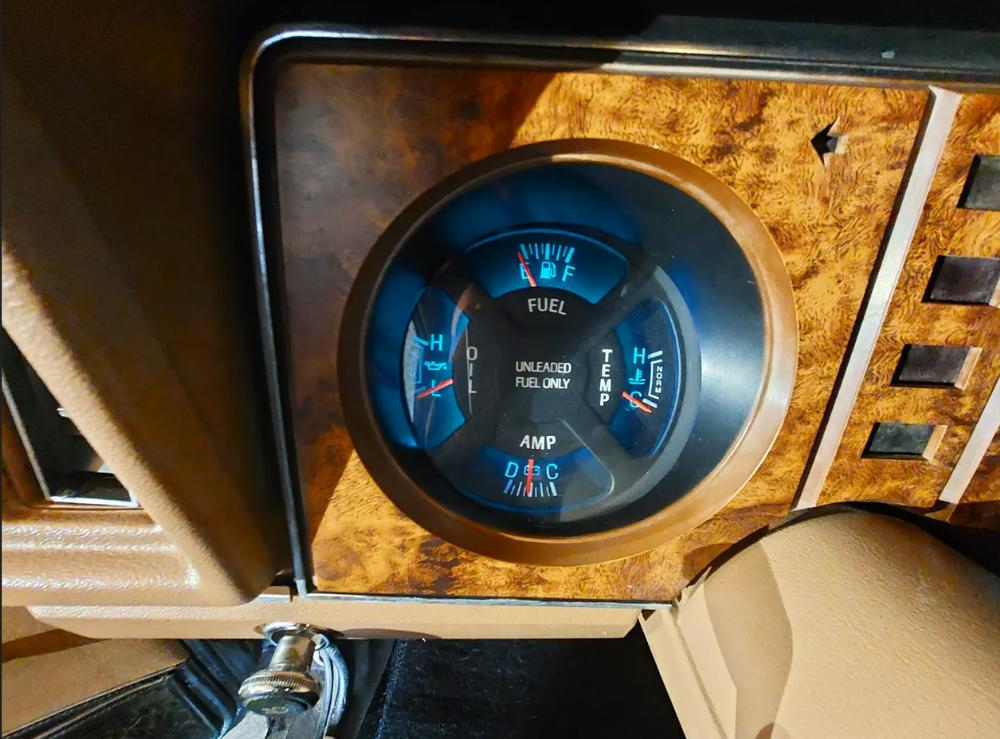
The needles on the dash gauges had faded white so I repainted them using Orange Createx Fluorescent Airbrush paint and a small paint brush.

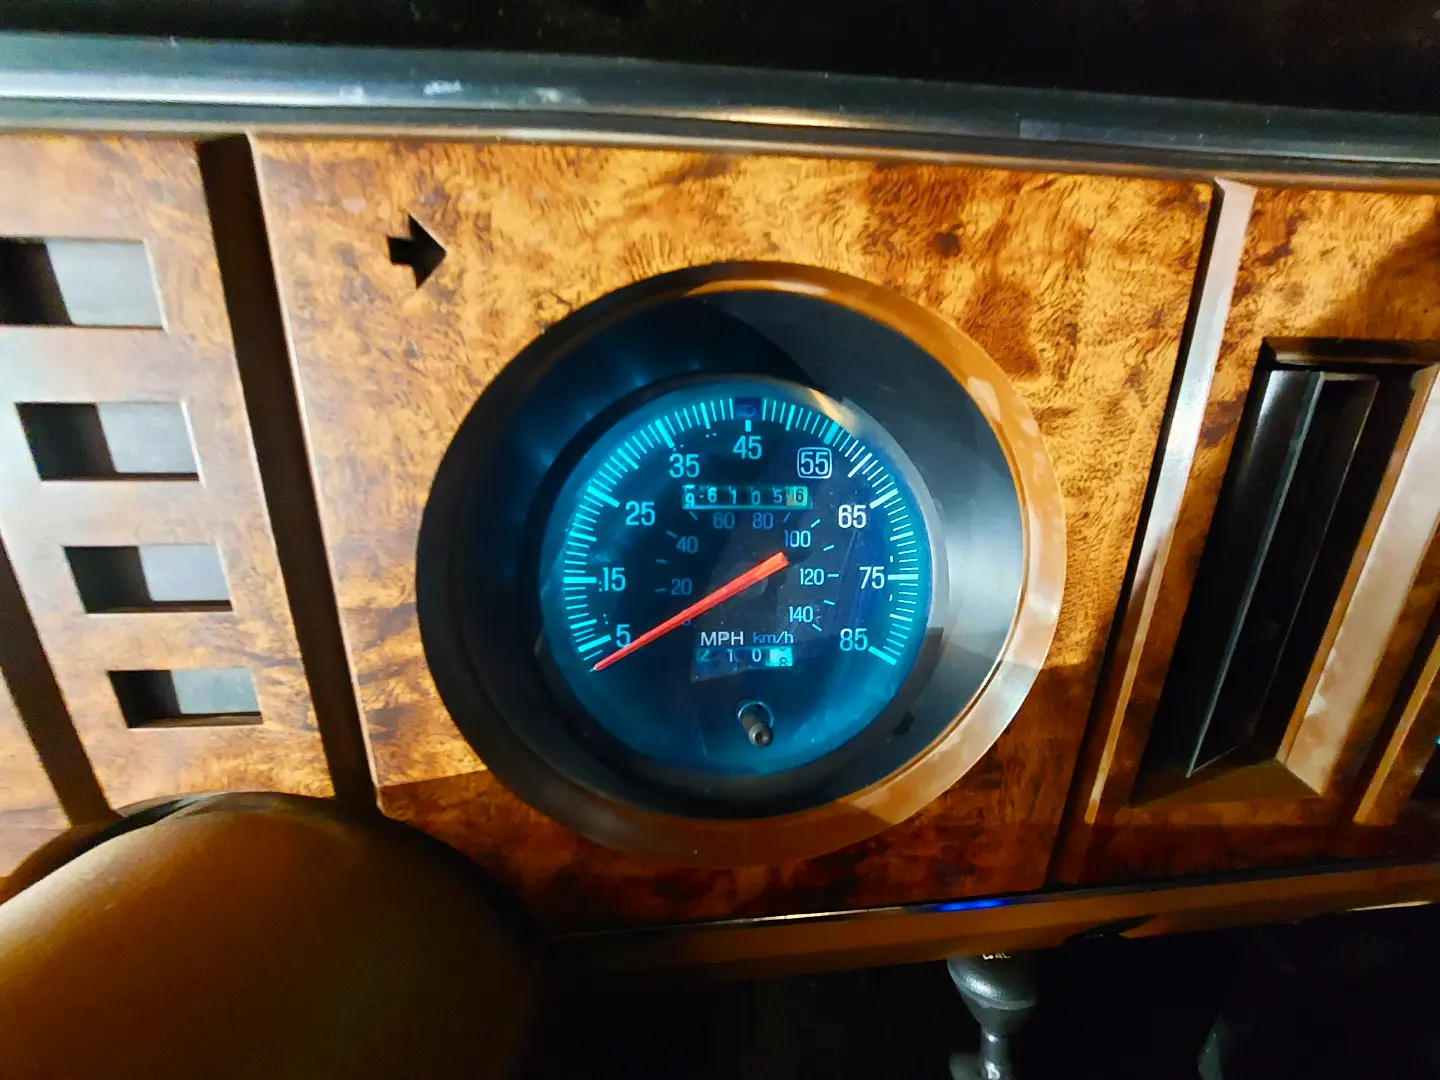
Believe it or not, the factory gauges have a blue filter over the bulbs to give the gauges a blue glow. The problem is that these old incandescent light bulbs put off a yellow hue, so it causes the blue filter to actually glow green. Switching to LED bulbs in the dash allowed the gauges to have the blue color that Ford intended them to have.
The stereo was updated with a Pioneer HEH-S5100BT head unit and matching speakers for the dash and side panels. I also updated the Bronco II with a backup camera I purchased on Amazon. Notice in the photo below that I replaced the factory cigarette lighter jack with a Dual USB 3.0 Quick Charging Port. This is the came charging port that I added to the rear of the center console.

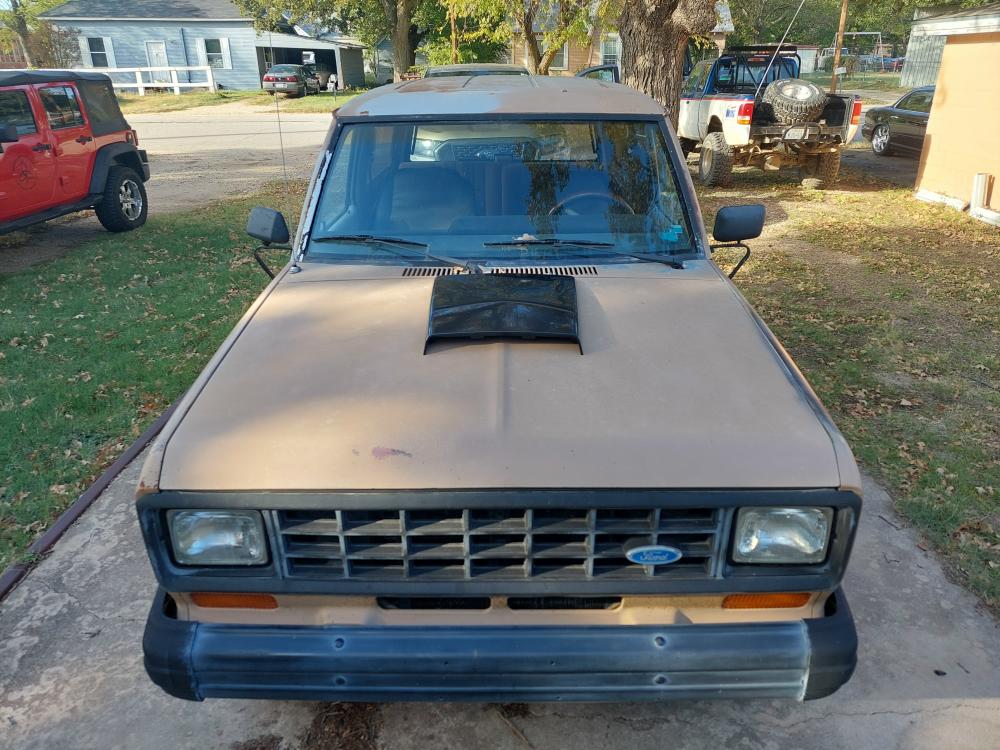
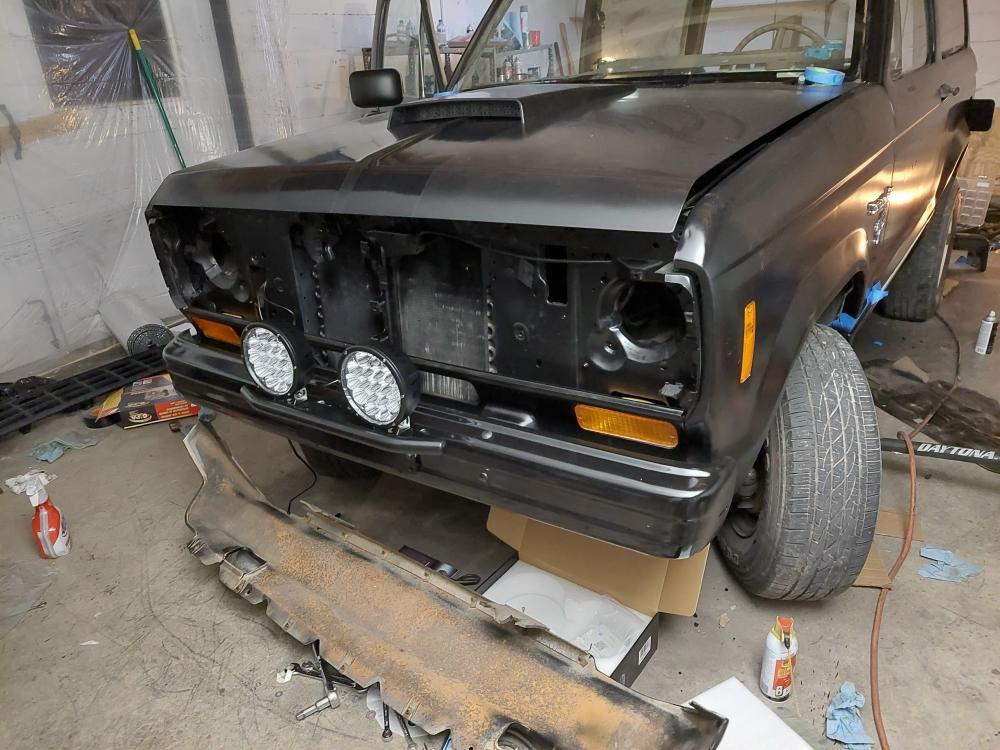
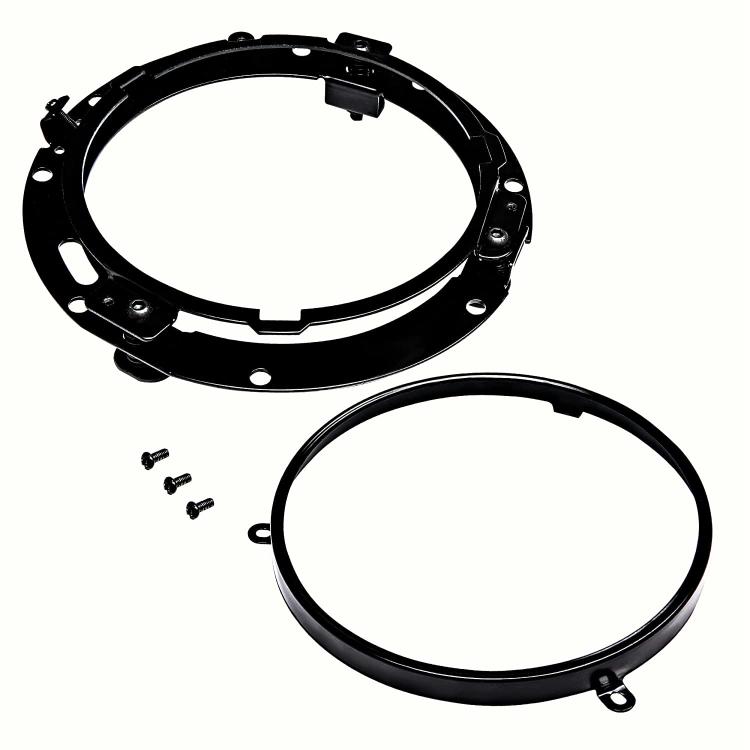
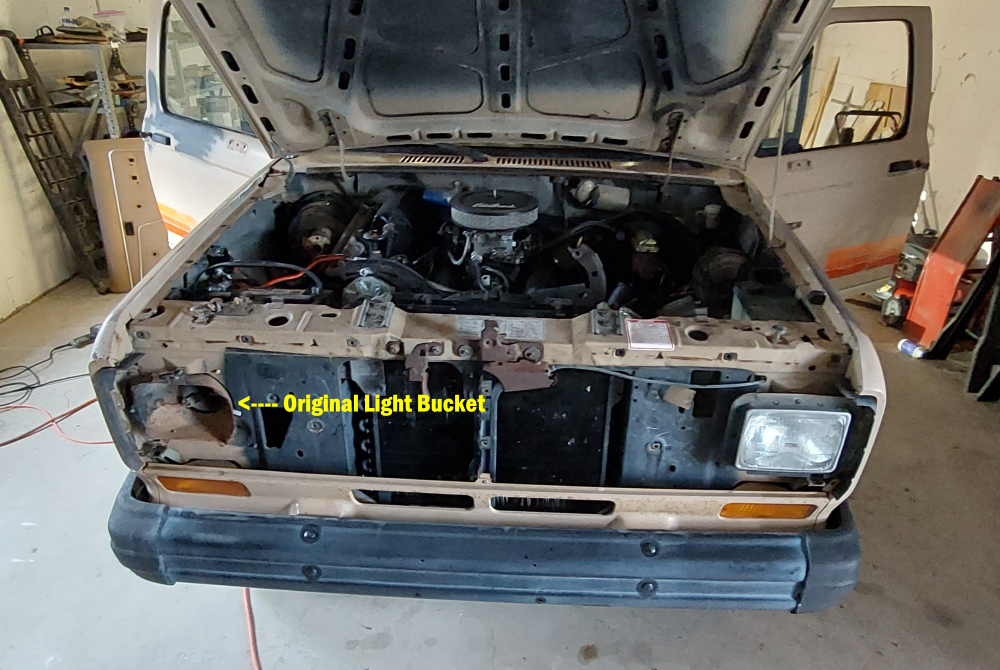
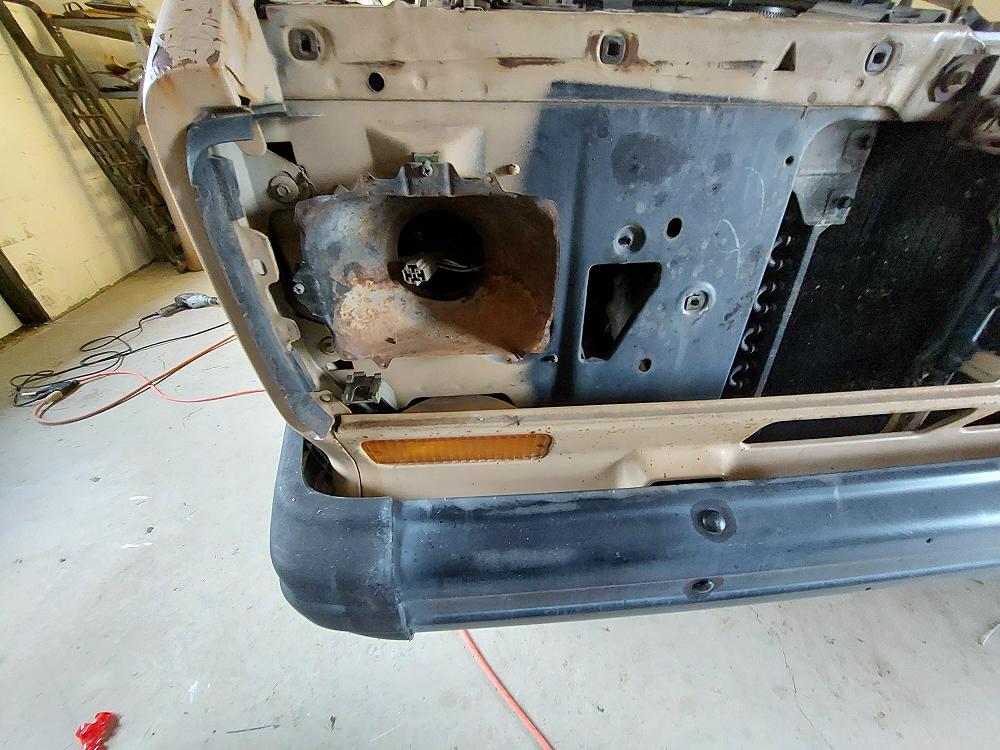
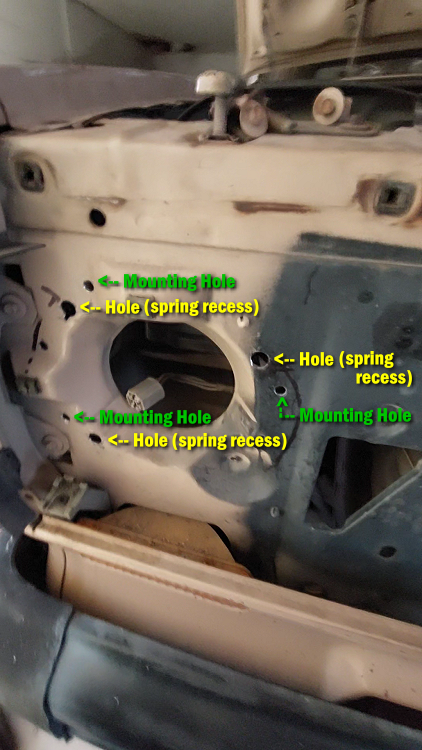
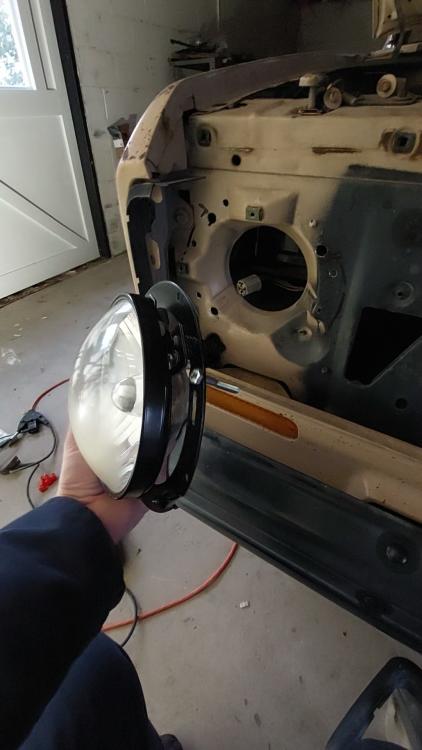
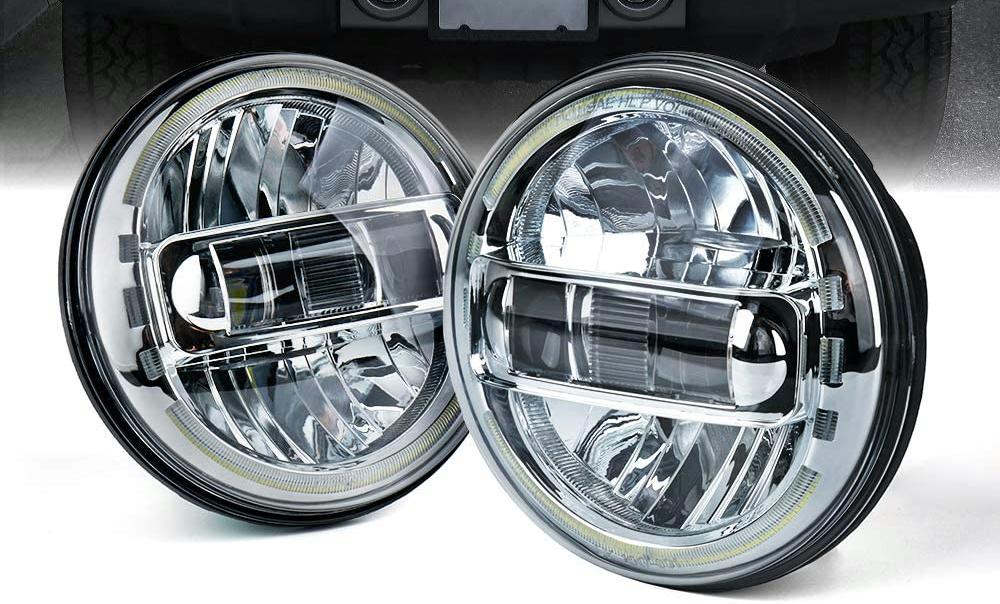
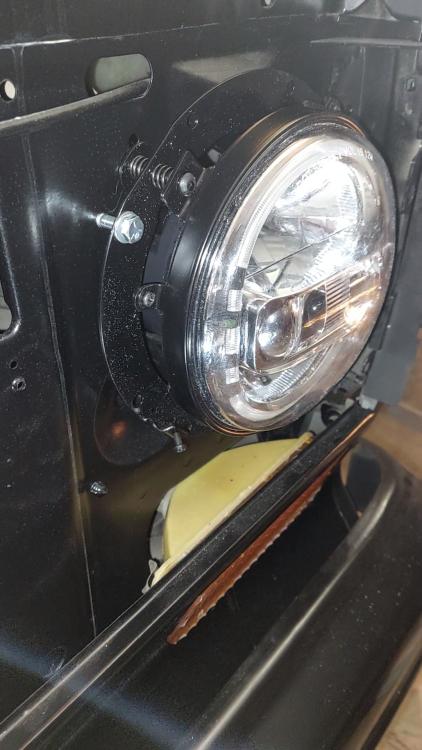
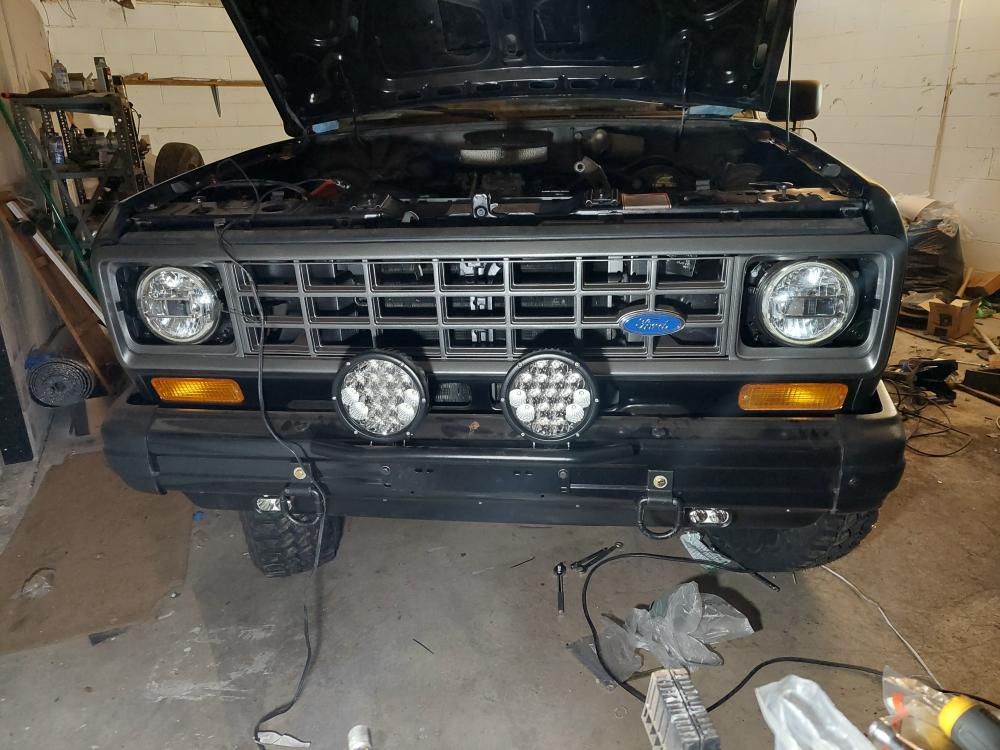
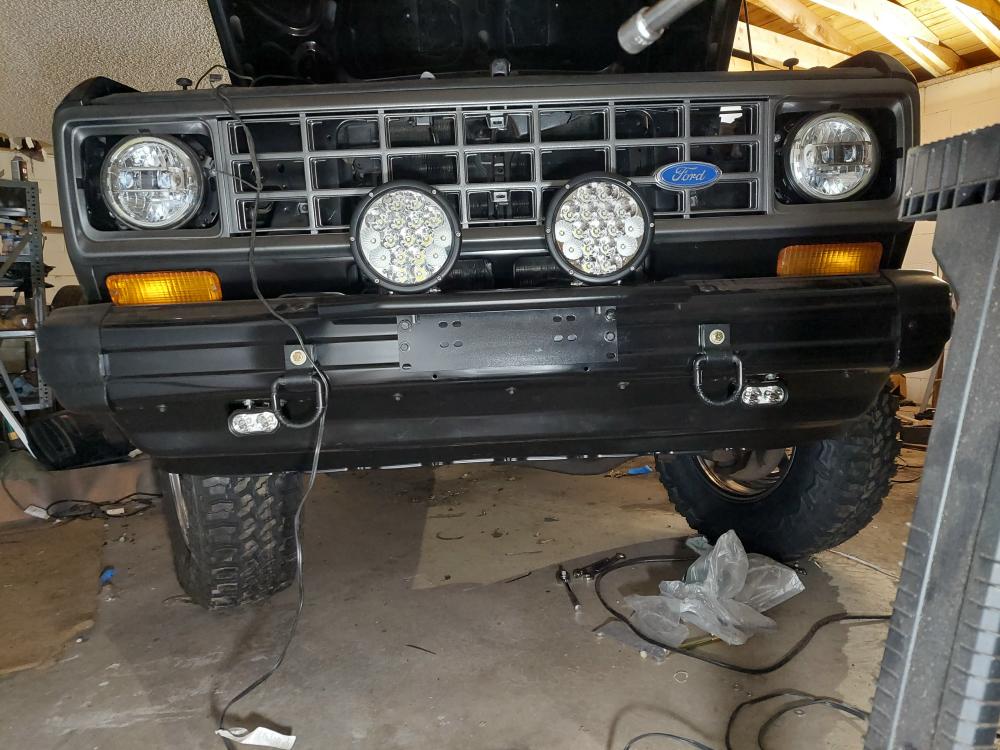
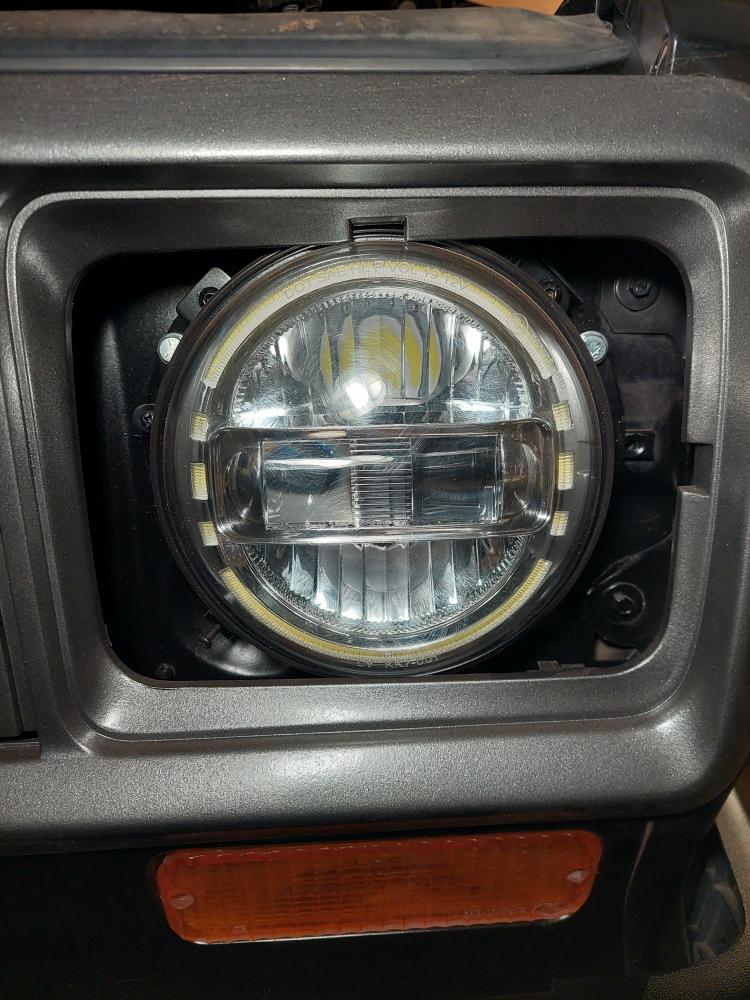
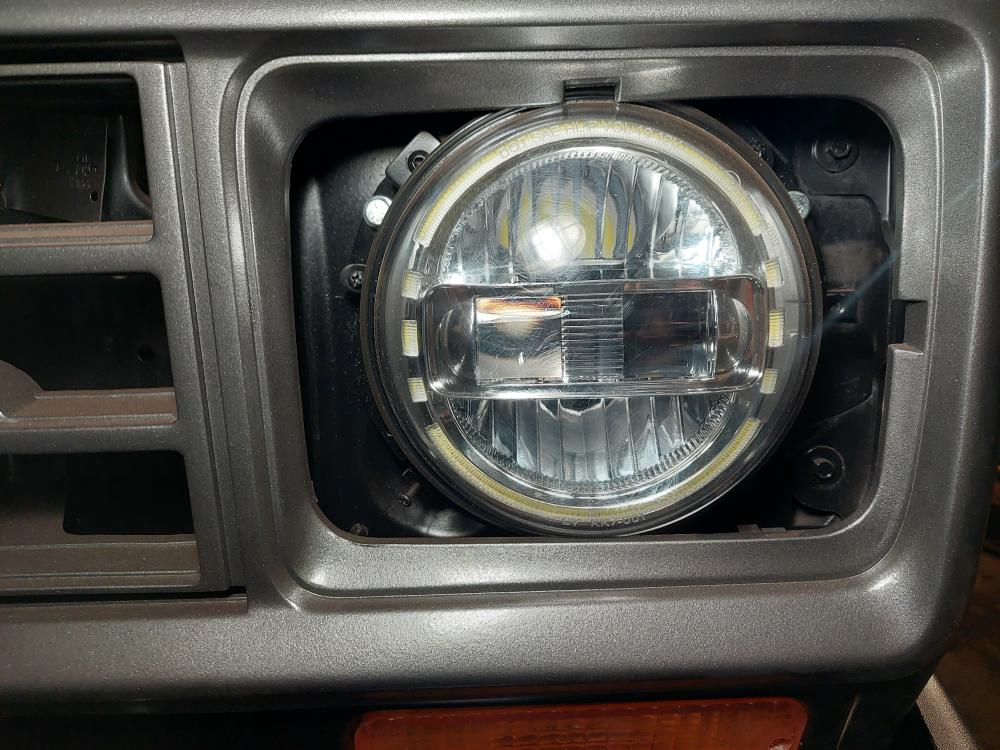
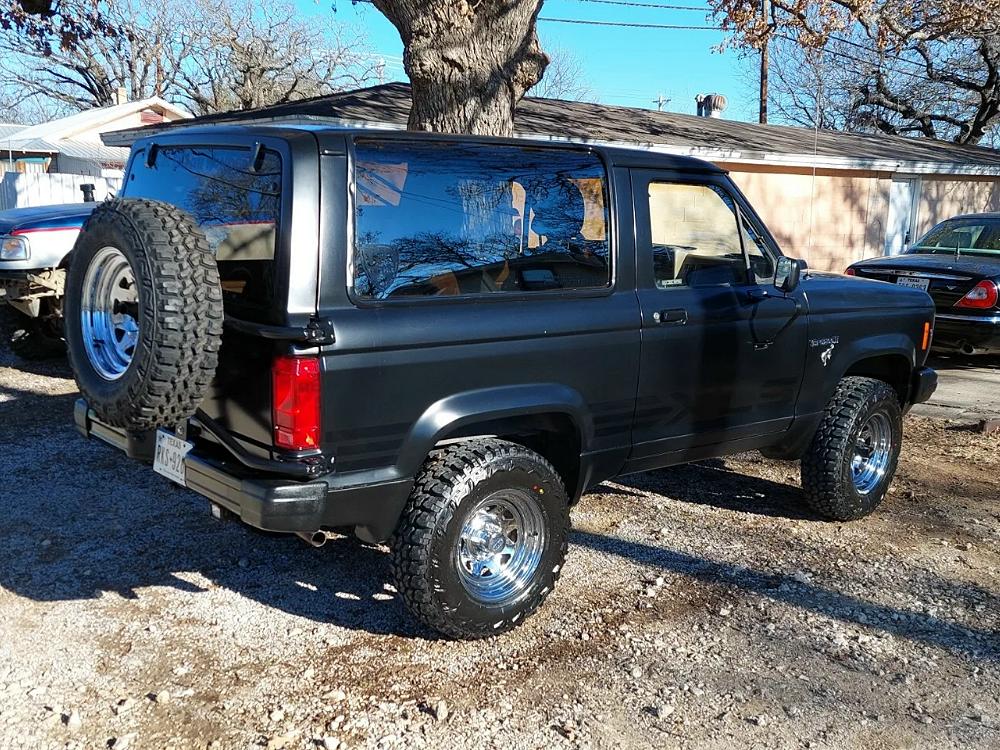
The modification that really gives the Bronco II it’s cool look is the Xprite 7-Inch Round LED Headlights. To learn how to do the round headlight conversion check out ‘Round Headlights on Your Bronco II‘. The round headlights are complimented by a set of Nilight 7-Inch Round LED Off-Road Lights. I also found that the Xprite Mini Pro Driving Lights fit the openings in the air damn. It seems odd that the air damn had light openings, but the Bronco II didn’t come with driving lights.

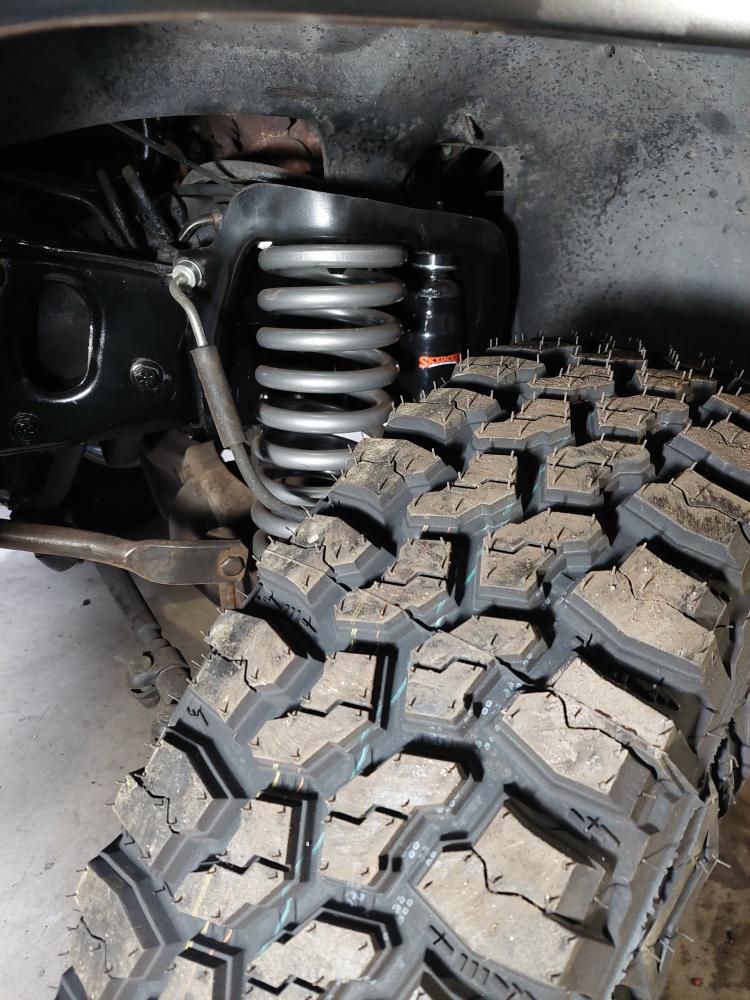
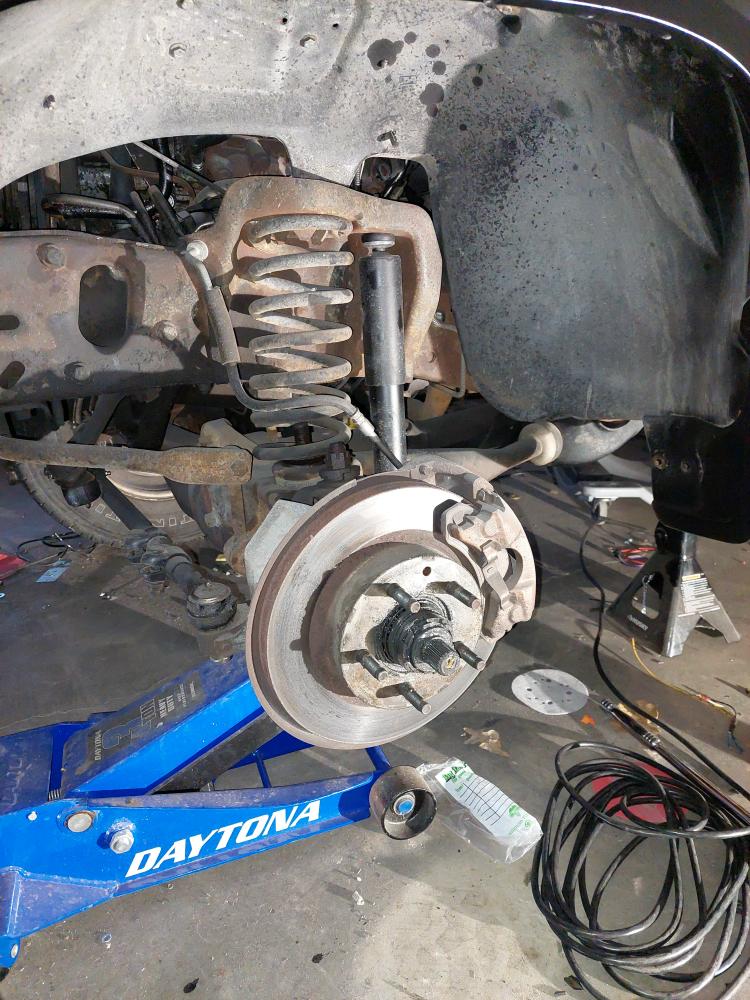
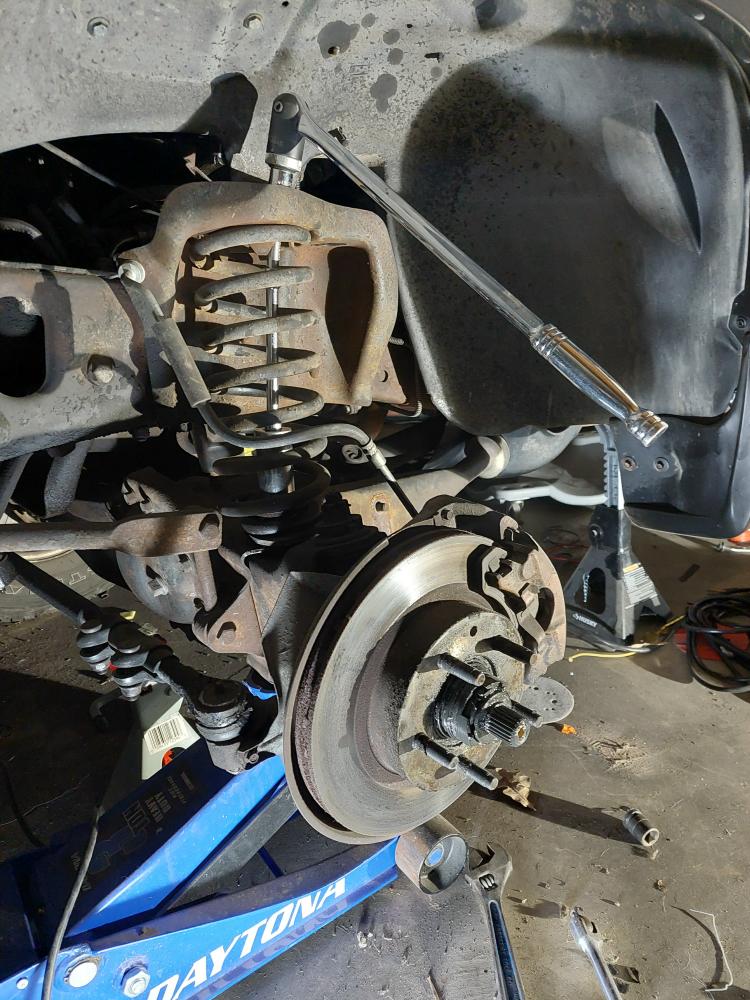
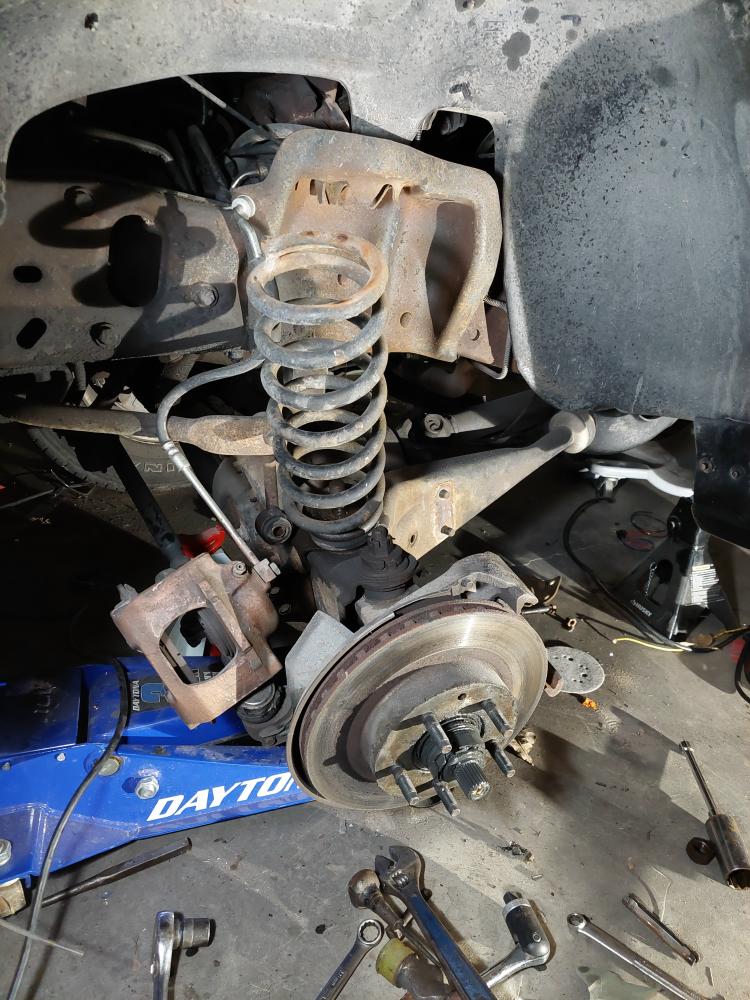
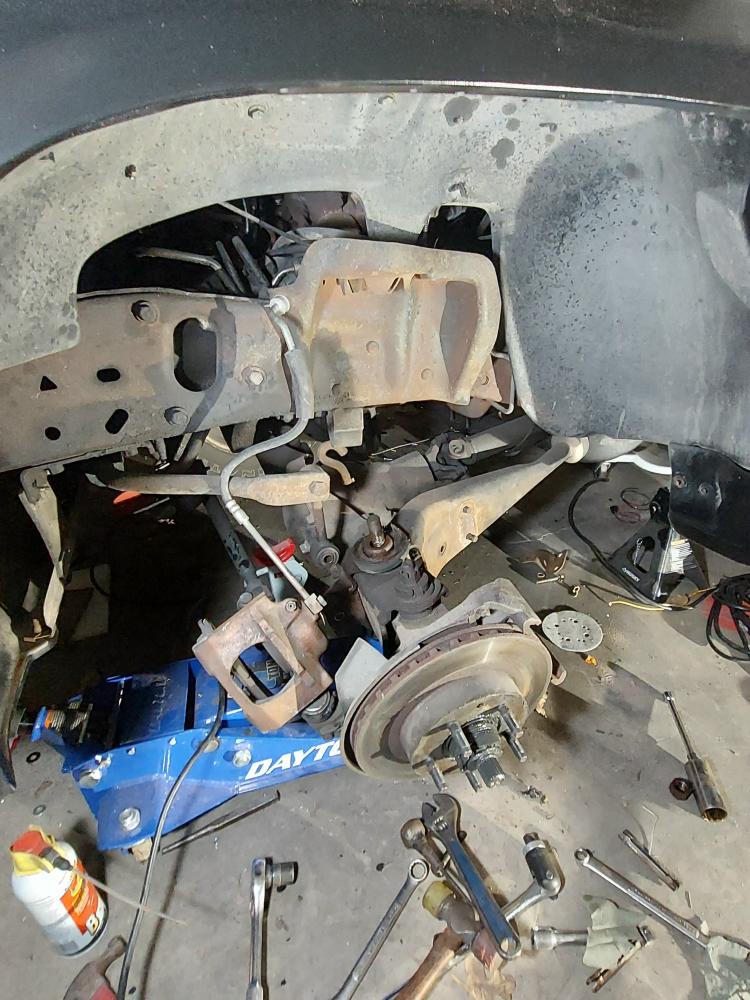
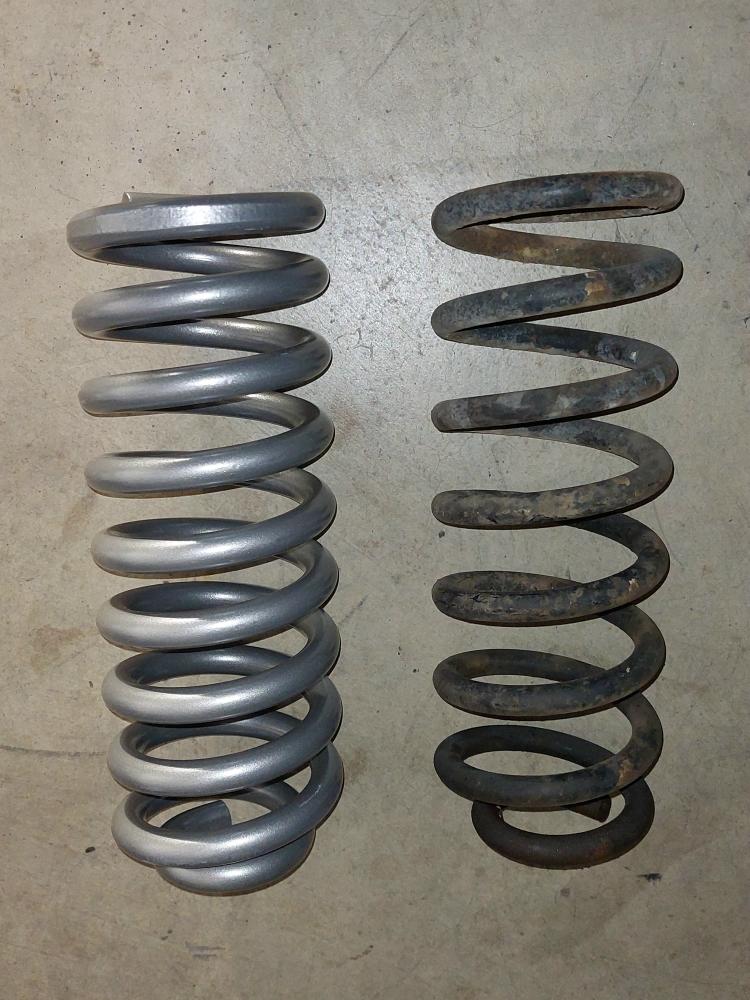
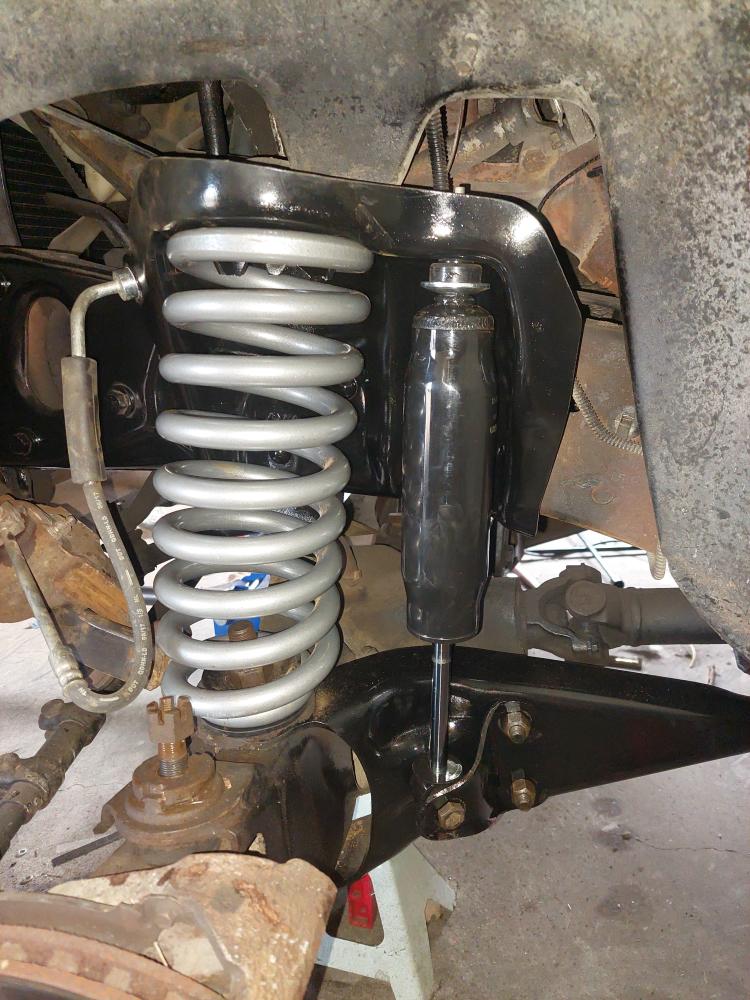
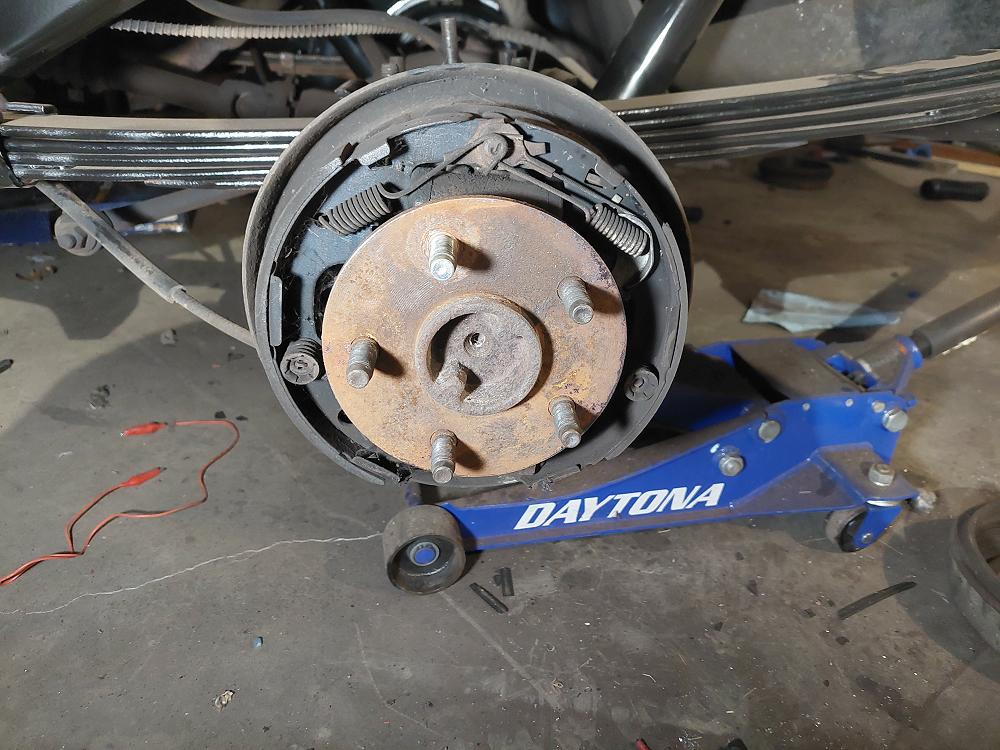
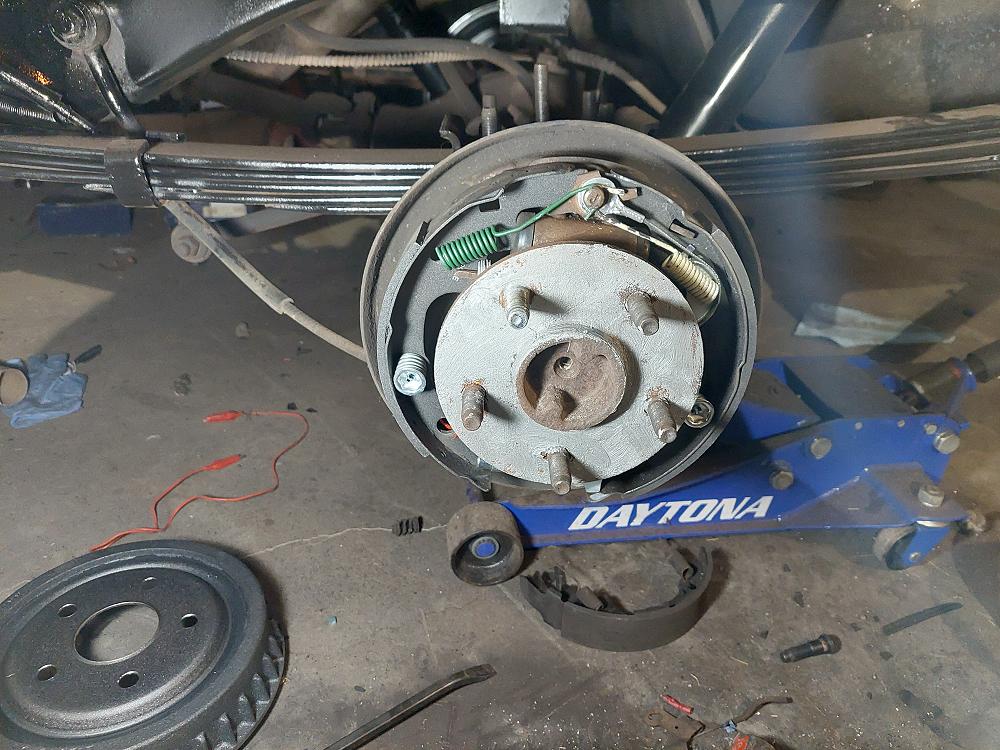
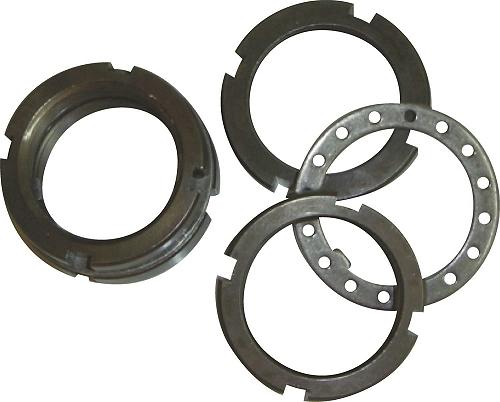
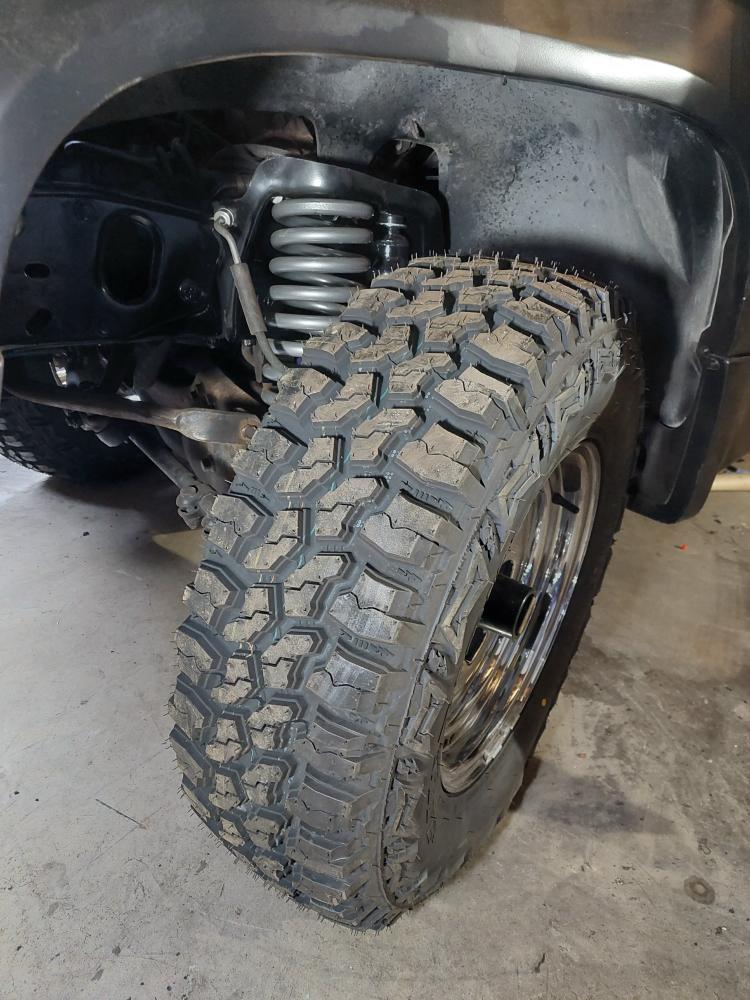
The suspension was updated with Rough Country 1.5-Inch lift coils in the front with Skyjacker BlackMax shocks. The rear received a Skyjacker Add-A-Leaf and a set of Skyjacker BlackMax Shocks. A set of Mile Marker 427 manual locking hubs replaced the factory automatic locking hubs. The automatics hubs were swapped to the manual hubs using a Mile Marker 95-27988 Hub Conversion Kit Automatic To Manual Hub Conversion Kit.
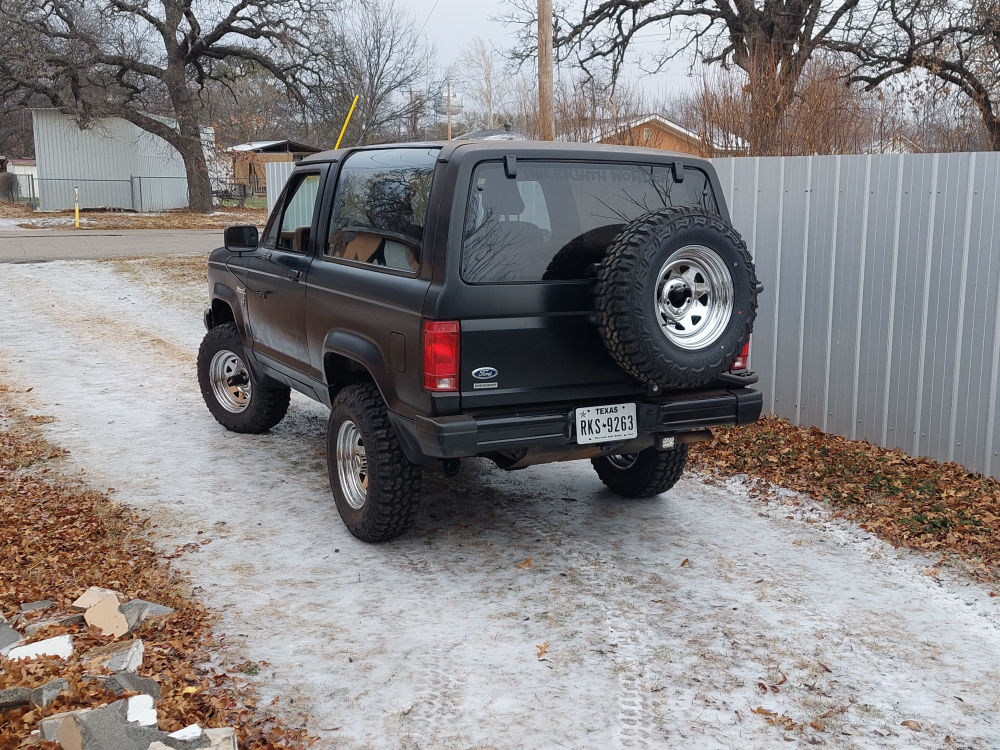
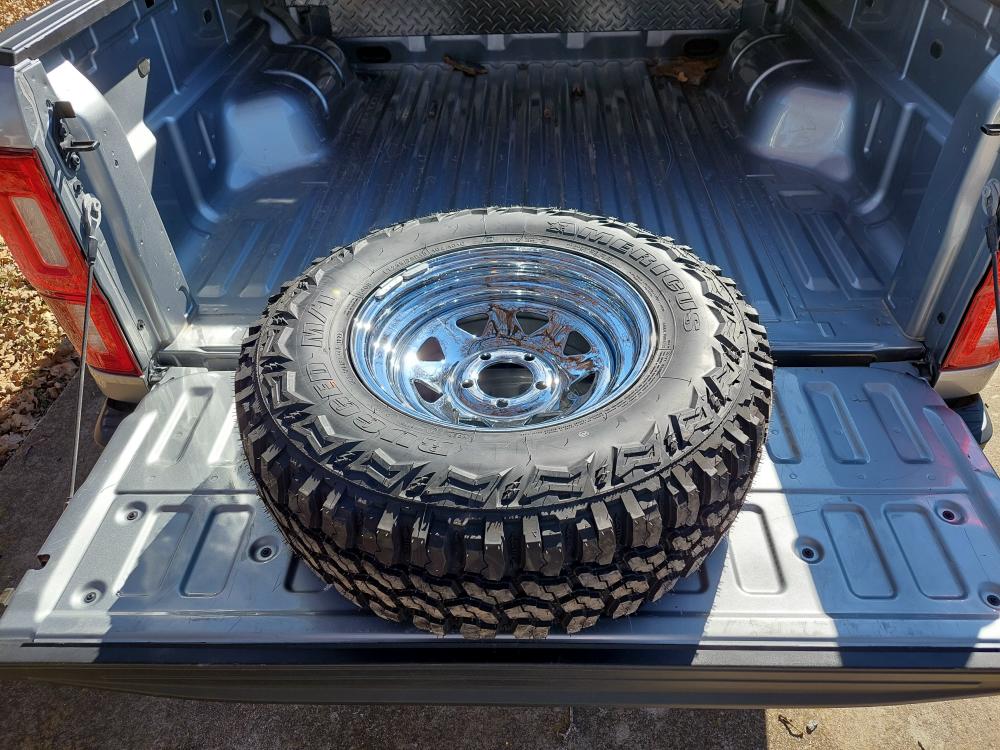
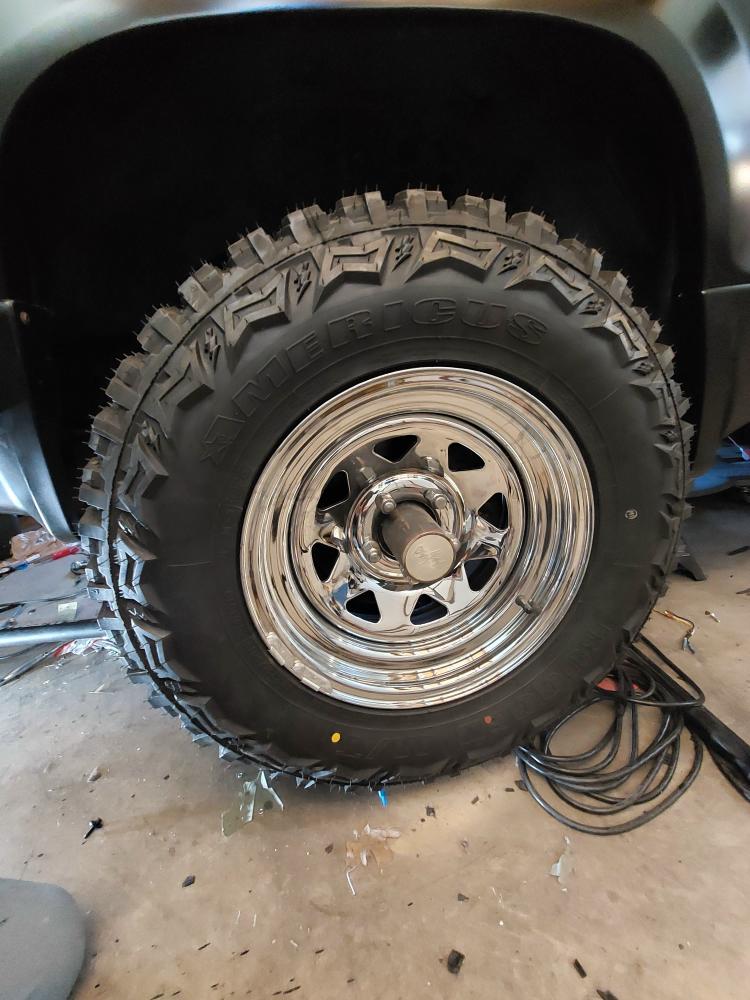
The original tires were a 195/75/15 (26.5″ x 7.7″ x 15″) tire. I chose to go with a 235/75/15 (28.9″ x 9.3″ x 15″) Americus Rugged M/T. Most people building one of these vehicles and adding some lift would have strived for a 31-inch tire. I chose a 29-inch tire because I wanted to retain the XLS flares. Any larger tire would have rubbed against them.
The tires are mounted on Crager Nomad II chrome wheels.
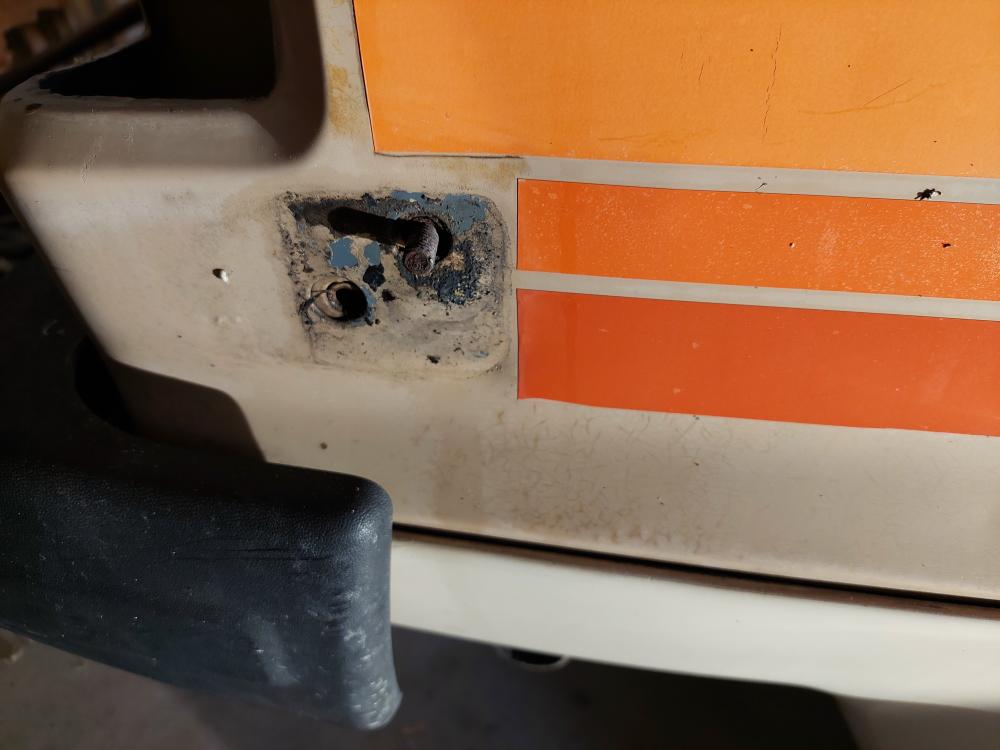
The Bronco II received gloss black XLS letters and stripes down the side of it. Can you spot them?

Link:
See more photos and details as well as ask questions at ‘Project B2 Marauder 1984 Ford Bronco II XLS‘.
Specifications:
- 1984 Ford Bronco II XLS 4×4
- 2.8L V6
- Starter From a Ford 4.0L (Automatic Transmission)
- 5-Speed Manual Transmission
- Manual Transfer Case
- Mile Marker Manual Locking Hubs
- 1.5-Inch lift kit (Rough Country Front Springs – Skyjacker Rear Add-A-Leaf and Shocks)
- Crager Nomad II Chrome Wheels
- Americus Rugged M/T 235/75/15 Tires
- Rust-Oleum Satin Black Paint Job
- Ford Fusion Leather Power Bucket Seats
- New Black Carpet & Headliner
- Repainted Interior Panels
- Xprite 7-Inch Round LED Headlights
- Xprite Mini Pro Driving Lights
- Nilight 7-Inch Round LED Off-Road Lights
- Nilight Switch Panel & Switches
- (3) Dual USB Charging Ports In The Passenger Area
- (1) Dual USB Charging Port & 12-Volt Accessory Jack In Cargo Area
- LED Dash Lights & Marker Lights
- Pioneer Stereo System
- Rear View Camera
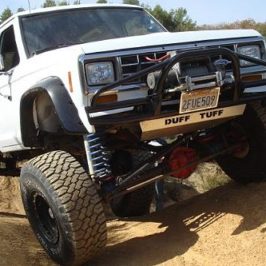
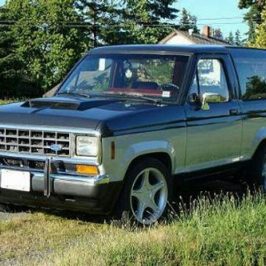
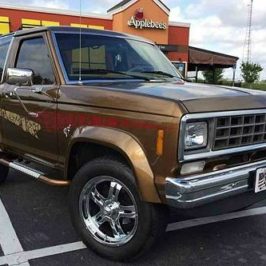
Photo Galley:
Click the photos to enlarge.